5-8
EN
CAUTION!
Do not install the bulkhead plate below the waterline. The fitting is not
completely watertight.
5.3.2 Bulkhead installation
The Electric Actuator harness is supplied with a bulkhead plate and cord
grip pre-installed. The harness ships with a protective cover on the
connector at the actuator end.
1. Determine where you want the harness to enter the transom. Pre-drill a
1.5” hole through the transom, above the waterline, for each actuator.
A template is provided in Appendix A.
NOTICE!
Leave the protective cover on the harness connector until you are ready to
connect it to the actuator, otherwise the connector may be damaged.
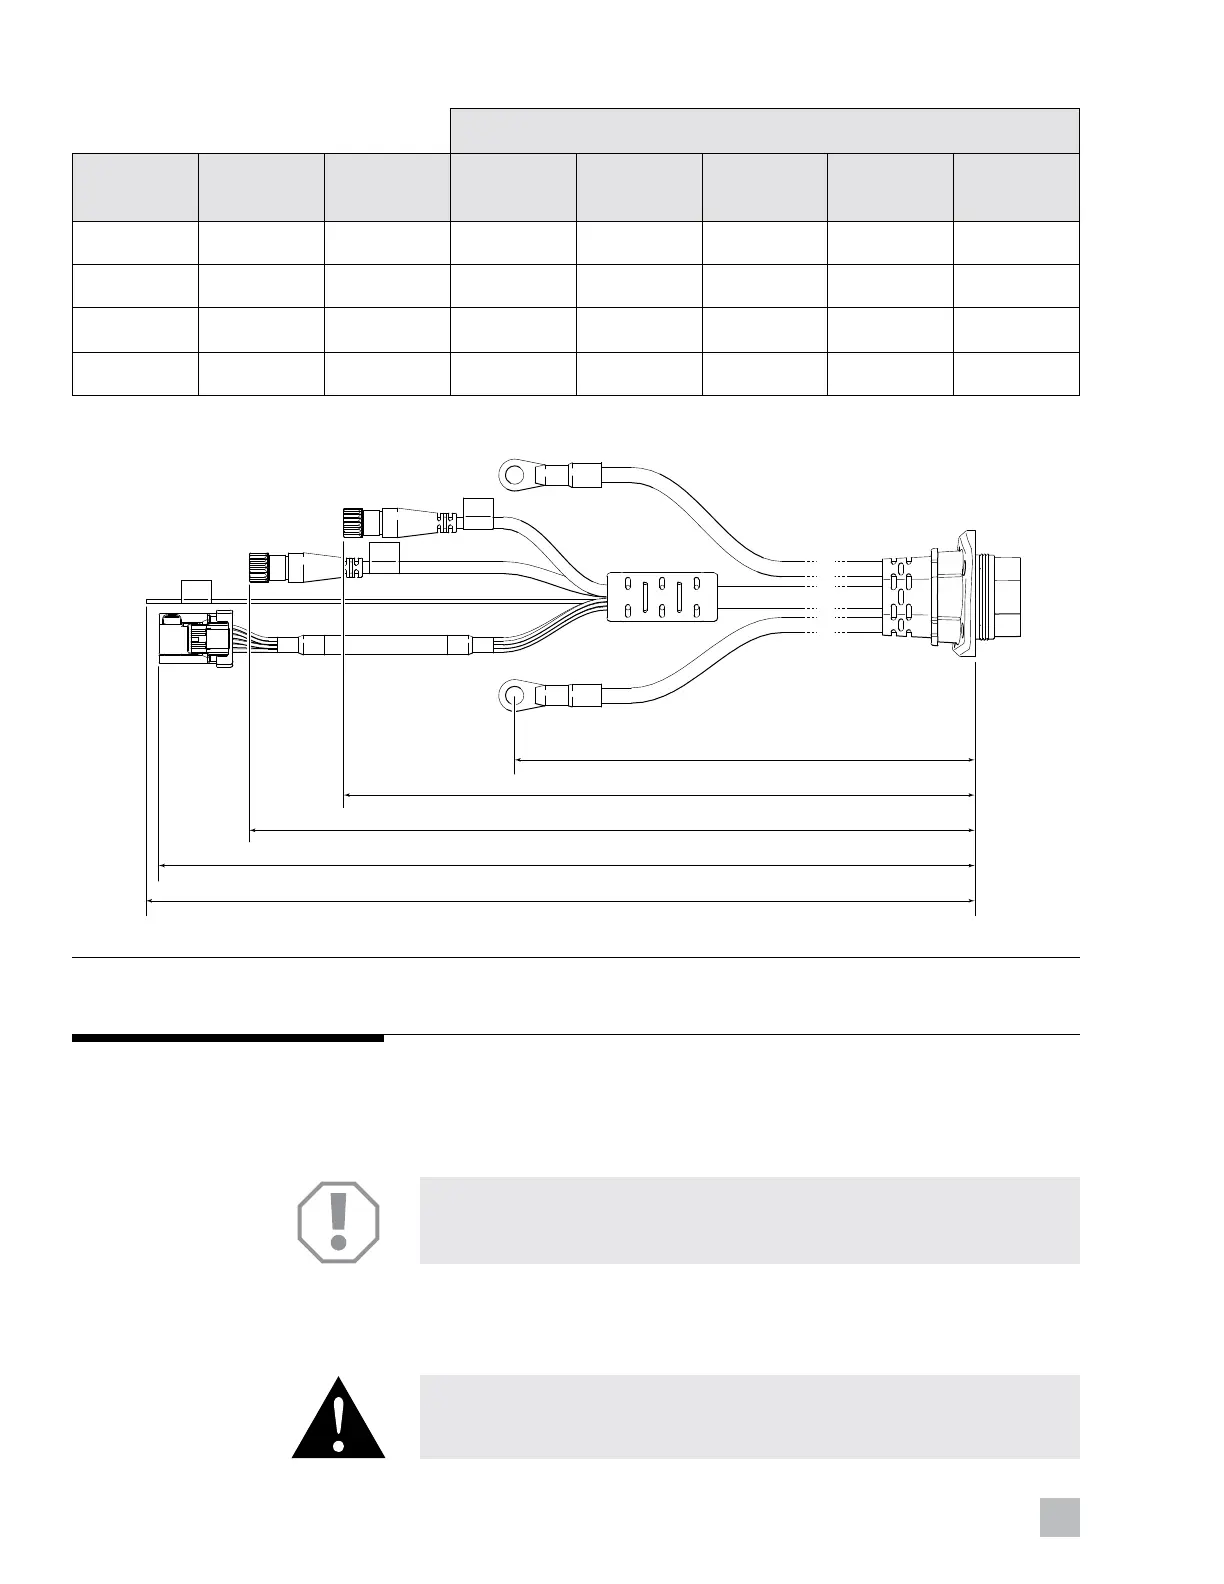
Harness component length, (m)
Nominal
Length Part No. Style Battery Ignition CAN1 CAN2 CAN3
12’ CM30012 Straight 12 (3.6) 30 (9.1) 12 (3.6) 12 (3.6) 12 (3.6)
18’ CM30018 Straight 12 (3.6) 30 (9.1) 18 (5.5) 18 (5.5) 18 (5.5)
12’ CM31012 180° 12 (3.6)
30 (9.1) 12 (3.6) 12 (3.6) 12 (3.6)
18’ CM31018 180° 12 (3.6) 30 (9.1) 18 (5.5) 18 (5.5) 18 (5.5)
Table 5-2.
CAN2
IGN+
CAN3
BATTERY
CAN3
CAN2
CAN1
IGNIT ION
Figure 5-7. Nominal harness lengths.