Operation – Part 1
20.08.2012 Page 19 of 42 Rev. 04
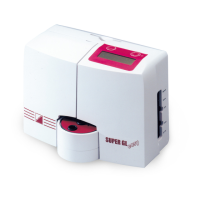
4.3 Installation of the equipment
Before first using the equipment please check that the equipment and accessories
are complete by using the list in 3.4. If the accessories are not complete, please
contact your sales partner immediately.
All parts delivered should also be checked to see that they are intact. Proper
operation can only be ensured if original parts and accessories are used. Other
parts or damaged parts must NEVER be used.
Stand the equipment on a horizontal, level and dry work surface. Please choose a
position so that the equipment is protected from direct sunlight and extreme
temperature variations, as this can impair the reading results.
Conditions at the set-up site:
- No direct influence of moisture
- No direct sunlight
- No strong electromagnetic fields or ionising radiation
- No rapid temperature change caused by windows, doors, air conditioning,
etc.
- Level, waterproof surface
- The whole placement surface must be completely free of the floor
Connecting the equipment to the electricity supply (see Fig. 4.1):
Make sure that the voltage given on the power supply unit matches your mains
supply.
Mains connection of the equipment is carried out via the supplied power supply
unit. Connect the mains connection lead to the power supply unit. Insert the plug
into the power supply unit connection on the right side of the housing (marked
with “DC 12V”) and insert the mains connection lead plug into the socket.
Connecting the printer (see Fig. 4.1):
If the SUPER GL easy / easy+ is used with the DPU 414 printer, the printer’s
voltage supply comes via the second power supply unit connection. The voltage
adapter must be switched between the printer and the power supply unit. The
printer cable plug is inserted into the printer connection on the right side of the
equipment housing (“Printer”) and connected to the appropriate socket on the
back of the printer.
EDP – connection (see Fig. 4.1):
Insert the EDP connection cable into the EDP connection socket on the right side of
the housing and connect the other end to the EDP. Make sure you follow the
information in the interface description and from your EDP – company.
 Loading...