Operation – Part 1
20.08.2012 Page 26 of 42 Rev. 04
4.6 Measuring operation
4.6.1 Calibration
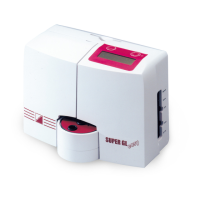
The SUPER GL easy / easy+ requires valid calibration to ensure correct readings.
The SUPER GL easy / easy+ automatically performs required calibrations. Every
time you leave “Stand by” without a valid, the device asks you to insert a cup
filled with calibration solution and then performs a calibration. With a valid
calibration, the operator can decide whether an additional calibration is carried
out or not.
If you want to carry out a calibration, switch into the “Function Menue” and
select “Calibration” by pressing the menu button. If you press the enter button
(=OK), you switch back to the “Measuring menue” and the sample rotor is turned
into the calibration position (blue).If there is a sample cup in the calibration
position, you will be asked to remove it so that the fill level can be checked. TO
start calibration, insert a sample cup filled with calibration solution.
After successful calibration, the device is ready for measuring. As long as the
device is not switched back to Stand by, the device automatically checks
calibration periodically.
In Stand by, calibration is retained within the given time frame and becomes
invalid afterwards without a new calibration.
Even if the calibrator in a cup is not used up during a
working day, you should insert a new cup on a daily basis
to guarantee the correctness of the measuring results.
Note that the calibration cups are not fully emptied and that a small residue
remains in them. When the SUPER GL easy / easy+ requests a new calibration
cup, a new one must be inserted, even though there is still some residue in the
old one.
4.6.2 Patient samples
To measure a patient sample, proceed as follows:
1. Select the menu item Measuring sample by pressing the MENU button; the
sample plate is turned into the sample position (red). If there is a sample cup
in the sample position, you will be asked to remove it.
2. To start measurement, insert a sample cup filled with the hemolyzed sample.
3. After about 40 seconds the measured value is displayed and printed out if a
printer is connected.
4. You can remove the sample cup as soon as the display shows “Remove cup”!
5. To view the result again, press ENTER. The result of the most recently
measured sample is displayed for about 2 seconds.
6. After removing the sample, the display shows “Insert cup”.
Now another sample can be measured. Proceed as described in steps 2 to 4.
 Loading...