Adjusting the Knife to Wear Plate Gap
CONTACT US AT www.DRpower.com or CALL TOLL FREE 1-800-DR-OWNER 39
ave a slight
resistance. Now you can slide the Wear Plate up or
down (in or out) to achieve the correct gap setting
(Figure 40).
Wear Plate. Adjust the Wear Plate against the Knife
Gauge and tighten the Locknuts.
3. Check the adjustment as described in the “Che n
the Gap” in the previous section.
4. Position the Chipper Hopper into t
and secure with the six Bolts, Washers an o
5. Re-connect the negative battery terminal wire
start only) and the spark plug wire.
Chipper Knife Sharpening
Tools Needed:
• 7/16" wrench
• Gap Gauge (provided with Chipper)
1. To adjust the Wear Plate Gap, loosen the three Nuts
on the Carriage Bolts with a 7/16" wrench just enough
so the Wear Plate will move but still h
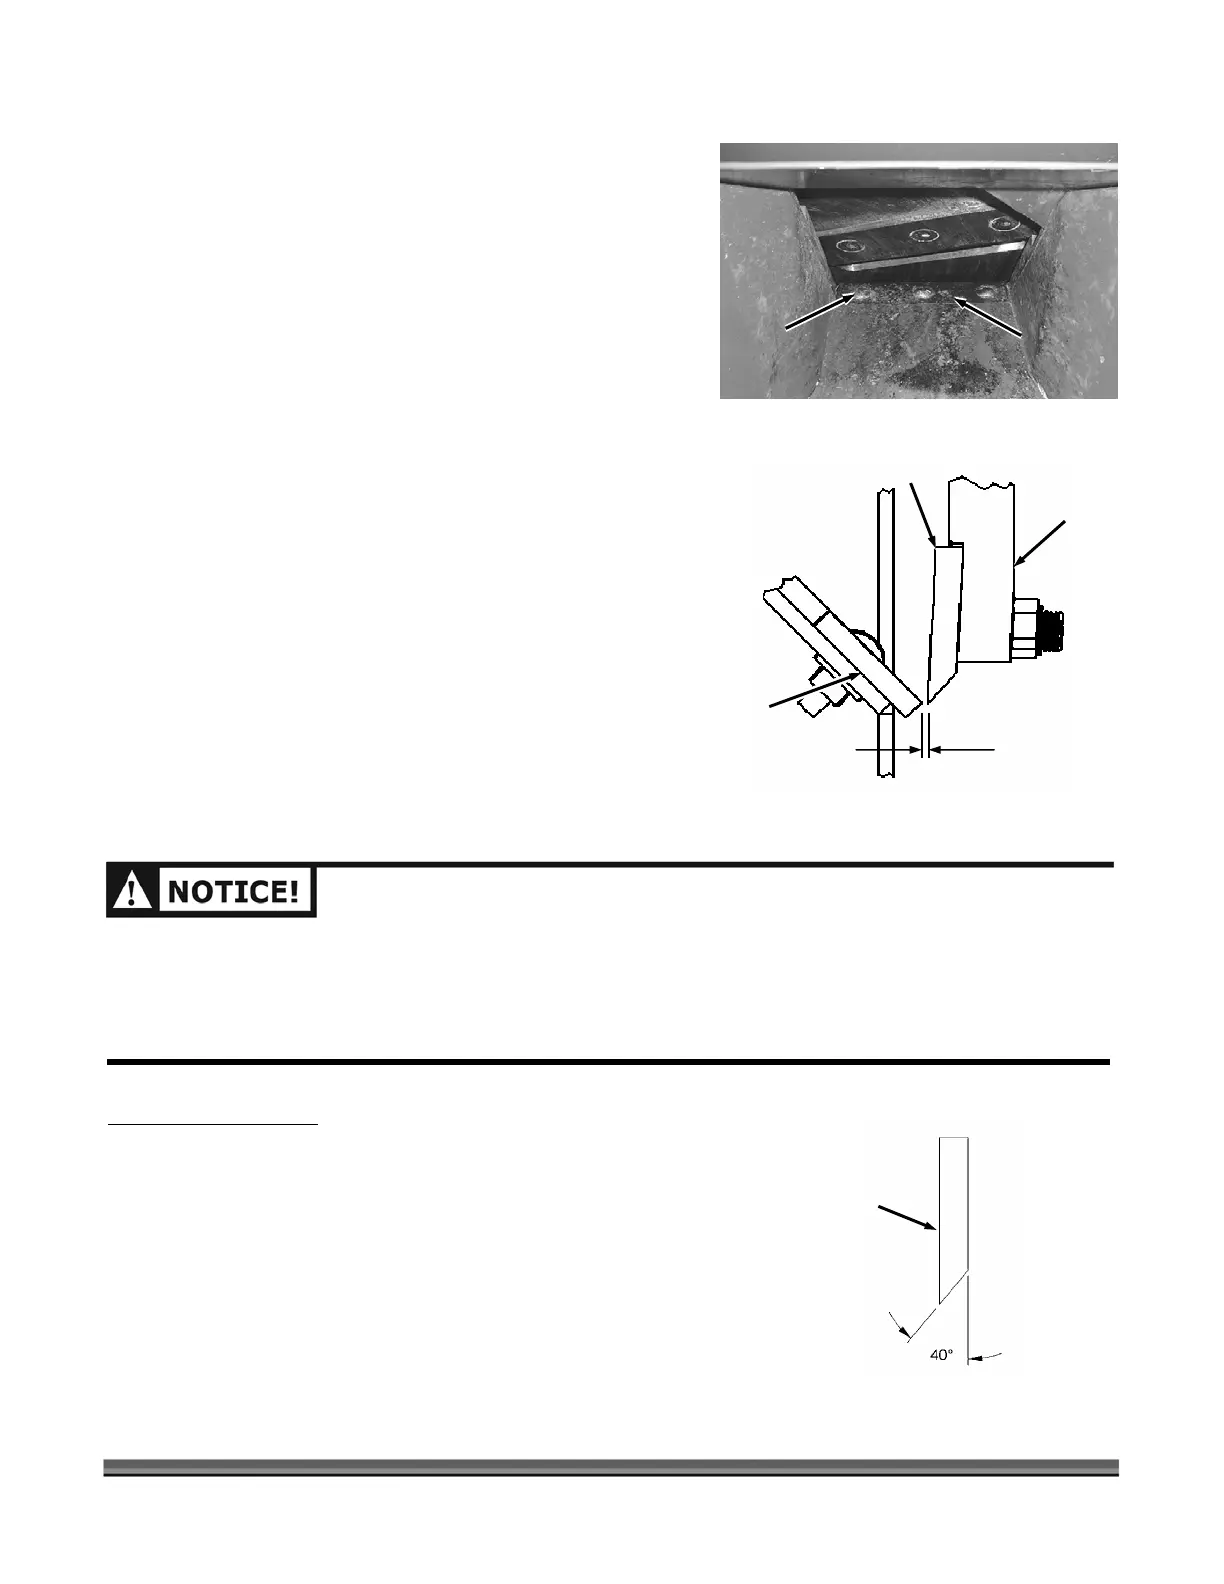
NOTE: See Figure 41 for a more detailed look at the
relationship of the Knife to Wear Plate.
2. Take the Gap Gauge and slide it between the Knife and
cki g
he Hopper Bracket
d L cknuts.
(electric
You should never attempt to sharpen the Chipper K
freehand.
• It is extremely important to consistently m
degree angle for proper performance (Figure 42).
• Excessive heat generated during the sharpening process
will damage Knives and weaken the metal. Be sure not to
overheat the Knife during sharpening because it will
shorten the life of the Knife.
• nife
aintain the 40-
1/16" Gap
(thickness of
Gap Gauge)
Figure 41
Chipper
Knife
Wear
Plate
Flywheel
AFTER ANY KNIFE OR WEAR PLATE MAINTENANCE OR ADJUSTMENT, ROTATE THE CHIPPER
FLYWHEEL BY USING A WOODEN STICK AND WATCH AND LISTEN CAREFULLY FOR ANY UNUSUAL
NOISES, CLICKING OR VIBRATION. IF YOU DETECT ANY OF THESE, INSPECT THE MACHINE FOR
DAMAGE, OR ANY LOOSE PARTS. REPAIR OR REPLACE N A Y DAMAGED PARTS AND TIGHTEN ANY
-
Carriage Bolt
Wear
and Locknut
Figure 40
Plate
Figure 42
Chipper
Knife
 Loading...

