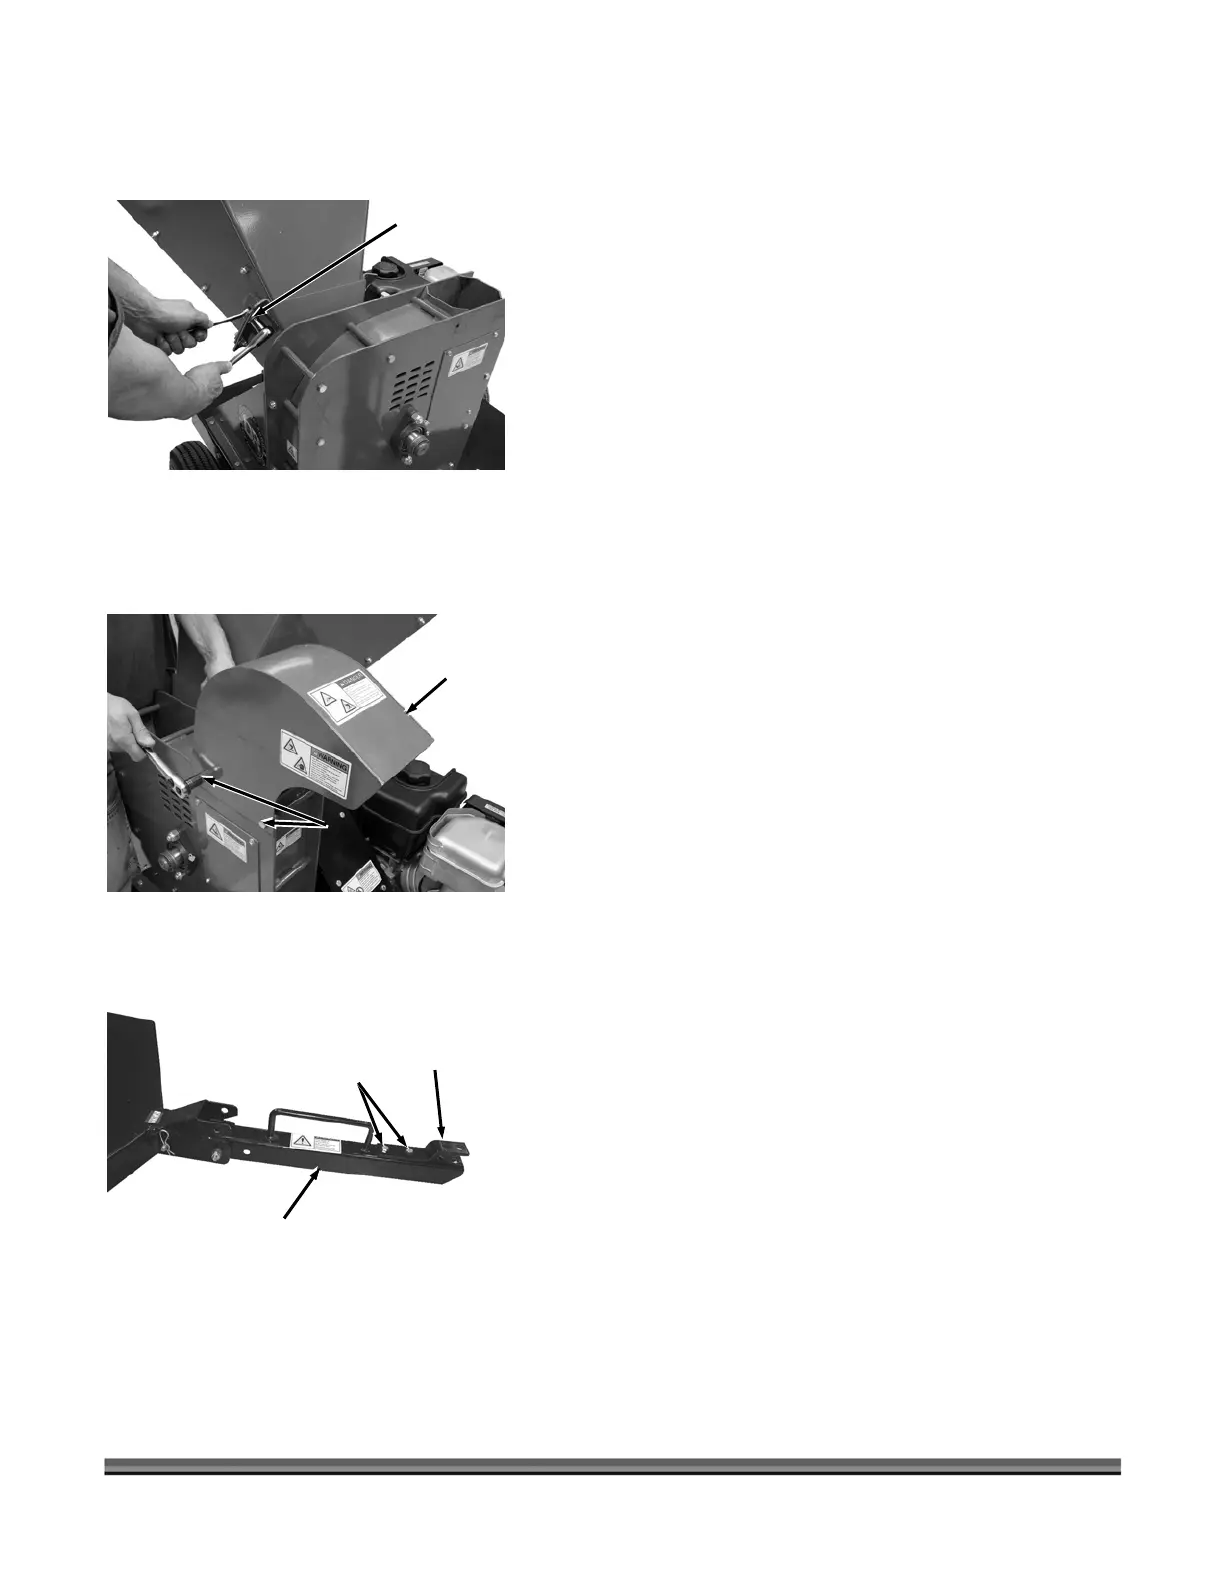
Attaching the Hopper Assembly
NOTE: We recommend that you have someone help you lift the
Hopper in place and support it until it is secured to the Chipper.
Hopper
Assembly
Hopper
Hardware
Tools Needed:
• Two 1/2" Wrenches
1. Attach the Hopper Assembly to the Chipper with six
5/16"-18 x 1" Bolts, twelve Flat Washers (one Washer
on Bolt side and one on Lock Nut side) and six Nylon
Lock Nuts (Figure 7).
NOTE: Install hardware with Bolt Head on the top side.
Fi
ure 7
Attaching the Discharge Chute
Tools Needed:
Discharge
Chute
Fi
ure 8
Bolts and
Locknuts
Tongue
Assembly
Hardware
Figure 9
Hitch
Plate
• Two 1/2" Wrenches
1. Position the Discharge Chute as shown and secure
with two 5/16-18 x 5-1/4" Bolts and Nylon Locknuts
(Figure 8).
Attaching the Hitch Plate
Tools Needed:
• Two 1/2" Wrenches
1. Position the Hitch Plate onto the Tongue Assembly as
shown and secure with two 5/16-18 x 1" Bolts and
Nylon Locknuts (Figure 9).
16 16.50 PRO DR
®
RAPID-FEED™ CHIPPER
 Loading...

