CONTACT US AT www.DRpower.com or CALL TOLL FREE 1-800-DR-OWNER 59
Tow i
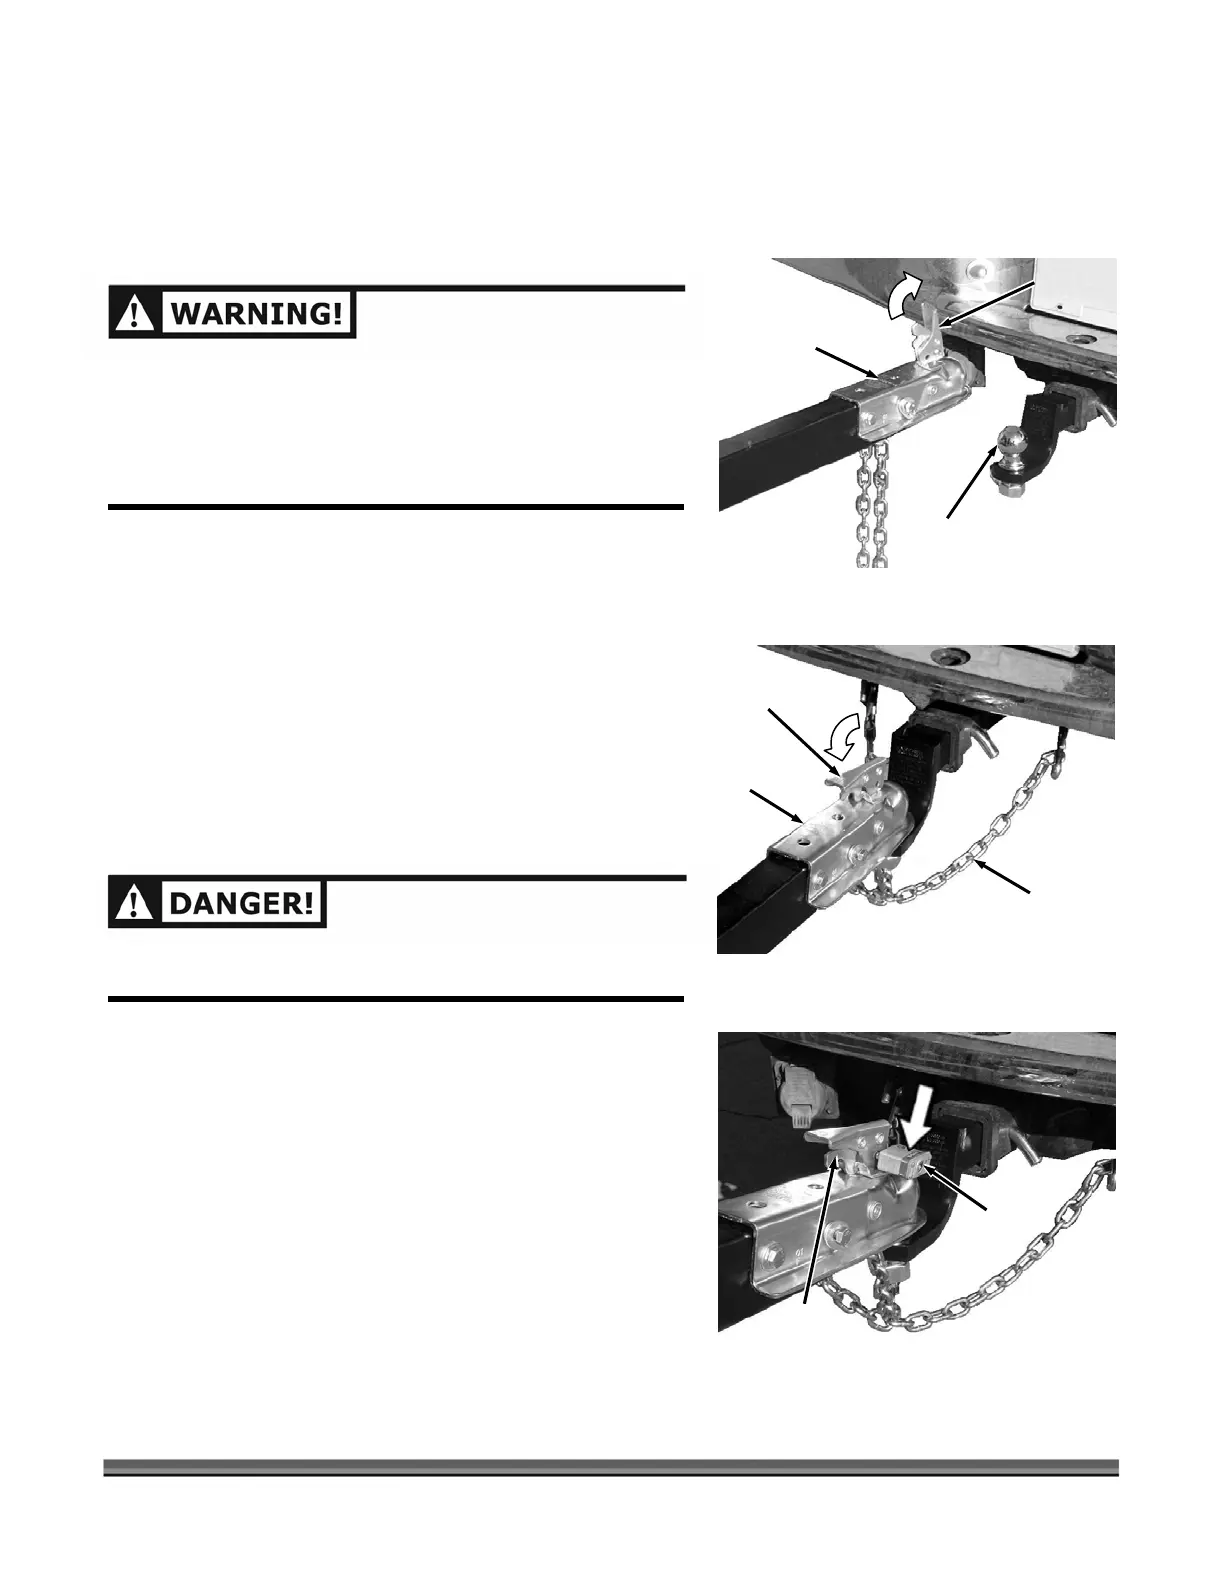
1. Pull the latch assembly on the Tow Hitch Assembly up
2. ow Hitch Assembly
vehicle ensuring there
is enough slack for turning.
h
4.
Ass 71).
If there are any questions, contact us at
www.DRpower.com or call 1-800-DR-OWNER (376-9637).
ng
NOTE: The Tow Bar must be in the horizontal (towing)
position for the following procedures.
and into the open position. Position the hitch coupler
of the Chipper over and onto the tow vehicle’s tow ball
(must be a 2" tow ball) (Figure 69).
Close the Latch Assembly on the T
to lock it onto the Tow Ball (Figure 70). Attach the
towing Safety Chains to the tow
3. Slide the Locking Pin into the hole in the Latc
Assembly.
AVOID DEATH OR SERIOUS INJURY. DO NOT EXCEED 45
MPH WHEN TOWING THIS MACHINE.
For extra safety and security, you may want to
purchase a Lock or Lock Pin to install into the Latch
embly of the Tow-Hitch Package (Figure
5. Connect the Wire Harness Connector to your Tow
Vehicle and ensure that your lights on the Chipper are
working properly.
Figure 70
Tow
H
A
itch
ssembly
Latch
Assembly
Safety
Chains
MAKING SURE THE CHIPPER IS SECURELY ATTACHED TO
THE VEHICLE IS THE RESPONSIBILITY OF THE
OWNER/OPERATOR. FAILURE TO SECURELY ATTACH THE
CHIPPER CAN CAUSE LOSS OF CONTROL OF THE VEHICLE
OR THE CHIPPER BEING SEPARATED FROM THE TOWING
VEHICLE, RESULTING IN SERIOUS IN
URY OR DEATH.
Figure 71
Latch
Assembly
Figure 69
Latch
Assembly
2" Tow Ball
Tow
Hitch
Assembly
Lock or
Lock Pin
 Loading...

