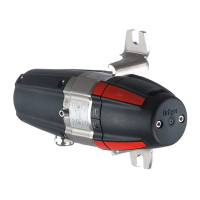
20 Instructions for use | Dräger PointGard 2000 Series
en | Maintenance
10 Maintenance
– The maintenance intervals must be established for each
individual installation. Depending on safety considerations
and application specific conditions the instrument is used
in, these might need to be shortened.
Every 6 months
– Inspection by trained service personnel.
– Check signal transmission to the central controller, LEDs
and triggering of alarm devices.
Calibrations have to be performed on a regular basis, see
8 Calibration
● To check the signal transmission to the central controller,
(see "Testing the analog interface", page 25)
● To check LEDs and triggering of alarm devices, (see
"Testing alarms/relays", page 23)
10.1 Performing a bump test
A bump test checks alarm activation without setting off the
alarms.
1. Select Settings > Instrument > Bump test and confirm.
The maintenance symbol is displayed
The analog output is set to the maintenance signal.
2. Apply a known concentration of gas.
3. Press OK to return to measurement.
10.1.1 Checking response time (t90)
1. Perform a bump test and check the response time.
2. Compare the response time with the t90 values that are
indicated in the corresponding sensor data sheet.
CAUTION
Delayed response time at the gas detection control unit.
If the transmitter is connected to control units, the total
response time could be delayed. The entire measuring path
must be taken into account (e. g. latency of the control unit).
► Ensure that the required response time is kept.
10.2 Create maintenance plan
The instrument has to be maintained on a regular basis by
trained service personnel. The responsible for the gas
detection system defines the preventive maintenance
intervals that should include the following tasks:
– Testing the alarm triggering of the instrument by:
– The built-in alarm devices
– The optionally connected external relays
– The optional signal transmission via the 4-20mA
interface in case of integration in an alarm
management system.
– Calibration of the sensor.
– Checking horn for cleanliness.
– Performing the inspection (recommended every 6 months)
– Cleaning the instrument using a soft cloth and water.
Detergent must not be used.
10.3 Sensor replacement
WARNING
Faulty Calibration
Faulty Calibration may cause inaccurate readings.
► If the sensor is replaced, all settings and parameters must
be checked for correctness.
► Check calibration to verify proper operation.
10.3.1 PointGard 2100 EC
Sensor lock function
If a sensor of the same type (same part number) was
previously installed, the instrument specific configuration is
retained (gas type, measuring range, test gas, calibration
interval, etc.) Otherwise the factory default settings of the new
sensor are uploaded and will overwrite the instrument specific
configuration. This can be prohibited if the sensor lock
function 26 is activated.
Sensor change function
With the menu function Change Sensor, a sensor can be
changed during operation without triggering a fault signal at
the control unit. It also ensures that all sensor data in the
microprocessor can be saved in the sensor memory
(EEPROM) before disconnecting the sensor.
Replacing the sensor
A sensor can be replaced at any time.
1. Select Settings > Sensor > Change Sensor and confirm.
The maintenance signal is generated on the 4-20mA
interface.
The display shows Please remove the sensor.
The Maintenance symbol is displayed.
2. Replace the old sensor with a new sensor:
a. Loosen adjusting screw.
b. Unscrew the bayonet ring from the housing.
c. Remove and discard the cover plate or old sensor
respectively.
d. Remove the sensor from packaging and ensure that
the sensor is a DrägerSensor.
e. Insert the new sensor into the sensor opening with the
Dräger logo facing up.
182 Auto calibration not
possible with PIR
7200.
Perform new zero and span
calibration
Warning
number
Cause Remedy
 Loading...