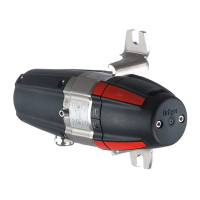
Configuration of integrated alarm devices | en
Instructions for use | Dräger PointGard 2000 Series 23
d. Set acknowledgement mode.
e. Set the hysteresis mode.
The hysteresis function defines an interval where a
triggered relay maintains its status until the gas
concentration is outside the defined interval. Example:
Alarm threshold is set to 40 ppm and hysteresis to
3 ppm The alarm stays active until the value falls
below 37 ppm. This prevents relays from chattering at
an alarm threshold.
A confirmation screen shows all settings.
f. Select Confirm and confirm with OK.
✓ The new settings are saved.
11.9 Testing alarms/relays
These functions change the status of a relay and LED for test
purposes (e.g. to check the function of alarm devices
connected to the relay) and the symbol is displayed. After
exiting this function, the status of the relay and LED will
automatically return to their previous status.
1. Select Settings > Instrument > Alarm the desired alarm
condition and confirm.
2. Select Enable or Disable and confirm.
✓ If the function is activated, the fault relay is de-energized
and the 4 to 20 mA interface is set to the fault current. The
yellow LED is lit, the symbol for maintenance is shown.
11.10 Deactivating dongles
PointGard 2100 EC-specific:
This function deactivates a SW dongle to safely remove the
dongle or if the dongle is faulty.
A dongle can only be reactivated by cycling the power to the
instrument.
1. Select Settings > Instrument > SW dongle and the
dongle to be deactivated and confirm.
2. Select Deactivation func. The selected dongle is
deactivated.
11.11 Display settings
11.11.1 Changing the backlight color of the
display
The backlight color can be switched to red or green.
1. Loosen the screws (2) and open the cover.
2. Toggle the switch (13) to the desired position.
3. Close cover and tighten screws (2) with correct torque (22
Lbs. In. / 2.5 Nm).
11.11.2 Changing the display contrast
1. Select Settings > Instrument > Display > Display
contrast and confirm.
2. Change the contrast and confirm.
11.11.3 Changing the display mode
1. Select Settings > Instrument > Display > Display mode
and confirm.
2. Select the desired mode and confirm.
If an alarm is triggered, the display shows the current gas
concentration and the red LED blinks regardless of the
selected display mode.
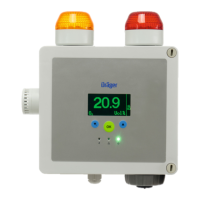
12 Configuration of integrated alarm
devices
For further information and configurations, consult the
technical manual 9300148.
12.1 DIP switch
The 5 pins on the DIP switch are used to configure the alarm
patterns of integrated alarm devices.
Non-latching The alarm status clears if the gas concen-
tration does not meet the alarm condition
anymore.
Acknowledge-
able
Alarm relay and LED can be reset before
alarm condition clears.
Non-acknowl-
edgeable
Alarm relay and LED can not be reset until
the alarm condition clears.
Pre-Acknowl-
edgeable
Alarm status is acknowledgeable before the
alarm condition clears. However, the alarm
relay and LED stay active until the alarm
condition clears.
Set Alarm A1 Simulates pre-alarm
Set alarm A2 Simulates main alarm
Set fault Simulates fault signal
left backlight color red
right backlight color green
Standard Shows the standard display.
Non-display Shows the start screen and
the applicable symbols.
Pin ON OFF
1
1)
1) Pins 1 and 2 are not applicable for instruments with green/red strobe
combination.
Horn is active on A2
alarms.
Horn is not active on A2
alarms.
2
1)
Horn is active on A1
alarms.
Horn is not active on A1
alarms.
3 Strobe alarm pattern for
green/red strobe combina-
tion.
Strobe alarm pattern for
amber/red strobe combina-
tion.
4 Horn is active. Horn is not active.
5 Horn tone: Continuous Horn tone: Pulsating
 Loading...