19.10 STLS 13-2 2nd Stitch length
Available as optional equipment for the following subclasses:
767-FA-373-RAP-HP; 767-FA-273 and 767-VF-373
The option for the 2nd stitch length is available as standard for the
following subclasses: 767-FAS-373-RAP-HP; 767-FAS-573-RAP-HP
and 767-KFA-373-RAP-HP.
Being able to call up the 2nd stitch length makes possible a quick
change from the assembly seam to the following run-stitching seam.
The selection of 1st or 2nd stitch length occurs via the switch on the
sewing arm. The 2nd stitch length is always s horter than the 1st stitch
length.
After the sewing machine is turned on the 2nd stitch length is active.
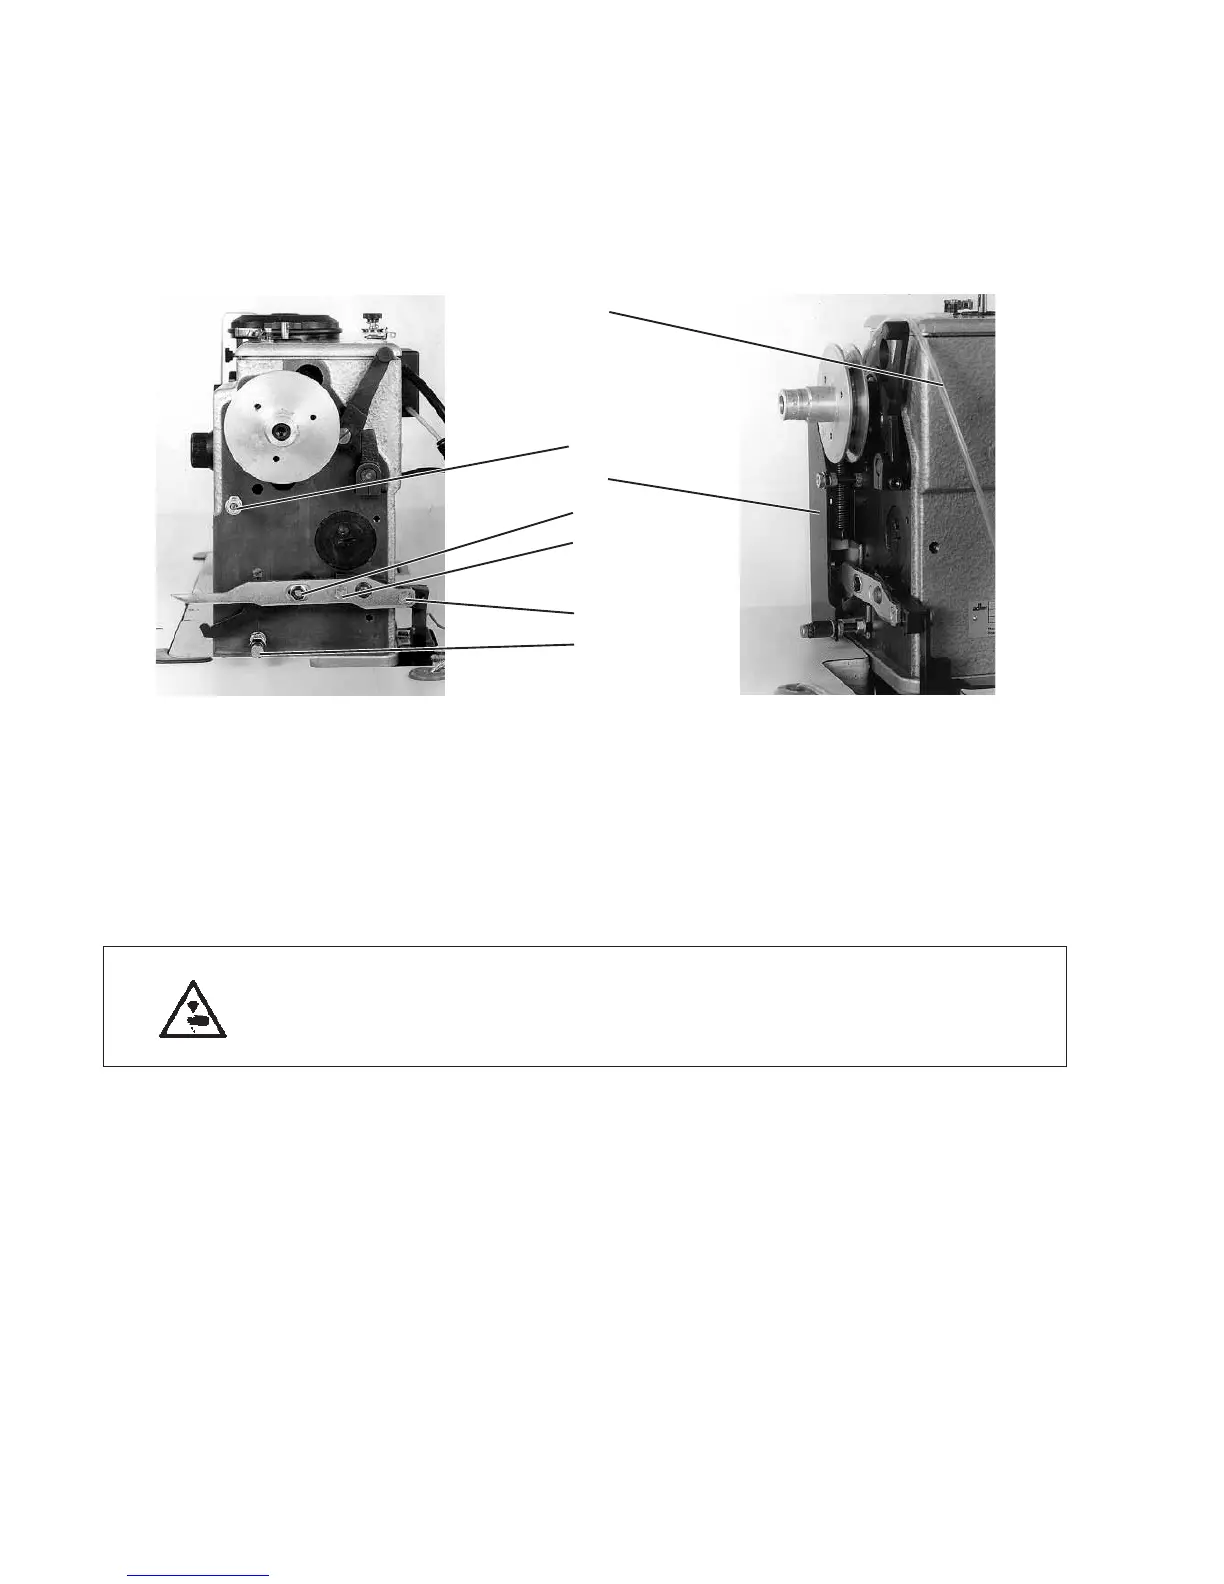
Mounting the 2nd stitch length optional equipment
Caution Risk of Injury !
Turnthemainswitchoff!
The 2nd stitch length optional equipment may only be attached
with the sewing machine turned off.
–
Remove the belt guard and old stitch length indicator.
–
Insert the stud bolts 2 and 7 with Loctite 270.
Observe the instructions of the adhesive manufacturer !
The stud bolts project 32 mm. The hexagonal socket of the stud
bolts is in the threaded hole.
–
Place the new stitch length indicator 6 onto the shaft and screw on.
The bolt 4 should be in the center of the slot.
Do not tighten the clamping screw 5.
–
Position the switching unit 3 and fasten it on the stud bolts.
–
Connect hose 1 to the solenoid valve underneath the table top.
86
1
2
3
4
5
6
7