Dymax BlueWave® 200 Version 3.0 User Guide
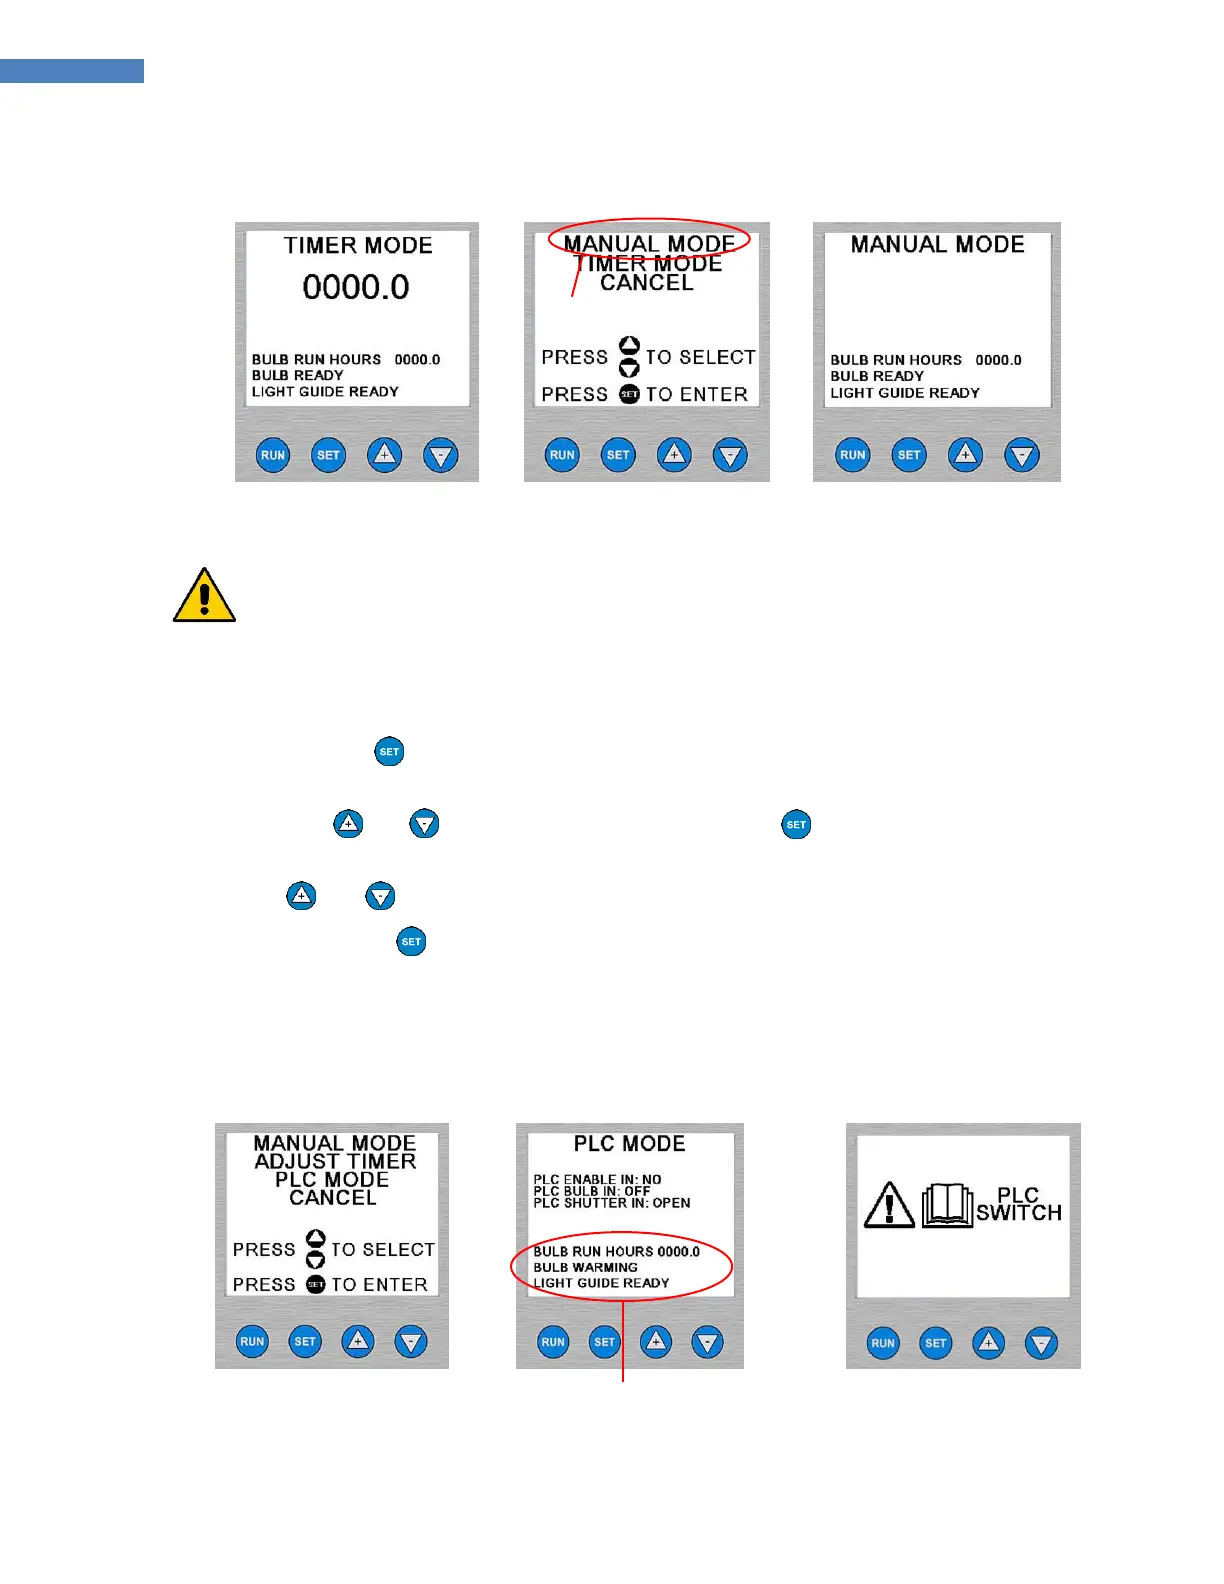
Figure 18. Timer Mode
Menu
Figure 19. Switching To
Manual Mode
Figure 20. Manual Mode
Screen
To Change from Timer Mode to PLC Mode:
CAUTION! Always wear UV-blocking protective goggles or a face shield when working near
UV light. Never look directly at the light exiting the lightguide. The PLC is capable of opening the
shutter at any time, including when the bulb becomes ready in PLC mode or when a user selects
PLC Mode from the front panel controls.
1. Ensure that the PLC Dip Switch is set to “ENABLED”. Refer to “Using the PLC Switch” (Page 20).
2. Press and hold the Button until the screen changes to Figure 21.
NOTE: If you do not see “PLC MODE” on the screen, then you did not hold the button down for a long
time. Use the and Arrows to select “CANCEL” and press the Button. No changes are
made and you can try again.
3. Use the and Arrows to select “PLC MODE”. It will flash when selected.
4. Press and release the Button. The screen should look like Figure 22.
NOTE: If the PLC Switch was not set correctly you will see the screen in Figure 23. Turn off the system and
refer to “Using the PLC Switch” (Page 20) for instructions on how to set the PLC Dip Switch.
Figure 21. Entering PLC
Mode
Figure 22. PLC Mode
Messages may vary depending on
PLC input signals
Figure 23. Message to
Set PLC Switch