Installation_-P_Oval_TypeB_Insertion_r1d -P Probe Physical Installation (Rectangular Ducts)Page 3
EBTRON, Inc • 1663 Hwy 701 S., Loris, SC 29569 • Toll Free: 800-2EBTRON (232-8766) • Fax: 843-756-1828 • EBTRON.com
Step 19. Place the terminal mounting plate [] over the terminal mounting bolt [] of the probe and secure
the terminal mounting plate [] to the duct with the four mounting screws [] selected. The foam
gasket on the plate should be facing the duct.
Step 20. Place the small foam gasket [], large fender washer [] and lock nut [] on the terminal mounting
bolt [].
Step 21. Tighten the lock nut [] until the small foam gasket [] is compressed to approximately 50% of its
original thickness.
Step 22. Mark a center-point where the longer probe will be located, offset by dimension ‘c’ (2 in. [50mm])
from the shorter probe, in the middle of the radiused side of the flat oval, dimension ‘d’ = ‘e’/2, where
‘e’ is the minor axis (shorter) dimension of the flat oval including any internal insulation.
Use a carpenter’s square or similar tool across the flat edge of the oval to locate the center-point on
the of the radiused side.
Step 23. If the probes are provided with the terminal mounting bolt [], follow Steps 24 to 25, otherwise skip
to Step 26.
Step 24. Mark a center-point directly across the duct from the points marked in Step 22.
Step 25. Drill a ½ inch hole at the probe center-point marked in Step 24.
Step 26. Drill a 1-1/8 inch hole at the probe center-point marked in Step 22.
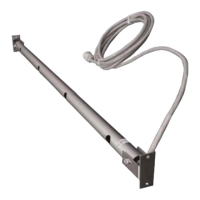
Step 27. Remove the large foam gasket [] from the probe tube [] and insert the probe into the duct. Use
the probe mounting bracket [] as a template to mark the location for the two center-line mounting
screws []. The mounting bracket will self-align on the round portion of the oval to the direction of
airflow. Remove the probe from the duct.
Removal of the foam gasket ensures that the insertion mounting plate [] lays flat on the duct and
properly aligns in the direction of airflow.
Step 28. Drill appropriately sized pilot holes for each insertion mounting bracket screw [] location (screws
not provided) marked in Step 27.
Step 29. Make sure the large foam gasket [] is installed on each probe tube [] against the insertion
mounting bracket [].
Step 30. Insert the probe tube [] in the duct with the airflow directional arrow pointing in the direction of
airflow (it is ok if the arrow is upside down).
Step 31. Secure the insertion mounting bracket [] to the duct with the two mounting screws [] selected.
Step 32. If the probe is provided with the terminal bolt [], follow Steps 33 to 34, otherwise skip to Step 35.
Step 33. Place the small foam gasket [], large fender washer [] and lock nut [] on the terminal mounting
bolt [].
Step 34. Tighten the lock nut [] until the small foam gasket [] is compressed to approximately 50% of its
original thickness.
Step 35. Probe installation is complete! Figure “B” shows the completed two probe installation.

 Loading...