Chapter 6
| Port Connections
How to Connect to QSFP+ Fiber Optic Ports
– 47 –
Note:
To uninstall a transceiver: First disconnect the network cable, then pull the
tab to remove the transceiver from the slot.
How to Connect to QSFP+ Fiber Optic Ports
Follow these steps to connect cables to QSFP+ transceiver ports.
Warning:
This switch uses lasers to transmit signals over fiber optic cable. The
lasers are compliant with the requirements of a Class 1 Laser Product and are
inherently eye safe in normal operation. However, you should never look directly at
a transmit port when it is powered on.
Warning:
When selecting a fiber QSFP+ device, considering safety, please make
sure that it can function at a temperature that is not less than the recommended
maximum operational temperature of the product. You must also use an approved
Laser Class 1 QSFP+ transceiver.
1. Remove and keep the port’s protective cover. When not connected to a fiber
cable, the cover should be replaced to protect the optics.
2. Check that the fiber terminators are clean. You can clean the cable plugs by
wiping them gently with a clean tissue or cotton ball moistened with a little
ethanol. Dirty fiber terminators on fiber cables will impair the quality of the
light transmitted through the cable and lead to degraded performance on the
port.
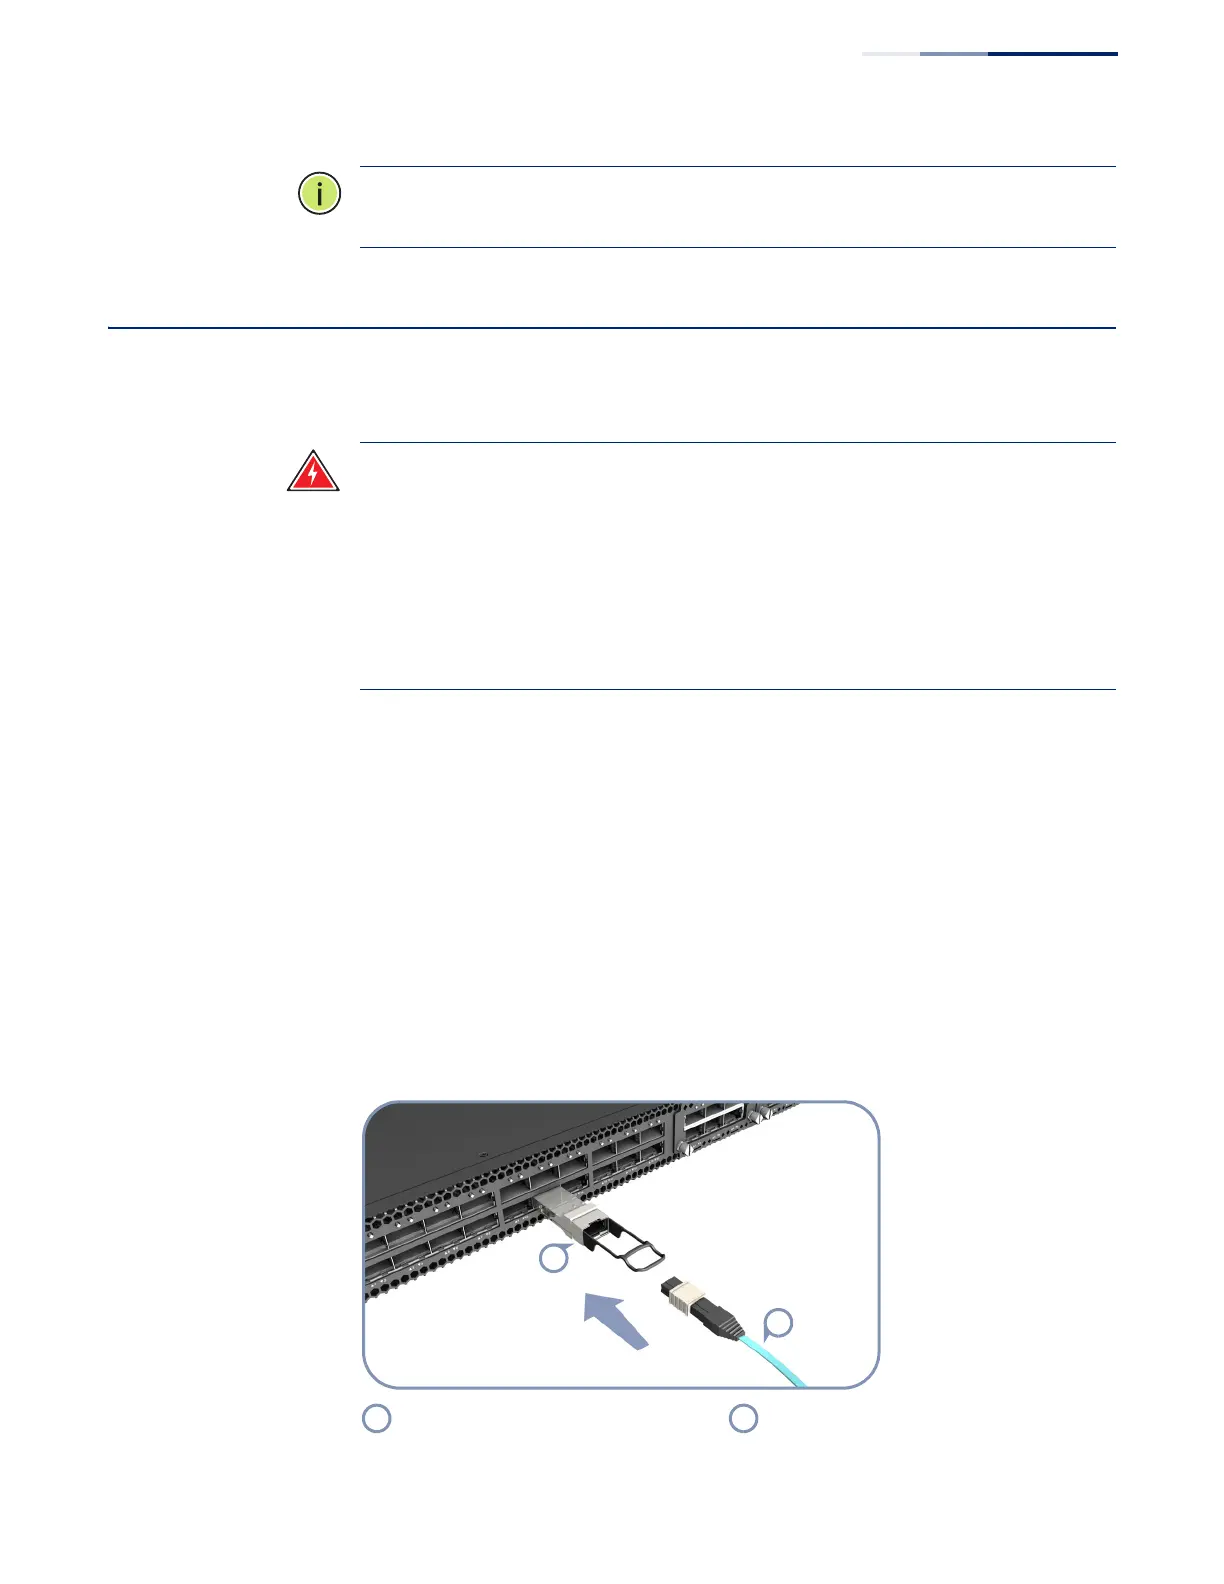
3. Connect one end of the cable to the QSFP+ port on the switch and the other
end to the QSFP+ port on the other device. Since QSFP+ connectors are keyed,
the cable can only be attached in the correct orientation.
Figure 27: Making a Connection to a QSFP+ Port
QSFP+ Transceiver Fiber Optic Cable