35Service Guide: EFI Fiery Central integrated server
Replacing parts
2 Remove the CPU fan cable from motherboard connector CPU FAN.
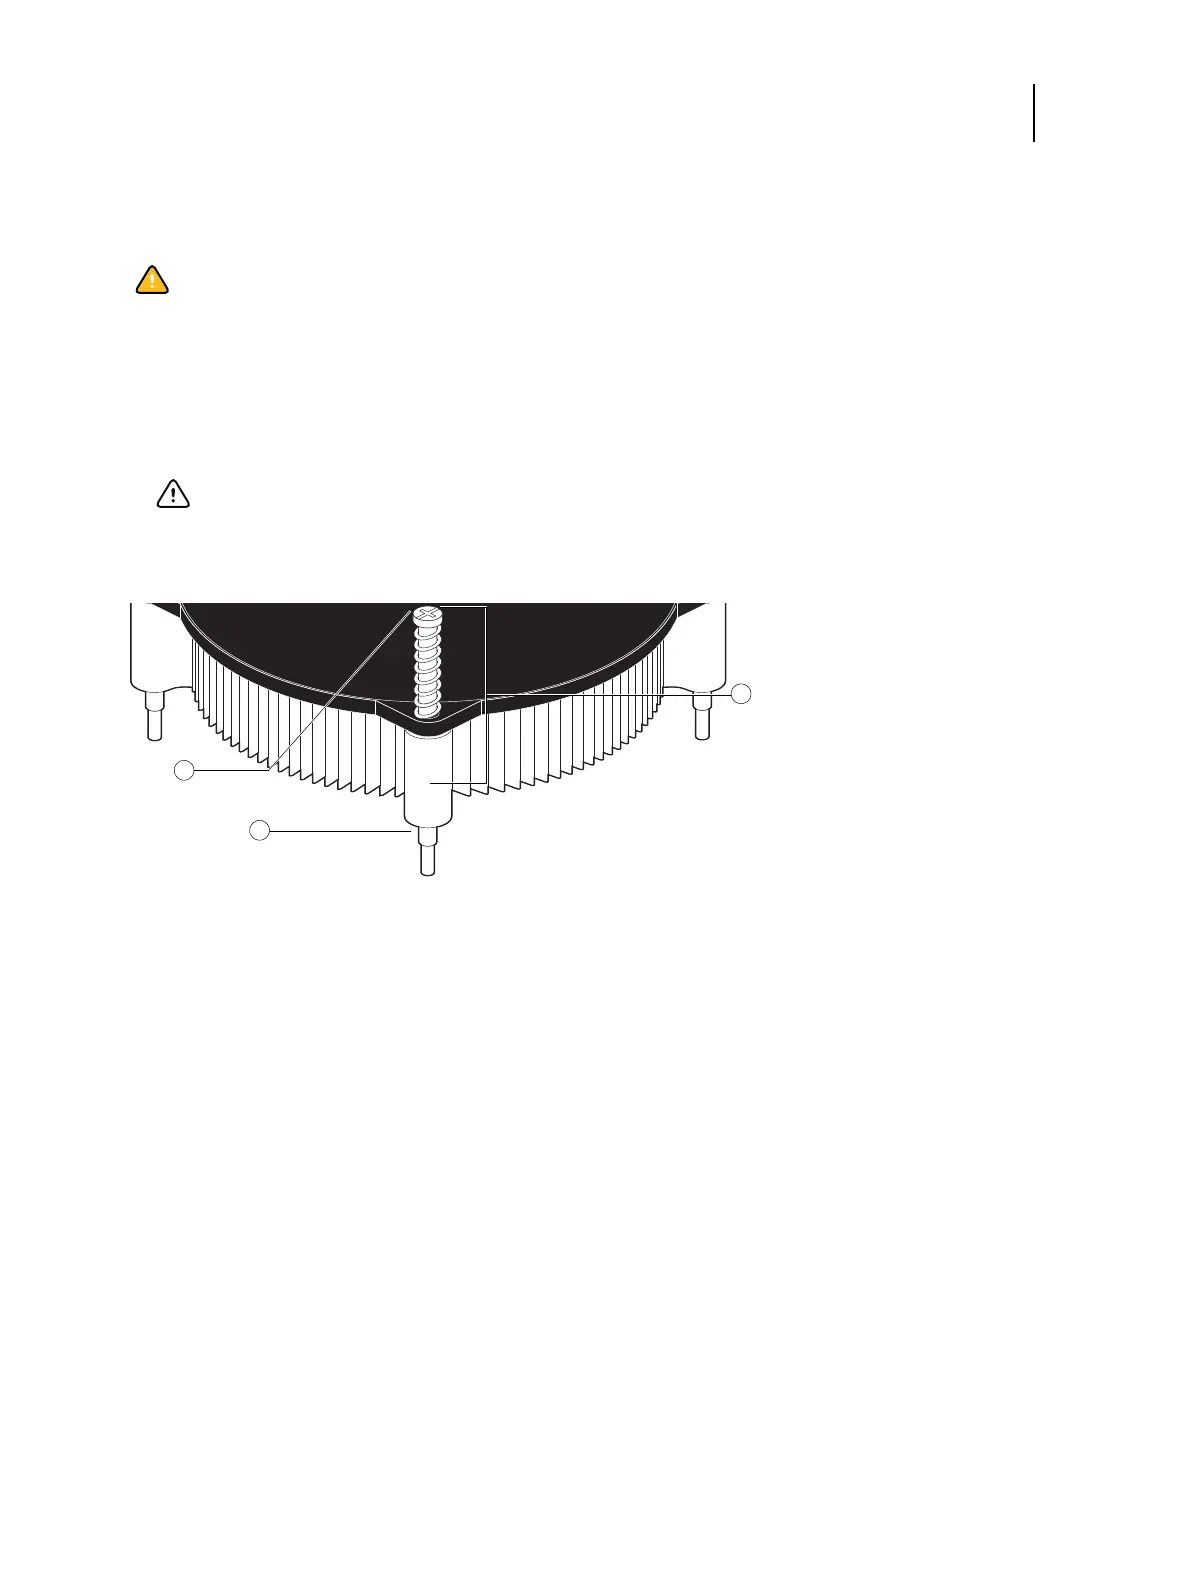
3 Remove the CPU cooling assembly.
• Insert a flathead screwdriver into the groove on the top of a fastener cap and rotate the fastener
counterclockwise (that is, in the direction of the arrow) to the position shown below.
• Pull straight up on the fastener cap until the peg is out of the motherboard.
4 Lift the cooling assembly off the CPU socket and set it aside.
To remove and replace the CPU
1 Unlock the CPU socket lever and raise it into the open position (flex the lever away from the retention post, and
then raise it).
2 Open the load plate (see Figure 14 on page 36).
3 Grasp the CPU by its edges, lift it out of the socket, and then place the CPU in a safe place.
Note: If you remove the CPU from the motherboard to install it on a new motherboard, unpack the new
motherboard and remove the protective plastic cover from the CPU socket. Transfer the protective cover to the
CPU socket of the old motherboard to protect the circuitry.
Caution:Be aware that the cooling assembly and the CPU may be very hot. You may need to let the
components cool before attempting to remove them.
Important: You may need to use moderate force to pull the pegs out of the motherboard. Be careful not to
damage the components on the motherboard or the CPU cooling assembly when pulling up on the
fasteners.
1Groove
2Peg
3 Rotate each fastener to this position.