114
Service Manual
Push the filter (B) back into position and remount the filter (A).
Remount the back panel.
14.4 Special filter
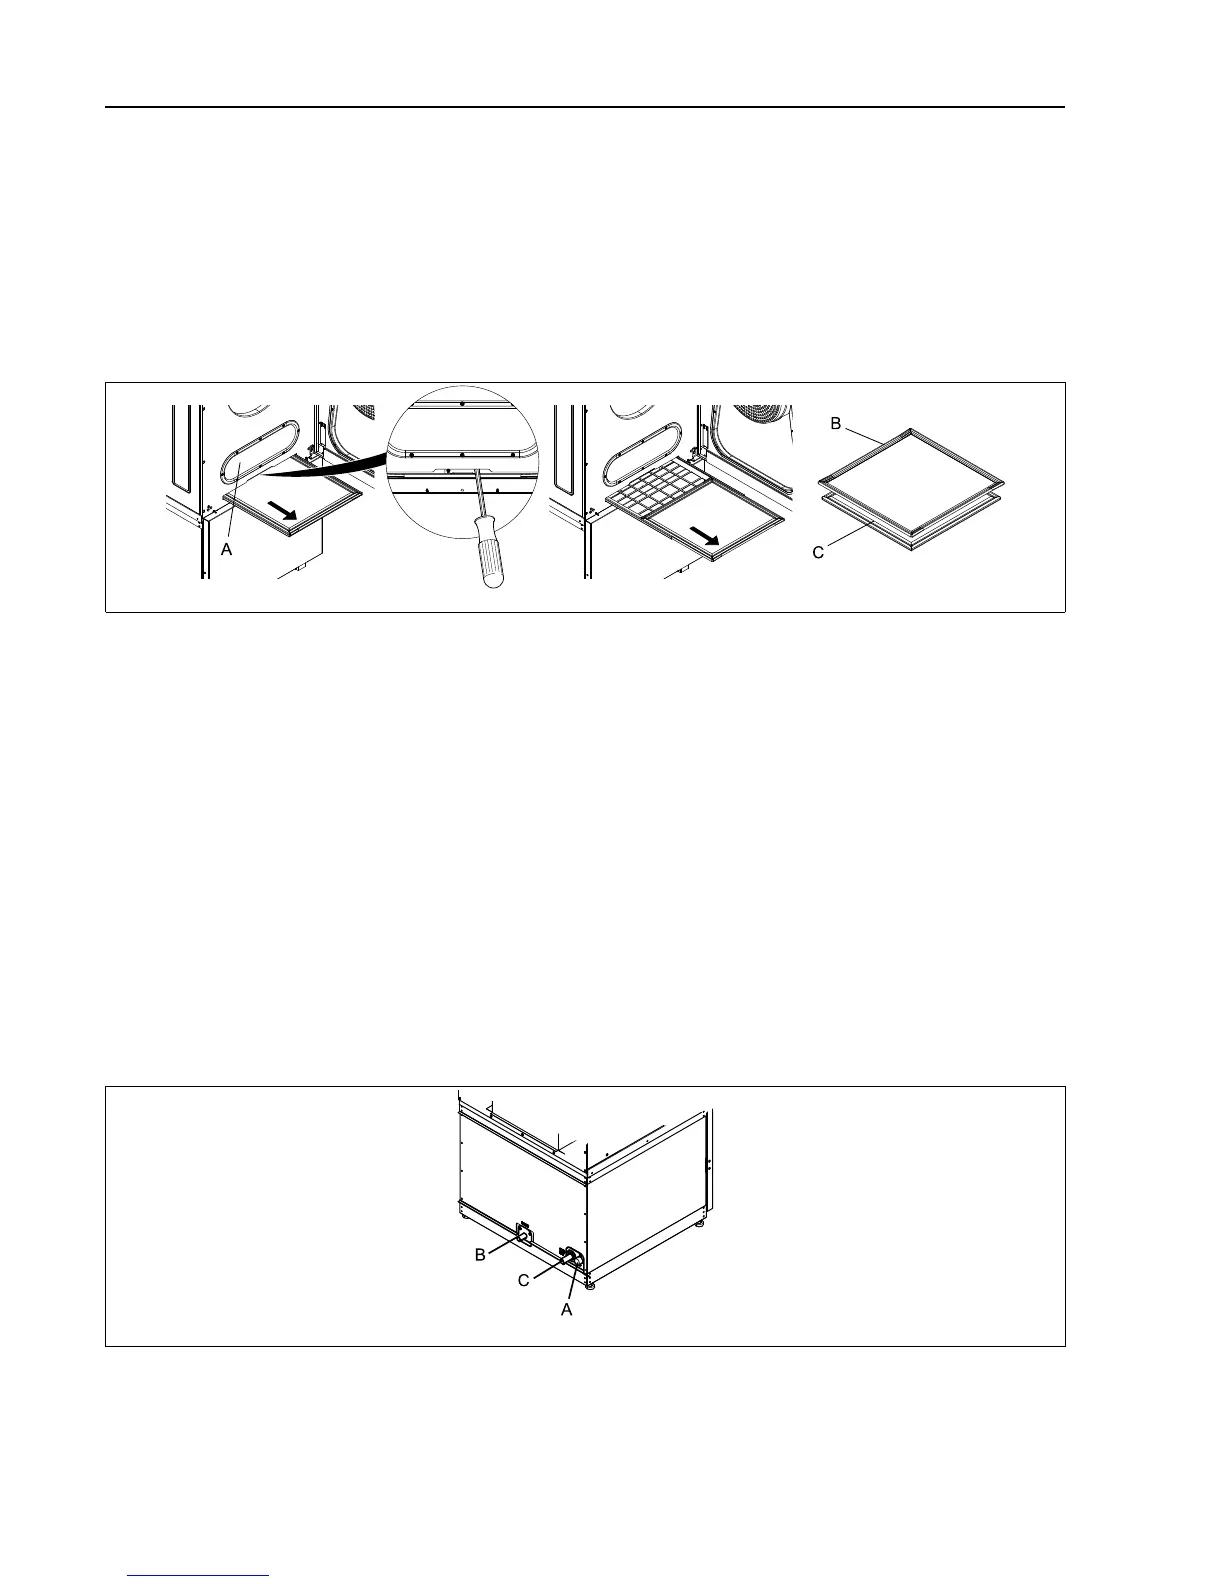
The Special filter (C) is placed under the lint filter (B).
Pull out the filters as far as possible.
Loosen the two nuts on the locking bracket.
It is also possible to reach the nuts from behind the filter (A). Demount the filter (A) and loosen the two nuts on the
locking bracket.
Note!
Replace the Special filter when needed or when the warning message “NOTIFY RESPONSIBLE! CLEAN SPE-
CIAL FILTER” is displayed.
Note!
Do not use water to clean the Special filter.
When remounting; position the Special filter (C) below the lint filter (B). Make sure the Special filter (C) is in center po-
sition when inserting the filters on the filter bracket.
Make sure the filters are in position and below the locking bracket. Tighten the nuts on the locking bracket, press the
locking bracket down at the same time as tightening the nuts.
If the filter (A) has been demounted; remount the filter (A).
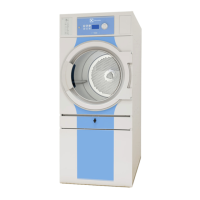
14.5 Clean the water valve
At regular basis, check the water valve and filter.
Disconnect the power to the machine.
Disconnect the water supply to the heat pump.
Disassemble the water valve (A) and check that the hole is not blocked. Check the filter.
Check the drain for condensed water (B) and the drain for cooling water (C).