foot.
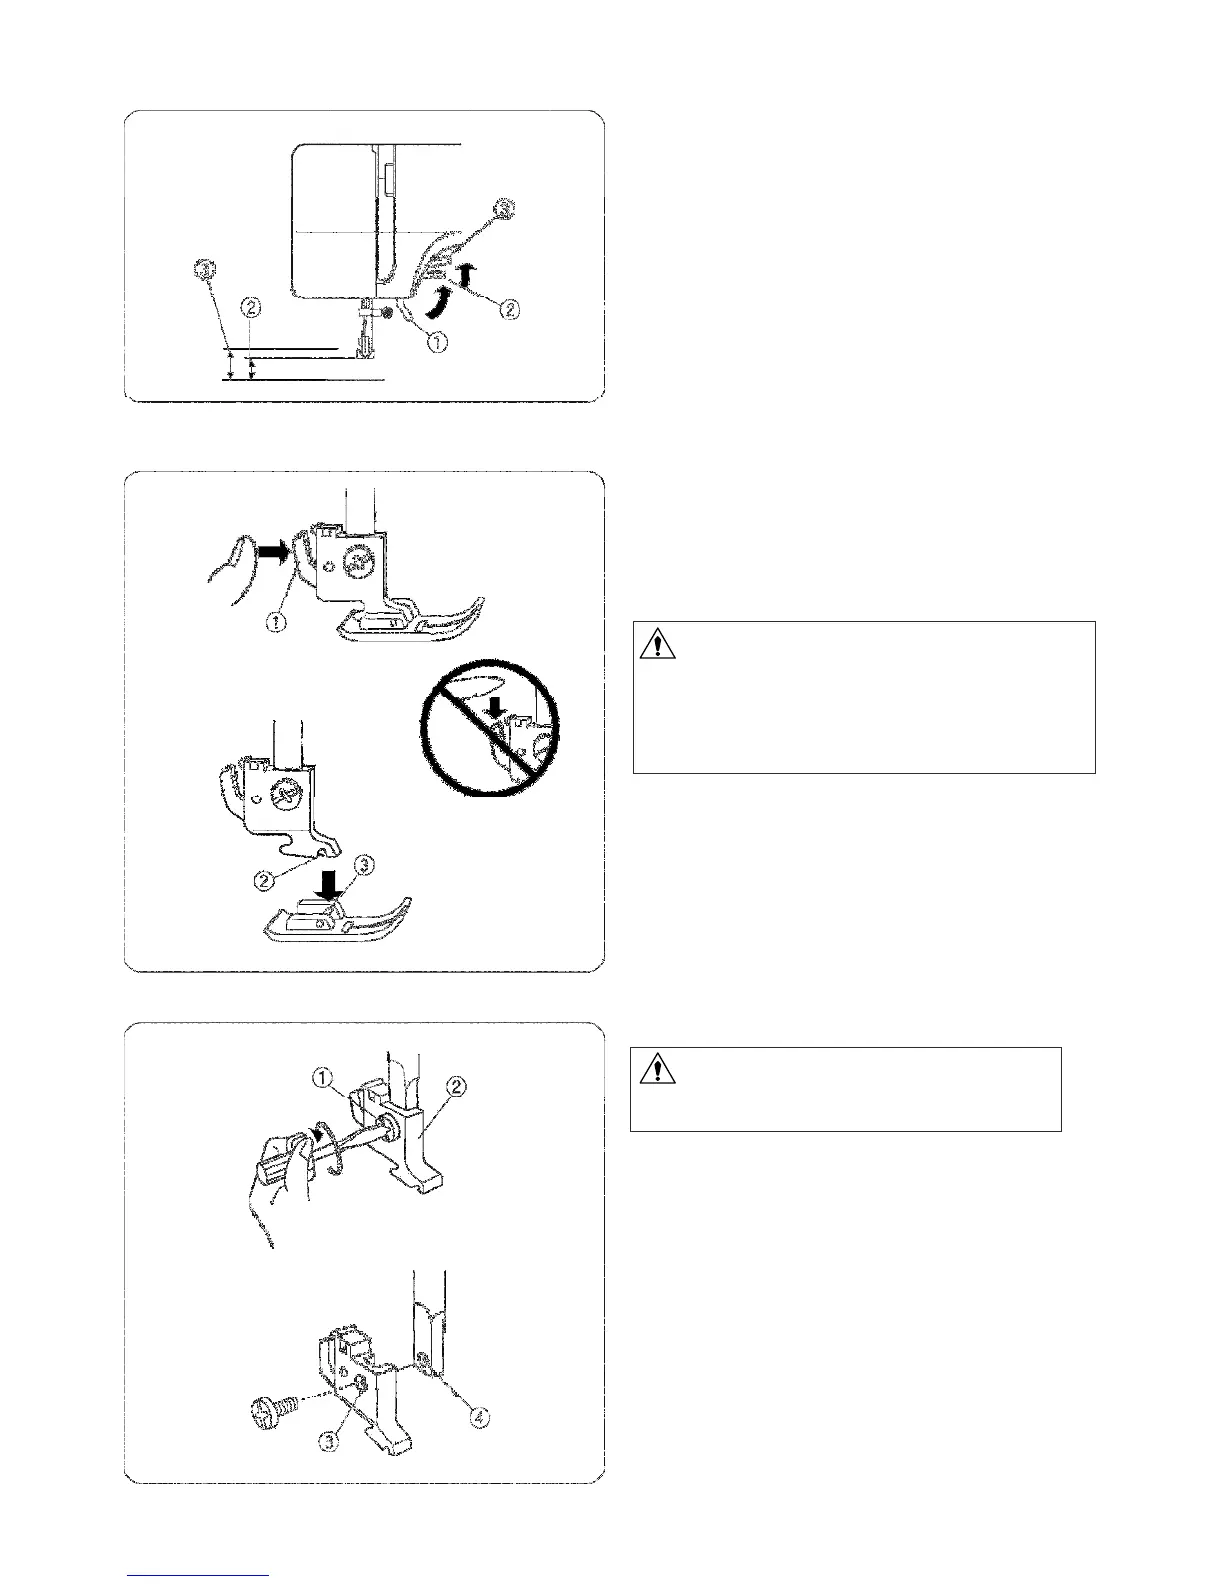
You can raise the foot about 1/4" (0.6 cm) higher than
the normal up position for easy removal of the presser
foot, or to help you place heavy fabric under the foot.
1
Lowered position
2
Normal up position
3
Extra up position
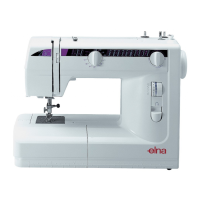
Raise the needle to its highest position by turning
handwheel counterclockwise. Raise the presser
and press the lever on the back of the foot holder.
1
Lever
CAUTION:
Turn OFF the power switch before changing the foot.
Always use the proper foot for the selected pattern.
The wrong foot can cause the needle to break.
Do not push the lever down to prevent it from being
broken.
Place the desired presser foot, so that the pin on the foot
lies just under the groove on the foot holder. Lower the
presser foot lifter to lock the foot in place.
2
Groove
3
Pin
WARNING:
Turn OFF the power switch before detaching
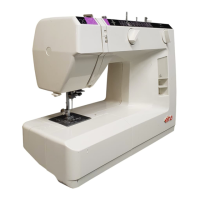
Remove the setscrew by turning it counterclockwise
a screwdriver and remove the shank.
Match the hole in the shank with the threaded hole
In the presser bar. Fit the setscrew into the hole. Tighten
the screw by turning it clockwise with a screwdriver.
1
Setscrew
2
Shank
3
Hole
4
Threaded
hole


 To Next Page