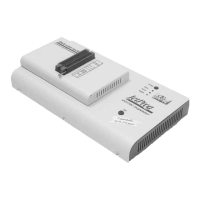
T51prog
T51prog performs programming verification at the marginal
level of supply voltage, which, obviously, improves
programming yield, and guarantees long data retention
T51prog programmer is driven by an easy-to-use control
program with pull-down menu, hot keys and on-line help.
Selecting of device is performed by its class, by manufacturer
or simply by typing a fragment of vendor name and/or part
number.
Standard device-related commands (read, blank check,
program, verify, erase) are boosted by some test functions
(insertion test, signature-byte check), and some special
functions (autoincrement).
All known data formats are supported. Automatic file format
detection and conversion during load of file.
The rich-featured autoincrement function enables to assign
individual serial numbers to each programmed device - or
simply increments a serial number, or the function enables to
read serial numbers or any programmed device identification
signatures from a file.
For T51prog are available DIL to PLCC and SOIC socket
converters.
Connecting T51prog programmer
to PC
Switch off the PC and programmer. Insert the connection
cable, included in the T51prog programmer delivery, to the free
printer port of PC. If your computer is equipped with only one
printer port, substitute the programmer cable for the printer
cable. Connect the opposite cable end to the programmer.
Screw on both connectors to counter connectors. This is very
important mainly for the connector to programmer. Though
replacing the printer cable by the programmer cable is
uncomfortable, it is not recommended to operate the T51prog
programmer through a mechanical printer switch. Use of an
electronic printer switch isn't possible.
Connect the mains connector of the power supply (or wall-plug
power supply self) to a mains plug, connect the connector to
the appropriate programmer's connector. Then, on the
programmer lights up LED POWER and the programmer
T51prog is ready to run. Next switch on the PC and run the
control program.
79