For more information on registers and indexes in the above table, please consult
the System Integrators Manual CANopen Interface.
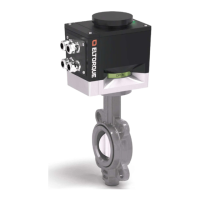
The Failsafe actuator is mounted and installed in the same way as a standard
actuator, with the following exceptions:
• There are routines to follow for the storage and installation caused by battery
considerations, see information in section B.4.ii on page 70.
• There are considerations to make when you open the actuator, see B.5.ii
below.
• The interface communication box is fastened to the failsafe module with nuts
instead of screws.
• Connection of the battery cable sees B.8.ii on page 78, steps 12 – 16.
See Chapter 4 Mounting and Installation on page 35 on how to connect the
external power and signal cables to the communication interface unit.
Due to the different states, the product might be operating in, considerations
should be made to ensure the battery is not drained below the levels necessary
to keep the battery suitable for use.
If there are planned power outages, the following rules should apply:
If 230 VAC power is expected to be unavailable for >36 hours:
• Activate Service mode
• Disconnect the 230 VAC power
If 230 VAC power is expected to be unavailable for >12 days:
• Disconnect the 230 VAC power
• Disconnect the battery on each unit
Depending on the selected installation plan the necessary operations will be
different. Below is a summary of both options. See section B.8.ii Changing
battery on the on page 78.
• Installation method A: Follow step 1-4 and 12-16
• Installation method B: Follow step 1-16