User Manual QT250 and QT800 gen 2.5, ID 2021 2.3 20. April 2021
B.7.iii.
The indicator LEDs are positioned at the top of the UPS unit. There are two LEDs,
one for the actuator status and one for the battery status. Table 8-24 shows the
different status conditions for both the battery and the actuator.
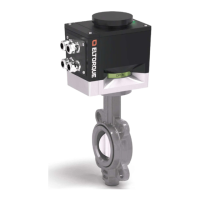
Figure 49: QT250 and QT800 –indicator LEDs
Table 8-24: LED indication.
Battery Health Good and
supplying
Battery Health Under Warning
Battery Health Under Warning
and supplying
Battery Health Under Critical
Battery Health Under Critical
and supplying
230 VAC power has been lost for >36 hours
while in Failsafe mode,
The battery must be recharged, see
B.8.i below.
230 VAC power has been lost for >12 days while
in service mode (not deep sleep)