A battery test and maintenance plan must be implemented according to the
certification requirements or the class requirements (whichever is the strictest).
For the failsafe product, this implies that the battery must be completely
discharged on a regular basis.
Battery discharge of lead acid batteries must only take place while the ship is at
port, for example during system revision shutdowns or as part of ship
maintenance routines. It implies that the actuator is nonoperational during this
procedure. The discharge routine may take up to 24 hours, depending on the
battery status when the routine is started.
Reference is made to the System Integrators Manual CANopen Interface for the
correct register/index.
1. Set the actuator in service mode.
2. Send the command “Start Battery Deep Cycle Test”
3. The actuator automatically charges the battery to 100%.
4. The bit “BATTDIS” indicates that the test is performed.
5. When the battery reaches 0% the “BATTDIS” is automatically cleared, the
SOH value is updated, and the battery is recharged.
6. When the battery has reached the lower limit for SOC, service mode can be
cleared, and the actuator resume normal operation.
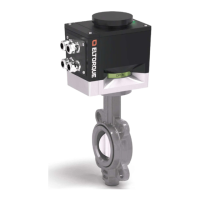
This procedure describes how to change the battery in Eltorque QT250 Failsafe
actuator.
Parts of this procedure also applies to first time installation the Failsafe actuator
as the battery cable must be connected - see steps 12 – 16.
Enable service mode either from the actuator control panel, or by rotating the handwheel of
the actuator.
Make sure that the actuator service indicator light is yellow on all actuators that the battery
change procedure is going to be performed on before proceeding to the next step.