Home
EMC
Storage
CLARiiON CX4-120
Page 18 (Installing the SPE Rail Kits)
EMC CLARiiON CX4-120 - Installing the SPE Rail Kits
62 pages
Manual
To Next Page
To Next Page
To Previous Page
To Previous Page
Loading...
16
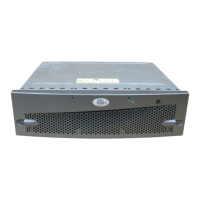
Install - Step 1 continued
Install the storage-system har
d
ware
2.
Install the SPE directly above the SPS tray
.
a.
Install the rail kits.
Installing the SPE rail kits
Leave the rail screws slightly loose.
F
ront
Re
a
r
CL4110
17
19
Table of Contents
Main Page
Notice
2
Overview
3
Preinstall
4
Prepare the Site
4
Plan Network Connections
5
Ipv4 Addresses for Iscsi Targets
7
IP Address for each Iscsi NIC or HBA Port (Iscsi Initiator)
8
Verify the Environment
9
Install the Storage-System Hardware
11
Verify Your Parts
11
Install the Storage-System Hardware in a Rack or Cabinet
13
Installing the SPS Rail Kits
14
Securing the SPS Tray to the Mounting Rails
15
Securing the SPS Units Onto the Tray
16
Installing the Latch Bracket and Bezel
17
Installing the SPE Rail Kits
18
Sliding the Enclosure Onto the Mounting Rails
19
Securing the SPE to the Chassis and Attaching Latch Brackets and Bezel
20
Installing the DAE-OS Rail Kits
21
Installing the DAE-OS in the Cabinet
22
Connect the Storage-System Back-End Ports
24
Connecting the HSSDC2 Cables
24
CX4-120 Connecting the Back-End Ports
25
Attach the Power and SPS Serial Cables
26
Connecting Power Cables
26
Site Power with Four Pdps
28
Power up
29
SPS Power Switches
29
Recharge and System Fault Leds
29
Connect the Initialization Client
31
Connecting to a Shared Management LAN
31
Connecting to a Local Management Client
31
Initialize and Enroll the Storage System
32
Before Continuing
32
Install the Initialization Utility
32
Run the Storage System Initialization Utility on the Host
33
Power up and Cable Optional Daes
34
Connecting AC Power
34
Plugging in AC Line Cords
35
Connecting CX4-120 Power Cords
36
Setting the DAE Enclosure Addresses
37
Addressing Overview
37
Addressing Rules
37
Setting the Addresses
37
Setting the Enclosure Addresses
38
CX4-120 Bus/Enclosure Identification
39
Connecting the Back-End Bus
40
Connecting a Disk Enclosure to Another FC Device
40
CX4-120 Back-End Cabling
42
Update Software
43
Install the Unisphere Service Manager
43
Installing a FLARE OE Patch or Software Enabler
44
What Next?
45
Prepare the Servers
46
Install Nics, Hbas, Drivers, and Required Patches
46
Starting the Iscsi Service
46
For Nics and Qlogic Iscsi Hbas
47
To Determine Which File to Download
47
Assign IP Addresses to Nics or Iscsi Hbas
48
Install Path Management Software
48
Install the Unisphere Server Utility
48
Install Admsnap And/Or Admhost Software
49
Connect Iscsi Data Ports
51
CX4-120 Iscsi Direct Connection
51
Configure and Register Iscsi Connections
53
Configure an Isns Client on the Storage System - Windows Only
53
Configure Iscsi Connections and Register the Server
53
For Iscsi Hbas
55
Set up Fibre Channel Switches
56
Connect Fibre Channel Data Ports
57
For High Availability
57
CX4-120 Fibre Channel Direct Connection
57
Zone Switches
58
CX4-120 Fibre Channel Switch Connection Configuration
58
Register the Fibre Channel Hbas
59
Verify Your High-Availability Configuration
60
If You Need Help
62
Related product manuals
EMC CX3-10
34 pages
EMC Celerra NX4
34 pages
EMC VPLEX
94 pages
EMC VNX7500
56 pages
EMC VNX5300
88 pages
EMC VNX5500
122 pages
EMC VNX5700
108 pages
EMC VNXe3200
44 pages
EMC VNX Series
18 pages
EMC Symmetrix DMX-3
326 pages
EMC Data Domain DD990
6 pages
EMC DATA DOMAIN DD4500
6 pages