Care and maintenance SPECORD PLUS
34
Figure22VIS lamp
1 Rear VIS lamp cover 2 Knurled head screws for fastening the
VIS lamp cover
3 VIS lamp with base
} Loosen the knurled head screws fastening the VIS lamp.
} Hold the lamp by the base and pull it out of the socket.
} Insert the new VIS lamp in the socket and screw it in hand tight. Observe that the pin
in the lower socket protrudes into the notch on the lamp base.
} If this has not yet been done, pull the cardboard shell protecting the lamp body off of
the lamp.
} Position the front VIS lamp cover and screw it on.
Inserting or replacing the dessi-
cant cartridge (optional)
} Remove the foam plug or unscrew the desiccant cartridge from the monochromator
hood. Use the protective cap of the desiccant cartridge as a tool.
} Screw the new dessicant cartridge into the monochromator hood.
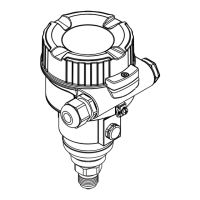
Figure23Protective cap of the dessicant cartridge
Recommissioning the device
} Close the service flap and fasten it with the knurled head screw.
} Turn the device back to its original position and connect the mains cable to the
mains connection of the device.
} Switch on the device, start ASpect UV and initialize the device.
} After a lamp replacement, allow the device to run for 2 hours and then carry out the
basic correction, and, on the SPECORD 250 PLUS, also the grid correction (→ "Check-
ing and correcting the adjustment" 21).

 Loading...