Operating Instructions SS2100i-2 TDLAS Gas Analyzer
26 Endress+Hauser
4.4 Hardware and tools for installation
Depending on the model, the configuration of accessories, and options ordered, you may need the following specific
hardware and tools to complete the installation process.
4.4.1 Hardware
• Stainless steel tubing. Using electro-plated coated ¼ in O.D x 0.35 in wall thickness, seamless stainless-steel
tubing is recommended. The SS2100 for trace analytes utilize SilcoTek SN2000 coated tubing. SN2000-coated
tubes may be used for the sample supply. Coated tubing is not needed for instrument air, nitrogen, or sample
return.
4.4.2 Tools
• 8 mm hex key wrench
• 8 mm ball-point hex L-key
• 10 mm ball-point hex L-key
• 9/16 in angled, double open-end wrench — 15 degree and 75 degree
• 11/16 in extra-long, thin-head double open-end wrench
• 7/64 in stainless steel ball point hex L-key
• 5/32 in high torque ball point hex L-key
• RS-485 USB converter (P/N 3100002220)
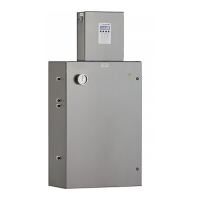
4.5 Mounting the analyzer
Refer to the layout diagram in Specifications → or the system drawings delivered with the analyzer for mounting
dimensions.
When mounting the analyzer, position the instrument so that adjacent devices can be operated. Allow 1 m (3
feet) of room in front of the analyzer and any switches.
4.5.1 To mount the analyzer
1. Select a suitable location to mount the analyzer. Choose a shaded area or use an optional analyzer hood (or
equivalent) to minimize sun exposure.
Endress+Hauser analyzers are designed for operation within the specified ambient temperature range.
Intense sun exposure in some areas may cause the analyzer temperature to exceed the maximum.
2. Secure all designated attachment points.
Once all designated attachment points are securely fastened, the analyzer should be ready for the electrical
connections.
4.6 Protective chassis ground connections
Before connecting any electrical signal or power, the chassis grounds must be connected. Safety requirements for the
protective and chassis grounds are as follows:
• The protective and chassis grounds must be of equal or greater size than any other current-carrying conductors,
including the heater located in the sample conditioning system.
• The protective and chassis grounds must remain connected until all other wiring is removed.
• If the protective and chassis ground is insulated, it must use the green/yellow color.
Failure to properly ground the analyzer may create a high-voltage shock hazard.
Refer to Fig 7. Components in SS2100i-2 electronics enclosure for locations of the chassis ground connections.

 Loading...