SS2100i-2 TDLAS Gas Analyzer Operating Instructions
Endress+Hauser 47
3. Check the O-ring. If a new O-ring is needed, apply grease on fingertips and then to the new O-ring.
4. Place newly greased O-ring into the groove around the outside of the mirror taking care not to touch the mirror
surface.
5. Carefully place the new stainless steel mirror onto the cell making sure the O-ring is properly seated.
6. Tighten the socket-head cap screws evenly with a torque wrench to 13 in-lbs.
6.6 Replacing the pressure sensor
A pressure sensor may need to be replaced in the field due to one or more of the following conditions:
• Loss of pressure reading
• Incorrect pressure reading
• Pressure sensor not responding to pressure change
• Physical damage to the pressure sensor
Refer to the following information to replace the pressure sensor:
• Replacing the pressure sensor on an 8 m or a 28 m cell →
• Replacing the pressure sensor on a 0.1 or 0.8 m cell →
Tools and materials
• Acetone-impenetrable gloves (North NOR CE412W Nitrile Chemsoft™ CE Cleanroom Gloves or equivalent)
•
9
/
16
in wrench
• ⅞ in wrench
•
9
/
64
in Allen wrench
• Flat-head screwdriver
• Phillips-head screwdriver
• Metal pick
• Military grade stainless steel PTFE tape (or equivalent)
• Dry nitrogen
• Isoproypl alcohol
Isopropyl alcohol can be hazardous.
Follow all safety precautions when in use and thoroughly wash hands prior to eating.
6.6.1 Replacing the pressure sensor on an 8 m or a 28 m cell
This procedure is broken into four parts:
• Purge the system and powering down
• Disconnect relevant components
• Replace the pressure sensor
• Reconnect components and performing a leak test
Purge the system and power down
1. Close the external flow of gas at the sample inlet.
2. Purge the system by connecting dry nitrogen to the sample inlet. Allow the SCS to purge for 5 to 10 minutes.
3. Close the nitrogen flow.
4. Power off the system. Refer to the Standard documentation → for this analyzer and the instructions Powering
down the analyzer.
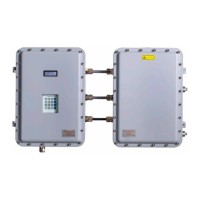
5. Open the door to the SCS enclosure. Refer to the SCS interior images below.
Disconnect components
1. Remove the optical cable harness using a flat-head screwdriver.
2. Disconnect the measurement cell inlet using a
9
/
16
in wrench.
 Loading...

