39
6 Configurations
6.1 Preference Settings
It’s advised to set display preference by these steps before operation.
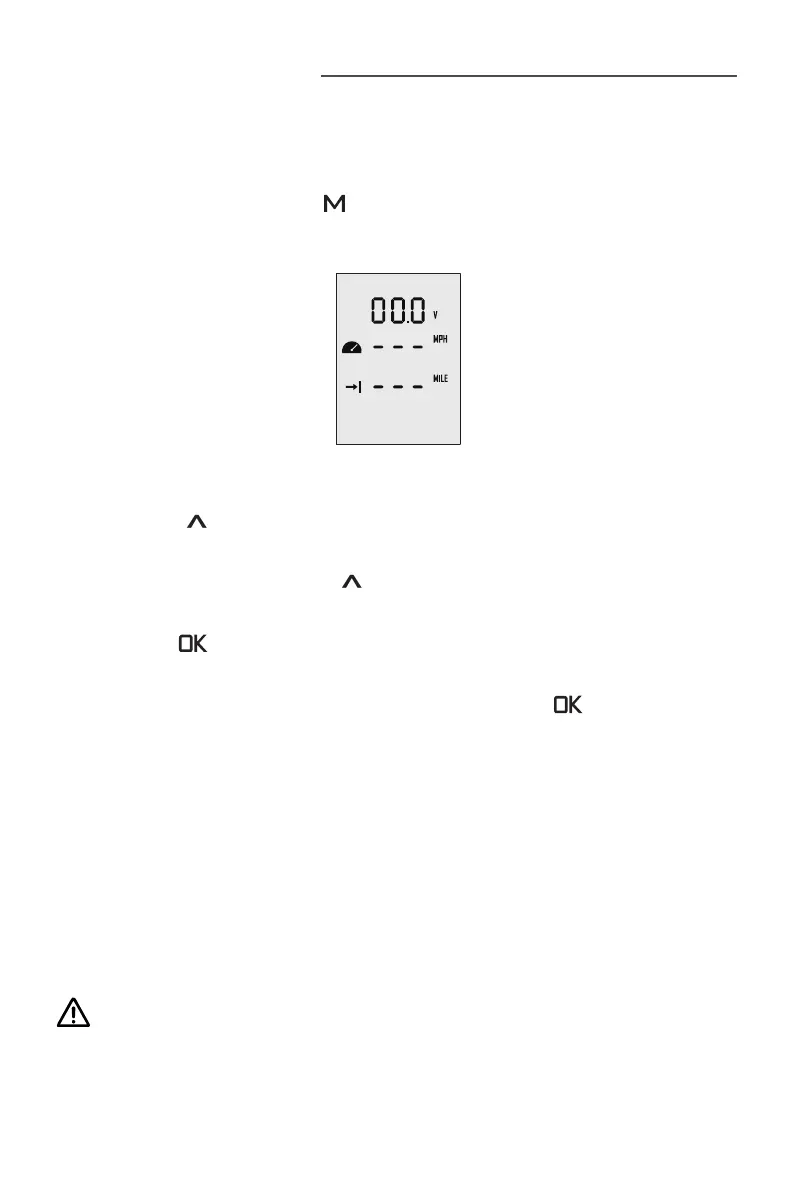
Step1: In power-on state, press “ ” button and hold to enter the preference setting
page as shown in Figure 6-1. Users can choose display items based on personal
needs and preference.
Figure 6-1
Step2: On the preference setting page, the blinking item is the object waiting to be
set. Press the “
” button to view options for the blinking item. For example, in Fig-
ure 6-1, if “ V ” is blinking on the preference setting page, it means that “ V ” has other
alternate options. Just press the “
” button, and “ V ” will switch to “ % ”, i.e. the
displayed item is switched from voltage to battery level.
Step3: Press “ ” button to save setting for the current item and skip to the next
item simultaneously.
Step4: When all the items have been set well, long press the “ ” button to save all
the settings and return to the main page.
6.2 Battery Configuration
Accurate battery conguration helps achieve precise estimation of the battery's dis-
charging state. When using an ePropulsion E Series Battery, battery conguration is
self-activated by the control system given that all the communication cables are well
connected. When not using E Series Batteries, users should manually congure the
batteries via Remote Control/Tiller at the rst time use, so the battery level will dis-
play more accurate.
Battery conguration should be carried out if a battery with different type/capac-
ity/voltage is connected to NAVY 6.0 for the rst time.