EPSON Stylus COLOR 680/777/777i Revision B
Disassembly and Assembly Disassembly 93
C H E C K
P O I N T
n
Unlike the previous products, the oil pad is not built in the CR
unit.
n
Make sure that the tips of the CR guide shaft rod springs are set
in the holes in the Main frame.
n
Make sure that the CR guide shaft rod springs are correctly set
in the suitable position. Refer to Figure 4-44,Figure 4-45.
n
If you disassemble the CR unit after removing the CR unit from
the printer, make sure that the CR Grounding plate is assembled
in the suitable position in the CR unit. Refer to Figure 4-47.
n
.Make sure that the CR slider is assembled on the CR unit.
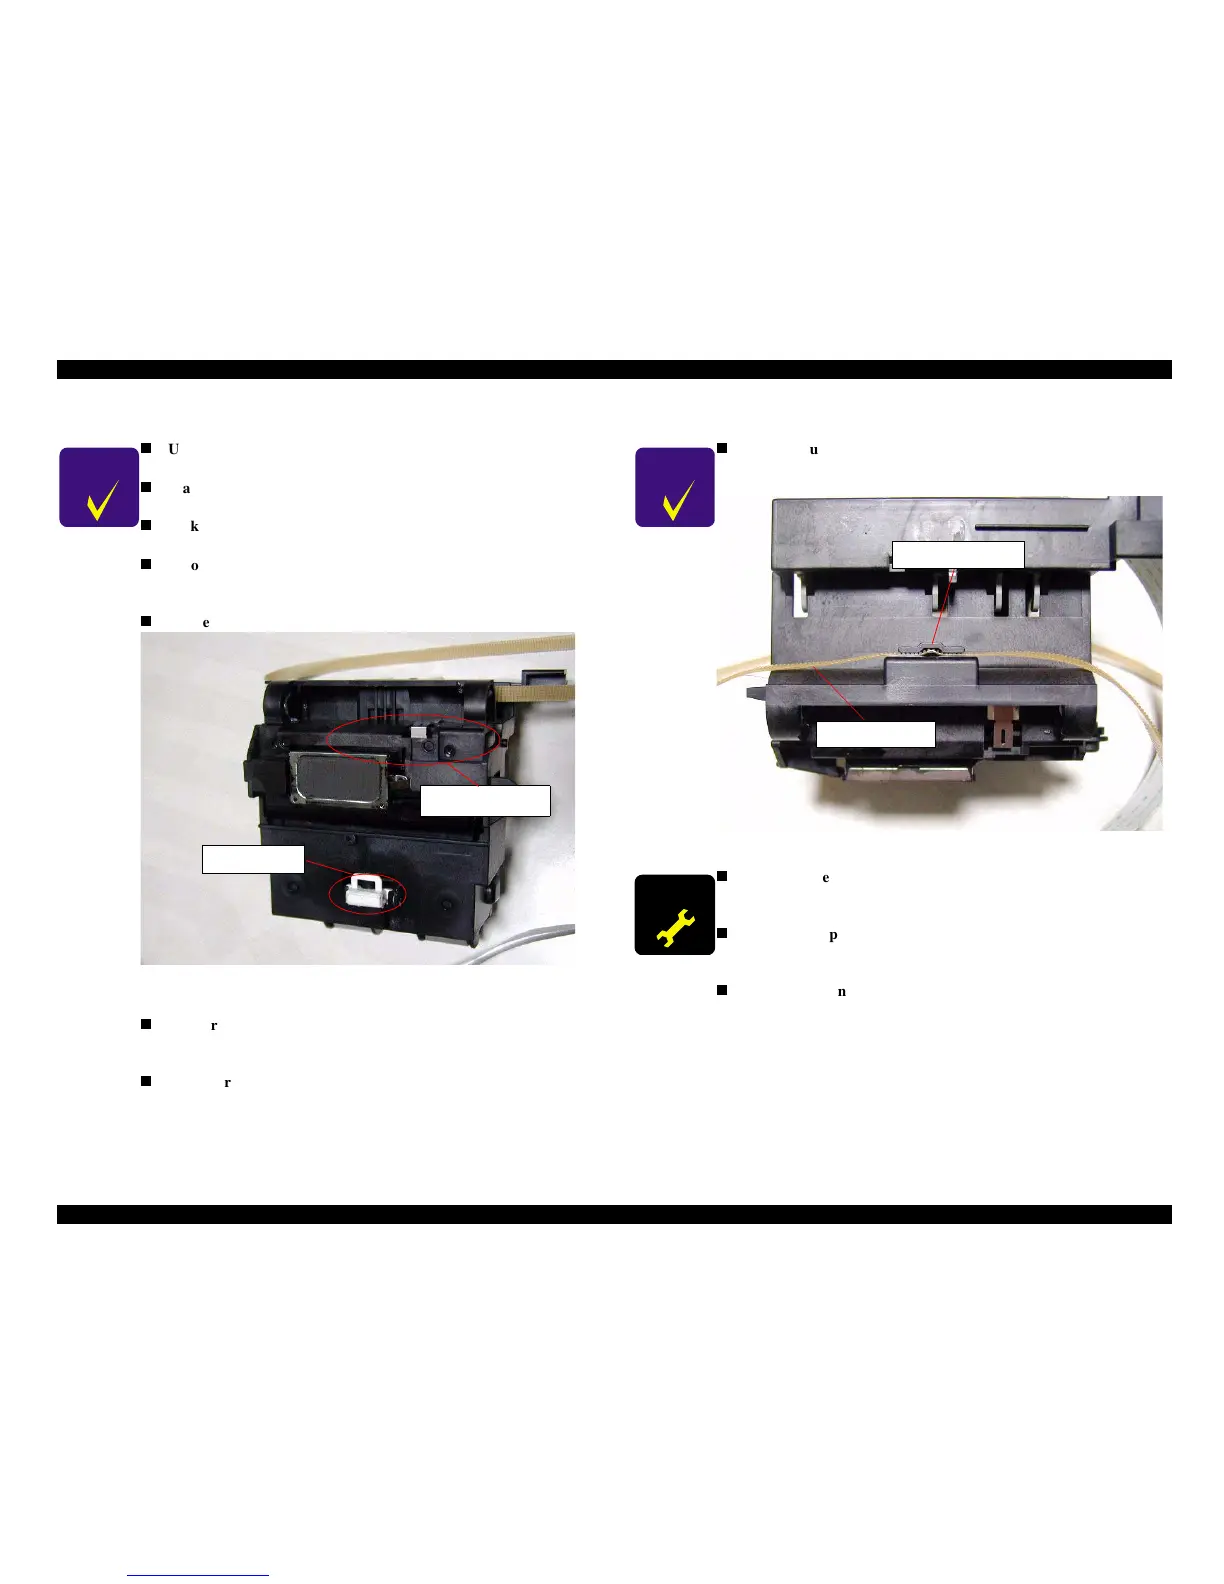
Figure 4-47. Grounding plate assembling position
n
If you remove the Printhead from the CR unit, make sure that
the Head grounding plate is set in the CR unit. Refer to
Figure4-9.
n
Make sure that the groove on the CR guide shaft must be set to
the left side.
CR slider
CR Grounding plate
C H E C K
P O I N T
n
If the CR unit is disassembled or replaced with a new one, make
sure that the CR timing belt is set in the assembling groove
correctly as following figure.
Figure 4-48. CR timing belt setting position
A D J U S T M E N T
R E Q U I R E D
n
When you replace the CR unit with a new one, lubricate it with
the suitable amount of the G-55 grease by the specified position.
Refer to Chapter 6 Figure 6-4.
n
When you replace the CR Pulley shaft with new one, lubricate it
with the suitable amount of G-26 grease by the specific position.
Refer to Chapter 6 Figure6-3.
n
When removing or replacing the CR unit with a new one, adjust
the Gap (Bi-d).
Assembling groove
CR timing belt