a
Once the adjustment screen appears, do not move the projector
or block the image. The projected image will not be corrected
properly.
d
After the correction is performed, the following message appears.
To exit the correction menu, press the [Esc] button on the remote
control or the control panel to clear the message.
To make fine adjustments after the initial adjustment, press the [
w]
[
v
] buttons on the control panel.
If no operation is performed, the message closes after about seven
seconds.
After performing Screen Fit, Keystone on the Configuration menu is
set to Quick Corner. From then on, when you adjust the projected
image using the [
w][v] buttons on the control panel, the
adjustments are made using Quick Corner.
s "Correcting manually" p.35
a
• When Screen Fit detects more than two sides of a
frame inside the projection area, it adjusts to fit the
detected frame. For example, when projecting onto a
wide screen in a small room, you can make
corrections by fitting the top and bottom sides of the
screen into the projected area.
• Screen Fit may not function correctly in dark rooms
such as rooms with the lights turned off. In this
situation, try performing Screen Fit again after
turning on the lights.
• Because Screen Fit relies on a sensor, it may not
function correctly depending on the status of the
projection screen (if it is curved or patterned and so
on) or if the room is open to daylight. In this case,
make the adjustments manually.
s "Correcting manually" p.35
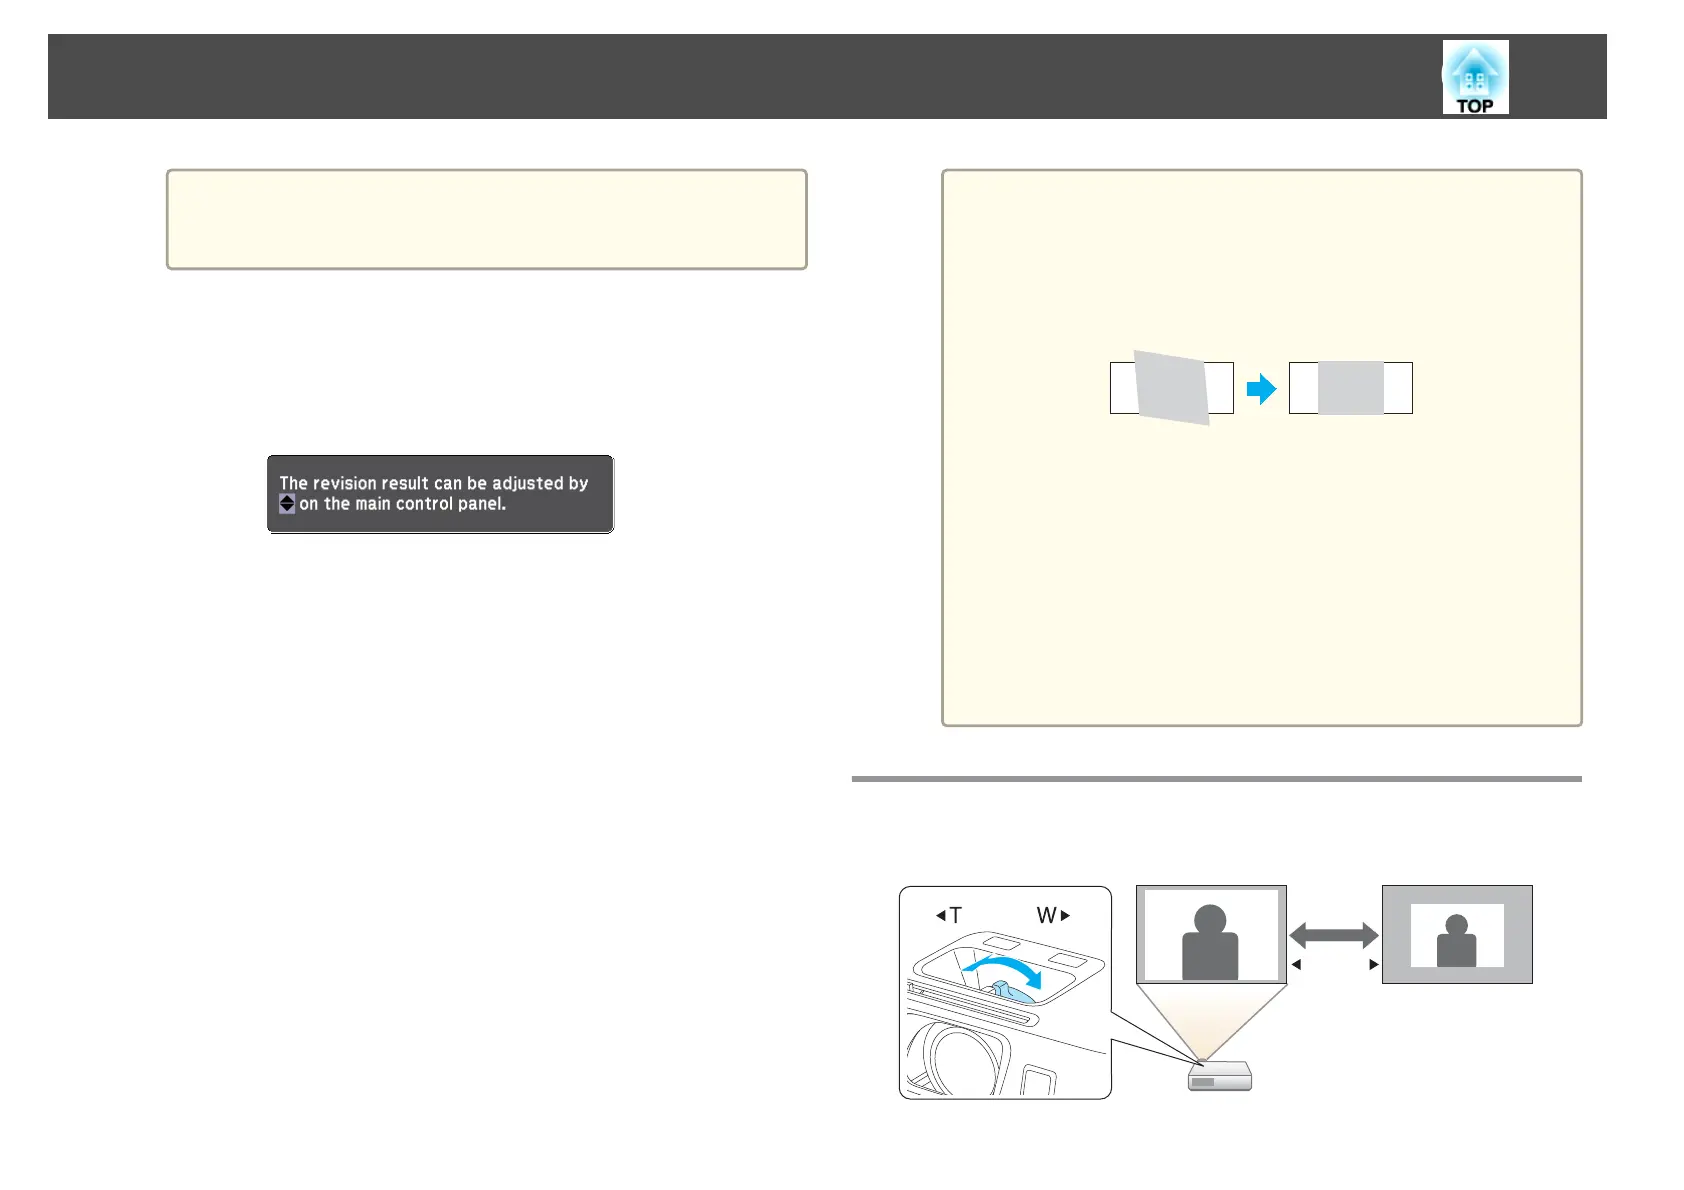
Adjusting the Image Size
Turn the zoom ring to adjust the size of the projected image.
W T
Adjusting Projected Images
40
 Loading...