EMP-9000/8000
4-4Revision:A SEIKO EPSON
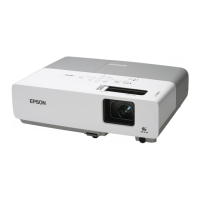
Outside view
Turn off the power then remove power and interface cables.
Figure4-2
Upper case unit
Operation panel
Lamp case unit
Projection lens unit
Lower cover unit
Air filter
Handle /PP knob
Lamp cover unit /
Lamp inner housing
Foot Unit/Front Case
Interface connectors
AC inlet
Attach the Lamp inner housing
and Lamp cover unit.
Start
Any transformation or crack are not presented.
Upper case unit is secured to the lower case with screws.(Refer to 3.2.3)
Dirt condition is not presented on the receptor window (front) on the Upper
case unit.
Button switches should move in smoothly.
Operator panel is fixed on the upper case with four tabs.
Any transformation or crack are not presented.
Rear case unit is secured to the upper case unit and lower case unit.
Dirt condition is not presented on it air duct.
Focus ring and zoom ring are adjustable.(move it in easily)
Dirt condition is not presented on the lens surface.
Any transformation or crack are not presented.
Air filter frame is looked on the lower case unit.
Tab on the Air filter frame is not transformed.
Dirt condition is not presented on the Air filter frame.
Dirt condition is not presented on the cooling fan.(cooling fan is located under the
Air filter frame.
Two of fixing screw on the Lamp cover are not loosen.
Tab on the Lamp cover is not transformed.
Any transformation or discoloration are not presented on the Lamp inner
housing frame and power cable connector.
Any damage or dirt condition is not presented on glass surface.
Discoloration are not presented on the FC board.
Foot lever A/B should move in smoothly.
Any transformation or discoloration are not presented on the interface
connector. (Rust may cause discoloration.)
Any damage or dirt condition is not presented on the socket
Discoloration is not presented on the connector terminal
Any damage or dirt condition is not presented on the socket