EasyManuals Logo

Epson G3 Series User Manual

Epson G3 Series
200 pages
To Next Page IconTo Next Page
To Previous Page IconTo Previous Page
Page #158 background imageLoading...
Page #158 background image
Maintenance 9. Replacing Arm #1
146 G3 Rev.14
Arm #1
Removal
(1)
Remove the arm
cap.
For details, refer to Maintenance: 3.3 Arm Cap.
(2)
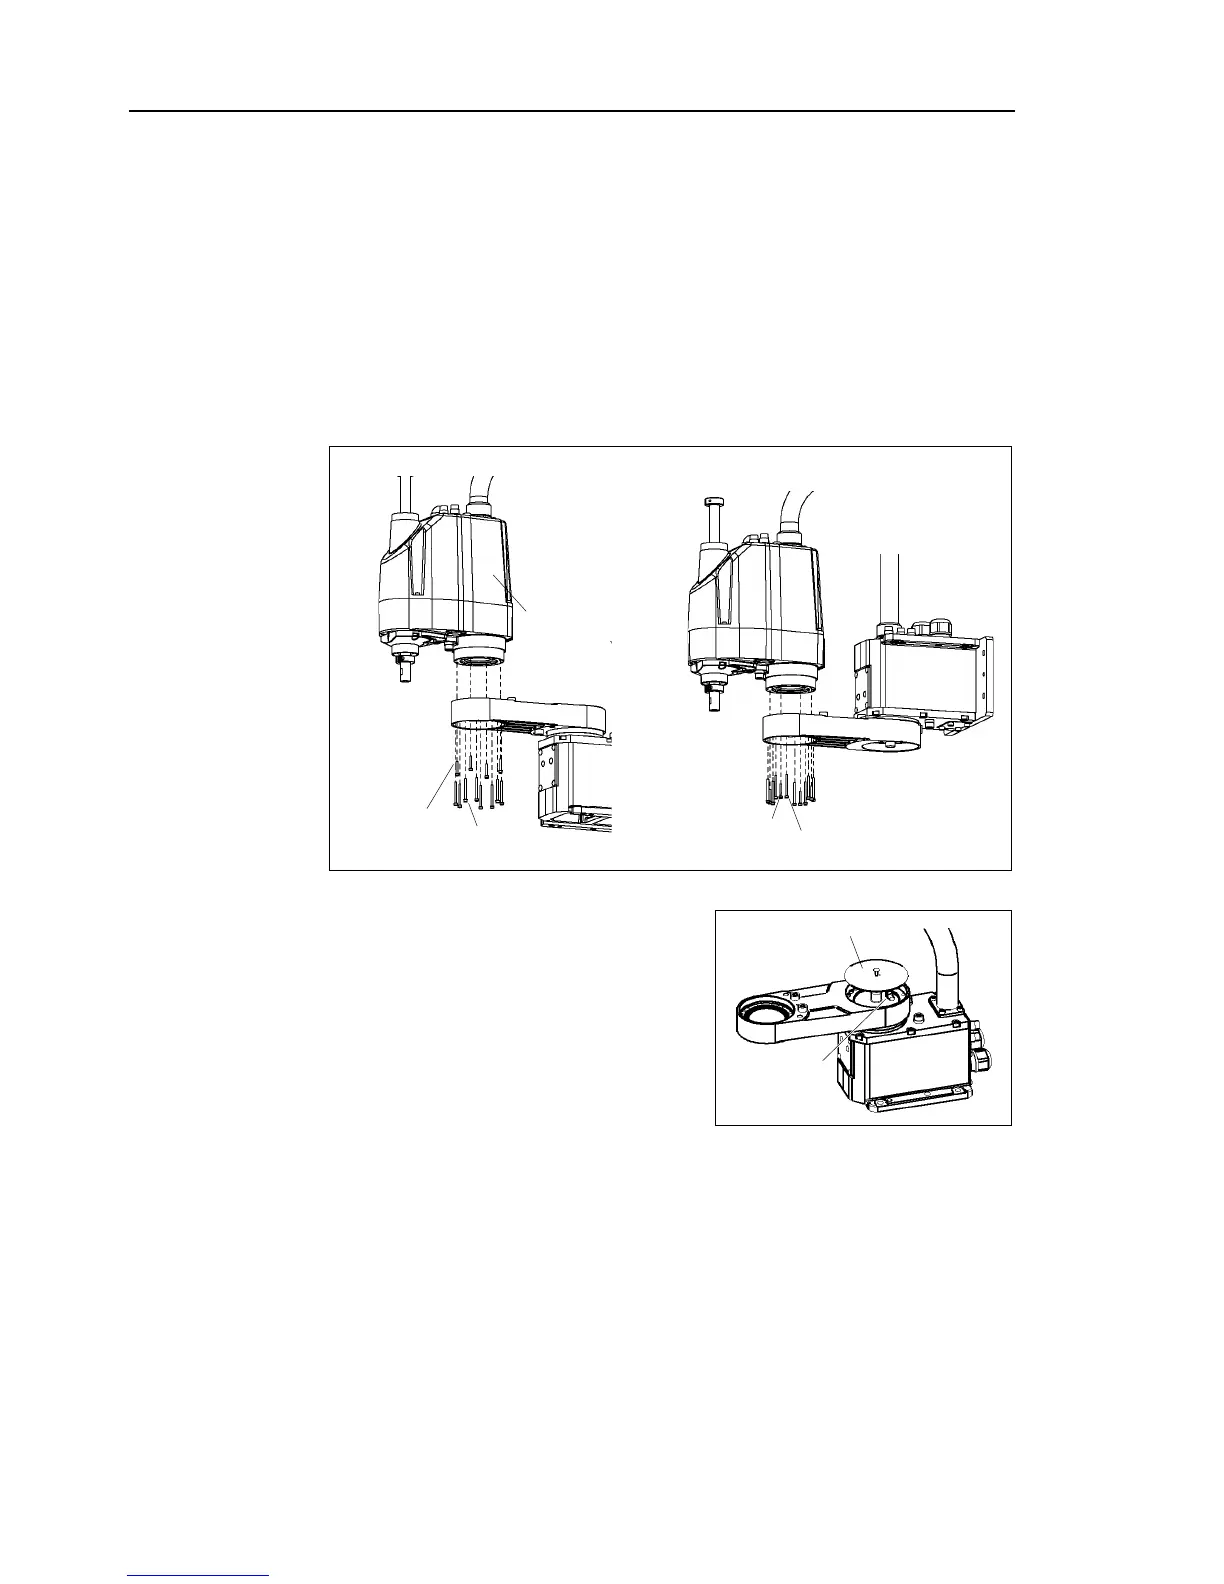
Remove the harmonic mounting screws on the Joint #2 side and remove the Arm #2
unit.
This procedure should be done with an assistant. The assistant supports the Arm #2
unit.
Do not
allow unnecessary strain on the cables.
For Multiple mounting, removal direction of Joint
1 and #2 is the same. In this
procedure, remove the only screws on the left side of figure.
Table Top mounting
Multiple mounting
8-M3×35
+ Washer
4-M3×20
+ Washer
Arm #2 unit
8-M3×35 + Washer
4-M3×20
+ Washer
(3)
Remove the O ring on the part where Arm #2 was mounted.
(4)
Remove the Arm #1 covet and hose elbow.
T
hese parts are not attached for the Multiple
mounting Manipulators.
Hose elbow
Arm #1 cover

Table of Contents

Questions and Answers:

Question and Answer IconNeed help?

Do you have a question about the Epson G3 Series and is the answer not in the manual?

Epson G3 Series Specifications

General IconGeneral
BrandEpson
ModelG3 Series
CategoryRobotics
LanguageEnglish

Related product manuals