3. Press the OK button.
If the network connection is already set up, the connection details are displayed. Select Change Settings to
change the settings.
If the printer has already been connected by Ethernet, select Change to Wi-Fi connection., and then select Ye s
aer checking the message.
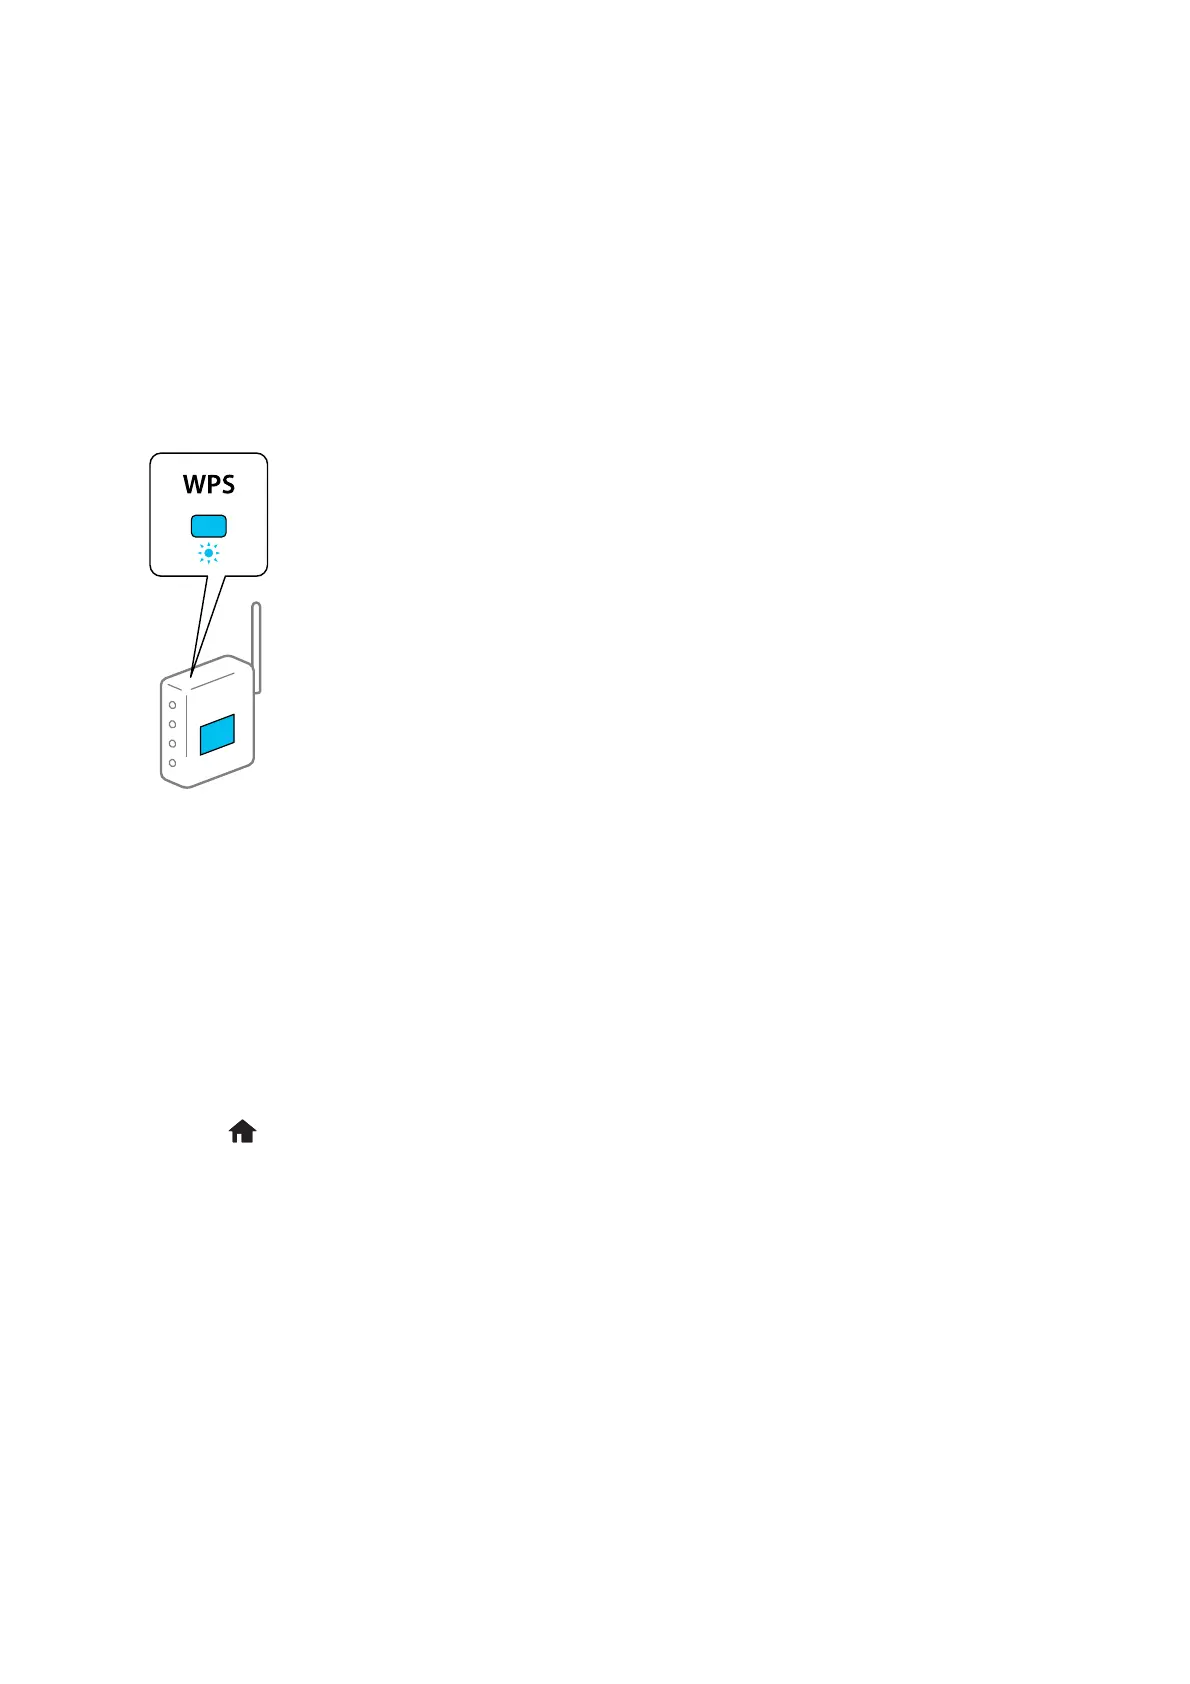
4. Select Push Button Setup (WPS).
5. Hold down the [WPS] button on the access point until the security light ashes.
If you do not know where the [WPS] button is, or there are no buttons on the access point, see the
documentation provided with your access point for details.
6.
Press the OK button on the printer.
7. Press the OK button.
e screen automatically closes aer a specic length of time.
Note:
If connection fails, restart the access point, move it closer to the printer, and try again. If it still does not work, print a
network connection report and check the solution.
8. Press the button.
Related Information
&
“Basic Operations” on page 15
& “Checking the Network Connection Status” on page 28
& “When You Cannot Make Network Settings” on page 106
Making Wi-Fi Settings by PIN Code Setup (WPS)
You can automatically connect to an access point by using a PIN code. You can use this method to set up if an
access point is capable of WPS (Wi-Fi Protected Setup). Use a computer to enter a PIN code into the access point.
User's Guide
Network Settings
24

 Loading...