20
Tip:
For information about an option, move the mouse over the setting or right-click it to access the
on-screen Help.
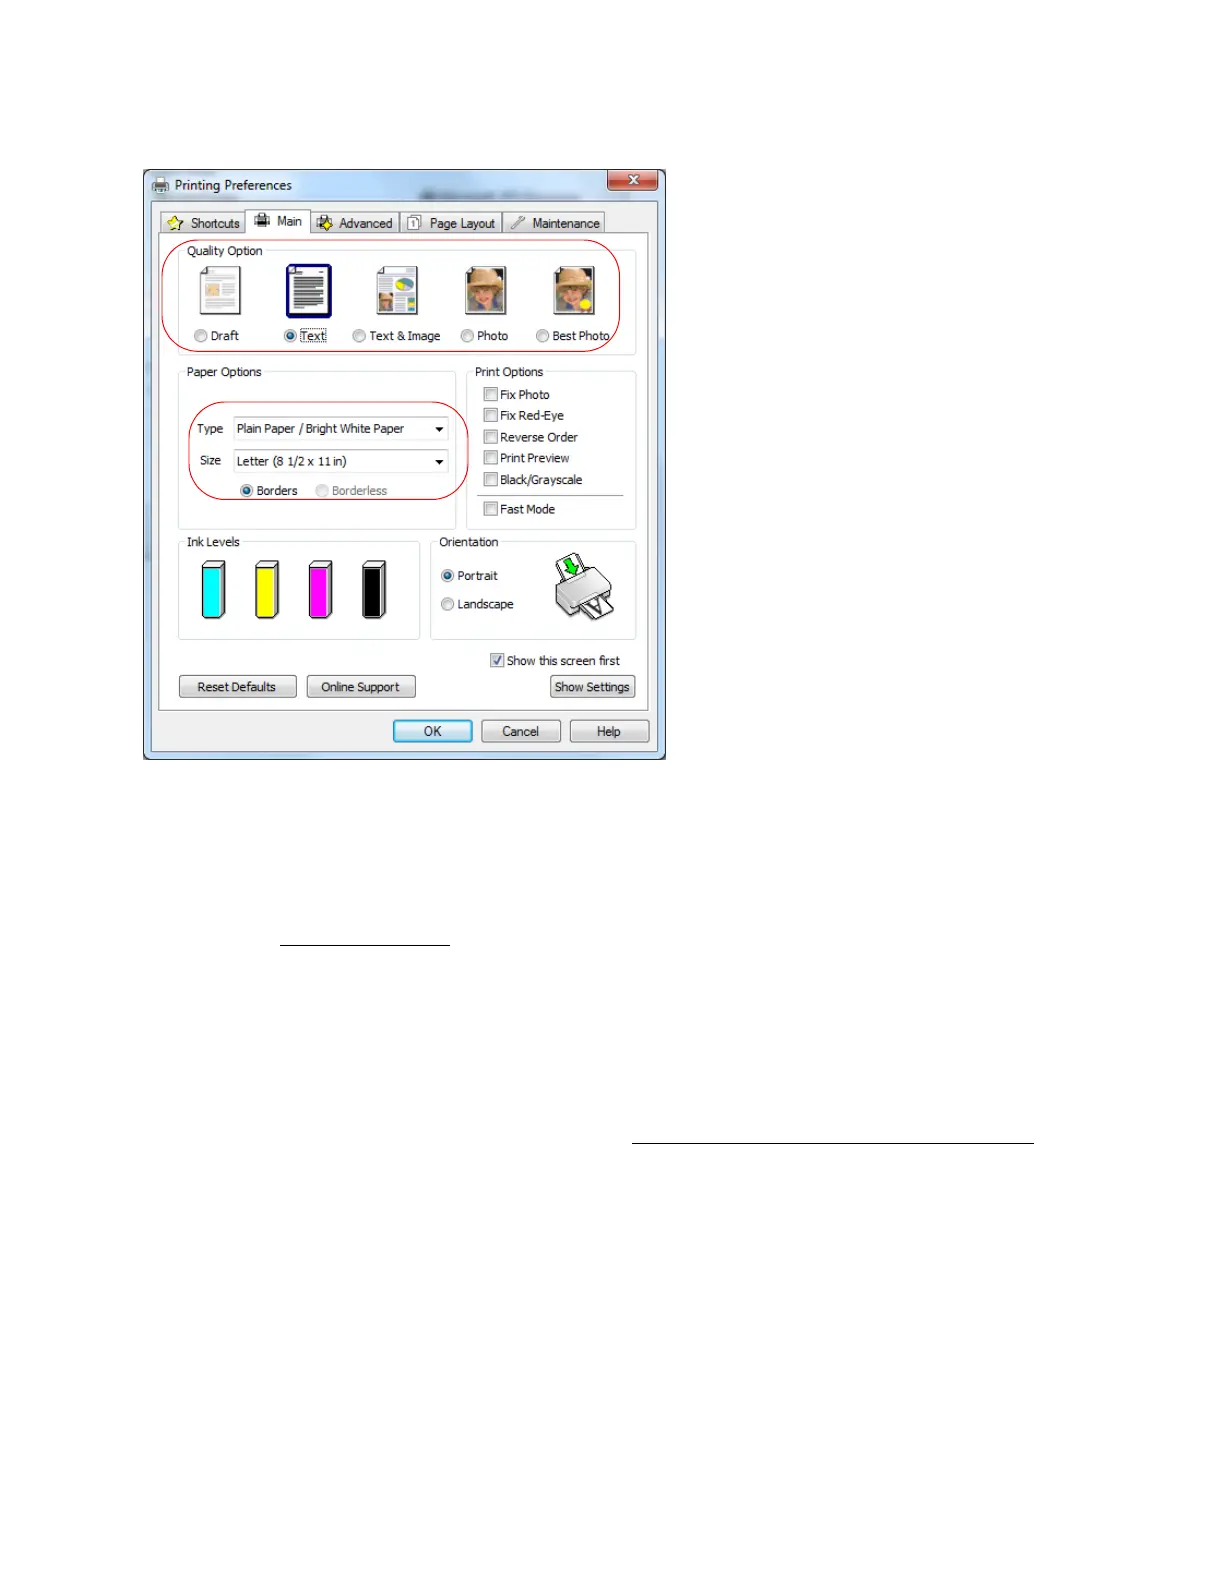
1. Select a Quality Option that matches your document or photo and the print quality you want.
2. Select the paper type setting
that matches the paper you loaded.
3. Select the paper size setting for the paper you loaded. A User Defined option is also available
so you can create a custom size.
4. If you’re printing borderless photos, select Borderless. For documents or photos with borders,
select Borders.
Note:
For borderless photos, make sure you loaded a compatible borderless paper size and type
.
5. Select any of the Print Options you want for your document or photo—such as Fix Photo to
improve the color, contrast, and sharpness of flawed photos—or Fast Mode to speed up
printing when Plain Paper/Bright White Paper is selected for the paper Type.
Note:
Fix Photo uses a sophisticated face recognition technology to optimize photos that include
faces. For this to work, both eyes and the nose must be visible in the subject’s face. If your
photo includes a face with an intentional color cast, such as a statue, you may want to turn off
Fix Photo to retain the special color effects.