B-4 How to Install the Printer on a Wall with the WH-10
Rev. D
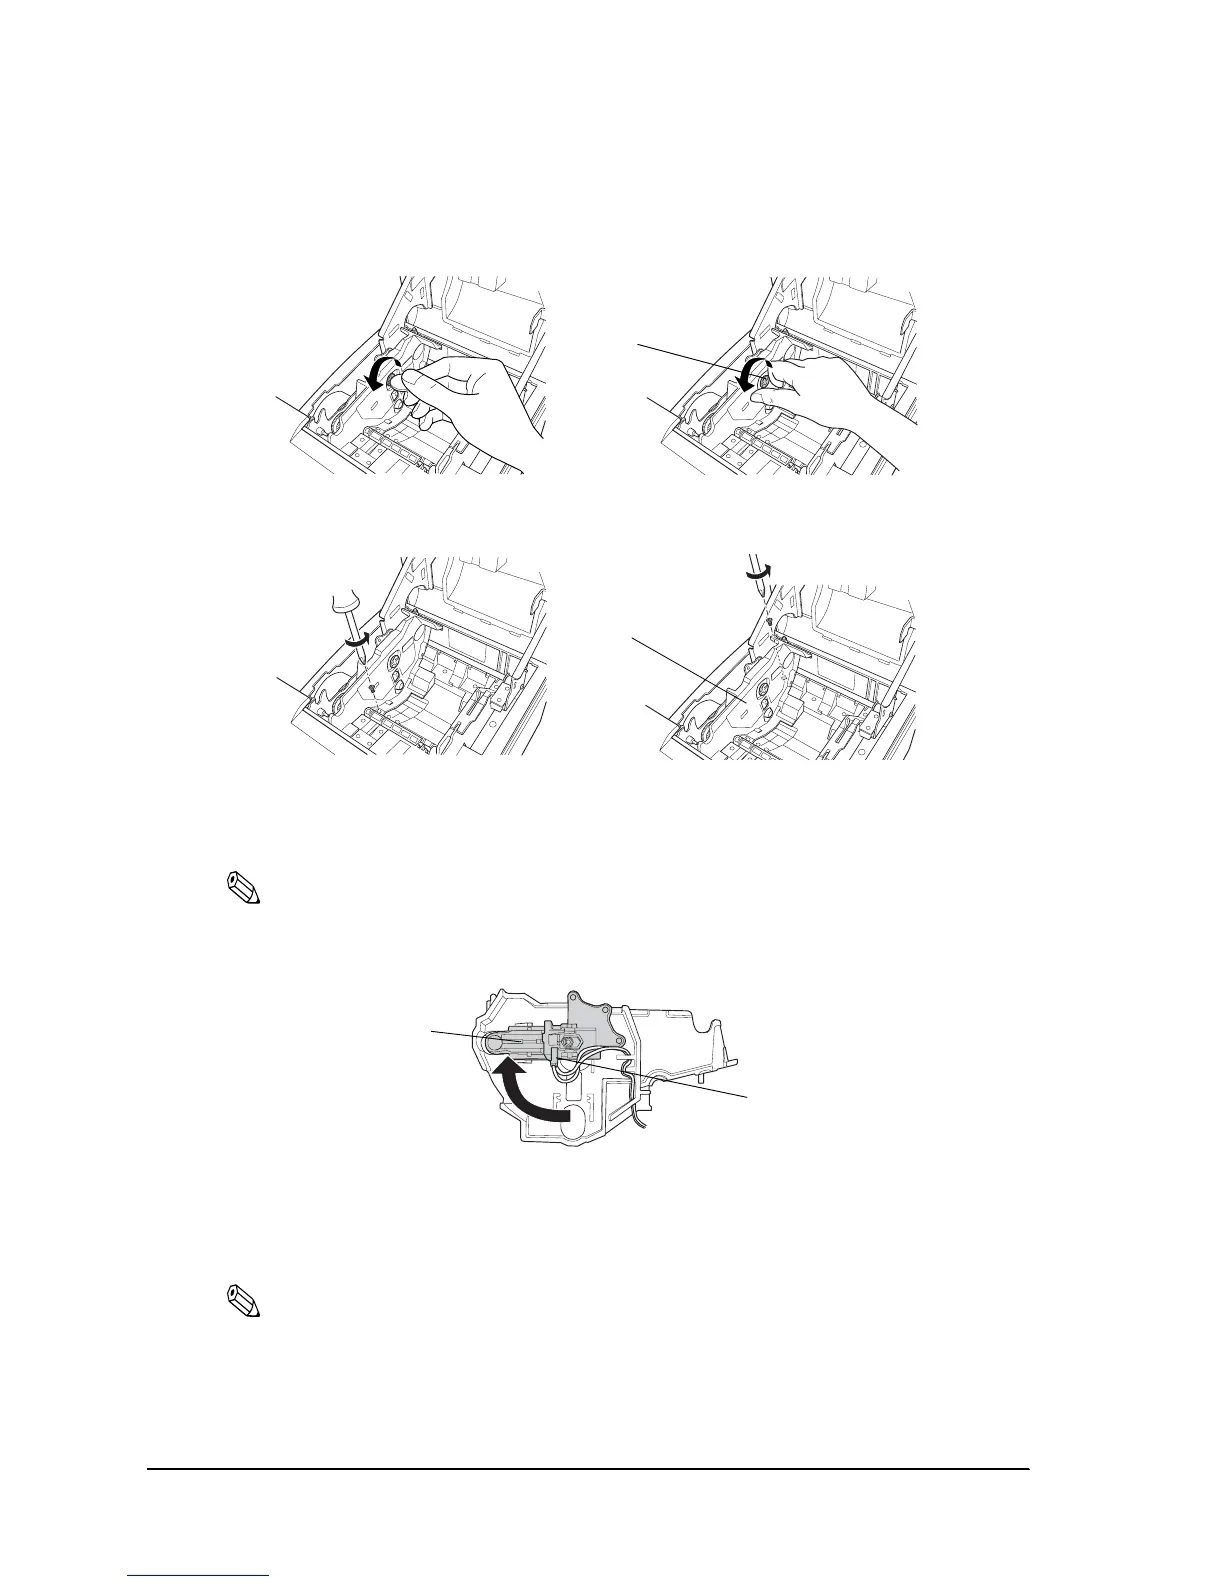
2. Loosen the detector adjustment screw a little bit by using a tool such as a coin and then
loosen the screw gently by hand as until it stops. It must not be removed completely.
3. Remove the two screws of the roll paper guide.
For a model that does not have a roll-paper near-end detector , jump to step 6.
4. Rotate the detector lever on the roll paper guide to change its direction.
Note:
After the direction of the detector lever is changed, be sure that the cable is connected to the connector
firmly.
5. Tighten the detector adjustment screw.
6. Align the hole on the roll paper guide with the hole on the roll paper holder to match your
roll paper width and then tighten the screw (3×10).
Note:
You will not use one of the two screws that have been removed when the roll paper guide is removed.
Please store it as an extra screw in case you need it.
detector
adjustment
screw
roll paper
guide
cable
detector lever

 Loading...