10
B
Creating the Cavity
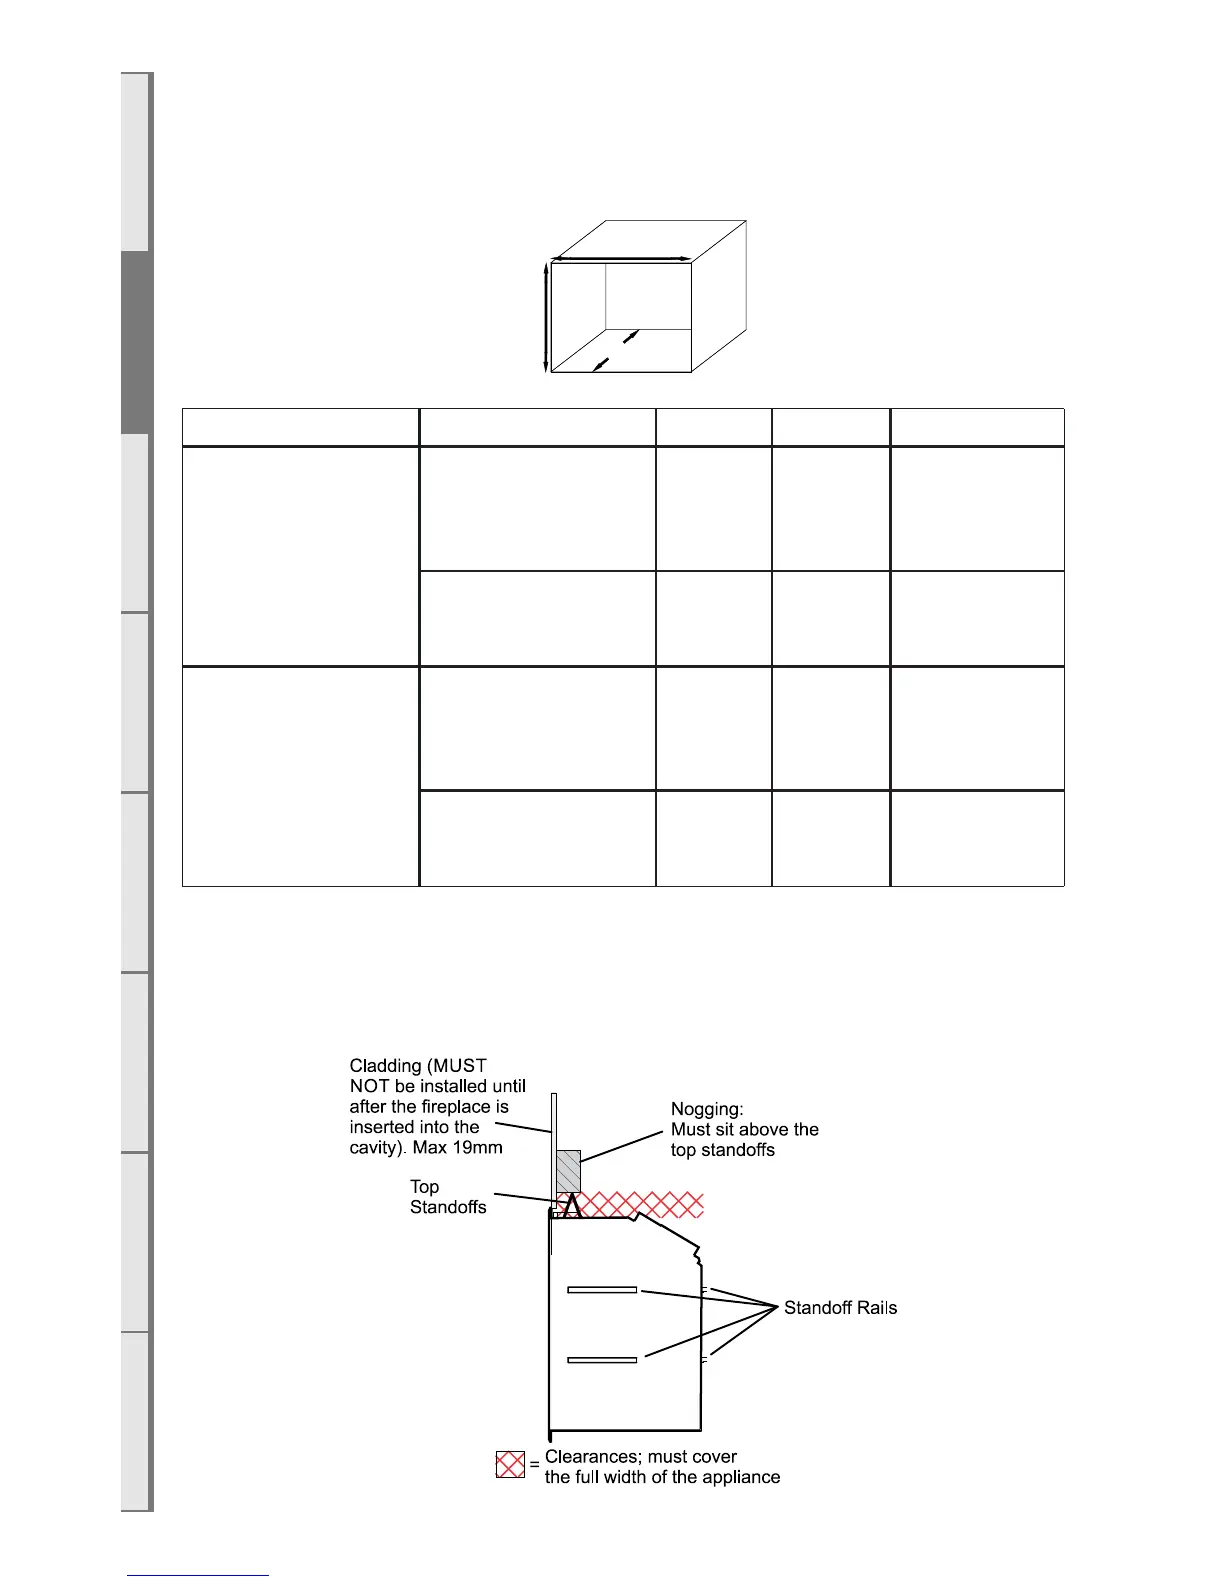
B1 Cavity Shape
The stando rails installed on the outside must only be removed when being installed into a masonry
cavity.
Note: a top is not required when creating the cavity
Height Width Depth
DF700 False Cavity
installation (top stand-
os must be adjusted
to the upright position)
600mm 695mm 390mm +
minimum
65mm flue
clearances
Masonry install with
stando rails & top
standos removed.
590mm** 685mm 385mm
DF960 False Cavity
installation (top stand-
os must be adjusted
to the upright position)
600mm 945mm 405mm +
minimum
65mm flue
clearances
Masonry install with
stando rails & top
standos removed.
590mm** 935mm 400mm
Note: If cavity dimensions significantly exceed those specified, a register plate is available for purchase
through your local escea retailer (New Zealand Only).
**Note: This dimension makes an allowance for the 30mm spacer for floor mounted intallations (see
next page).
False Cavity Installation Requirements
For floor mounted installations, allow for fascia clearance (see B10)