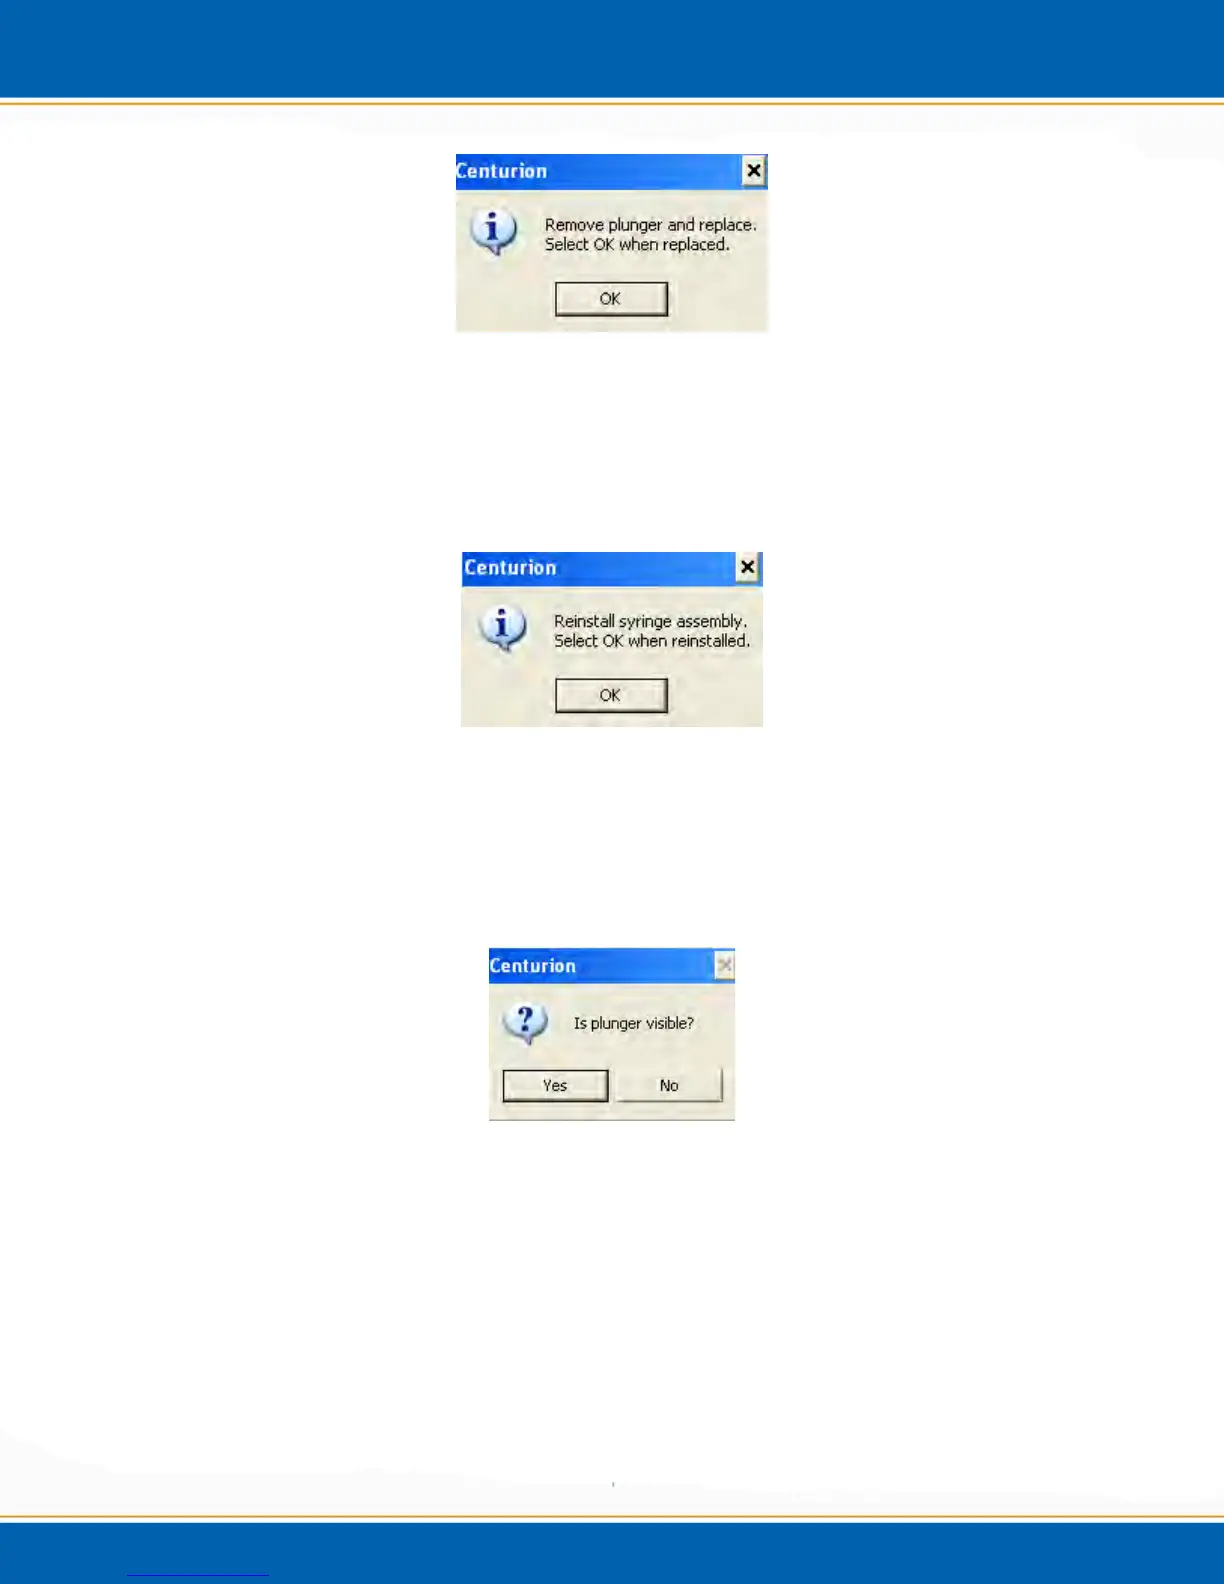
Figure 4z: Remove and replace syringe plunger screen
When the plunger has been replaced, <click> OK and the syringe plunger will lower
down in order for the syringe assembly to be re-installed, see Figure 4x. Next, a screen
will appear as shown in Figure 4aa. Re-install the syringe assembly, water lines and
Allen screws and <click> OK.
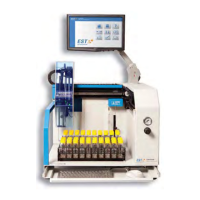
Figure 4aa: Reinstall syringe assembly screen
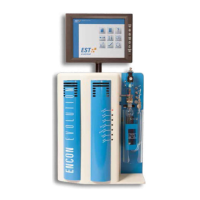
After you <click> OK, another popup screen will appear as displayed in Figure 4bb.
Check to make sure the syringe plunger is visible; if so, <click> Yes. If it is not visible,
<click> No and the system will automatically move the plunger up a set increment.
Repeat steps if plunger is still not visible.
Figure 4bb: Is plunger visible? Screen
4.6 Calibration
4.6.1 Auto Calibration
1. From diagnostic screen, <click> on the Calibration button, see Figure 4cc.