Figure 4cc: Calibration button
2. <click> Motor Calibration, then <click> Calibration, finally <click> Auto
Calibration, see Figure 4dd.
Figure 4dd: Motor Calibration Tab Menu
3. Start Auto-Calibration, see Figure 4ee.
Figure 4ee: Begin Auto Calibration screen
4. <click> Yes to begin the Auto Calibration routine and <click> No to exit the Auto
Calibration routine.
5. Once Auto Calibration begins, the system will perform a home check routine; this
means the system will move 400 steps off of home and then move back in order to re-
establish home for each axis.
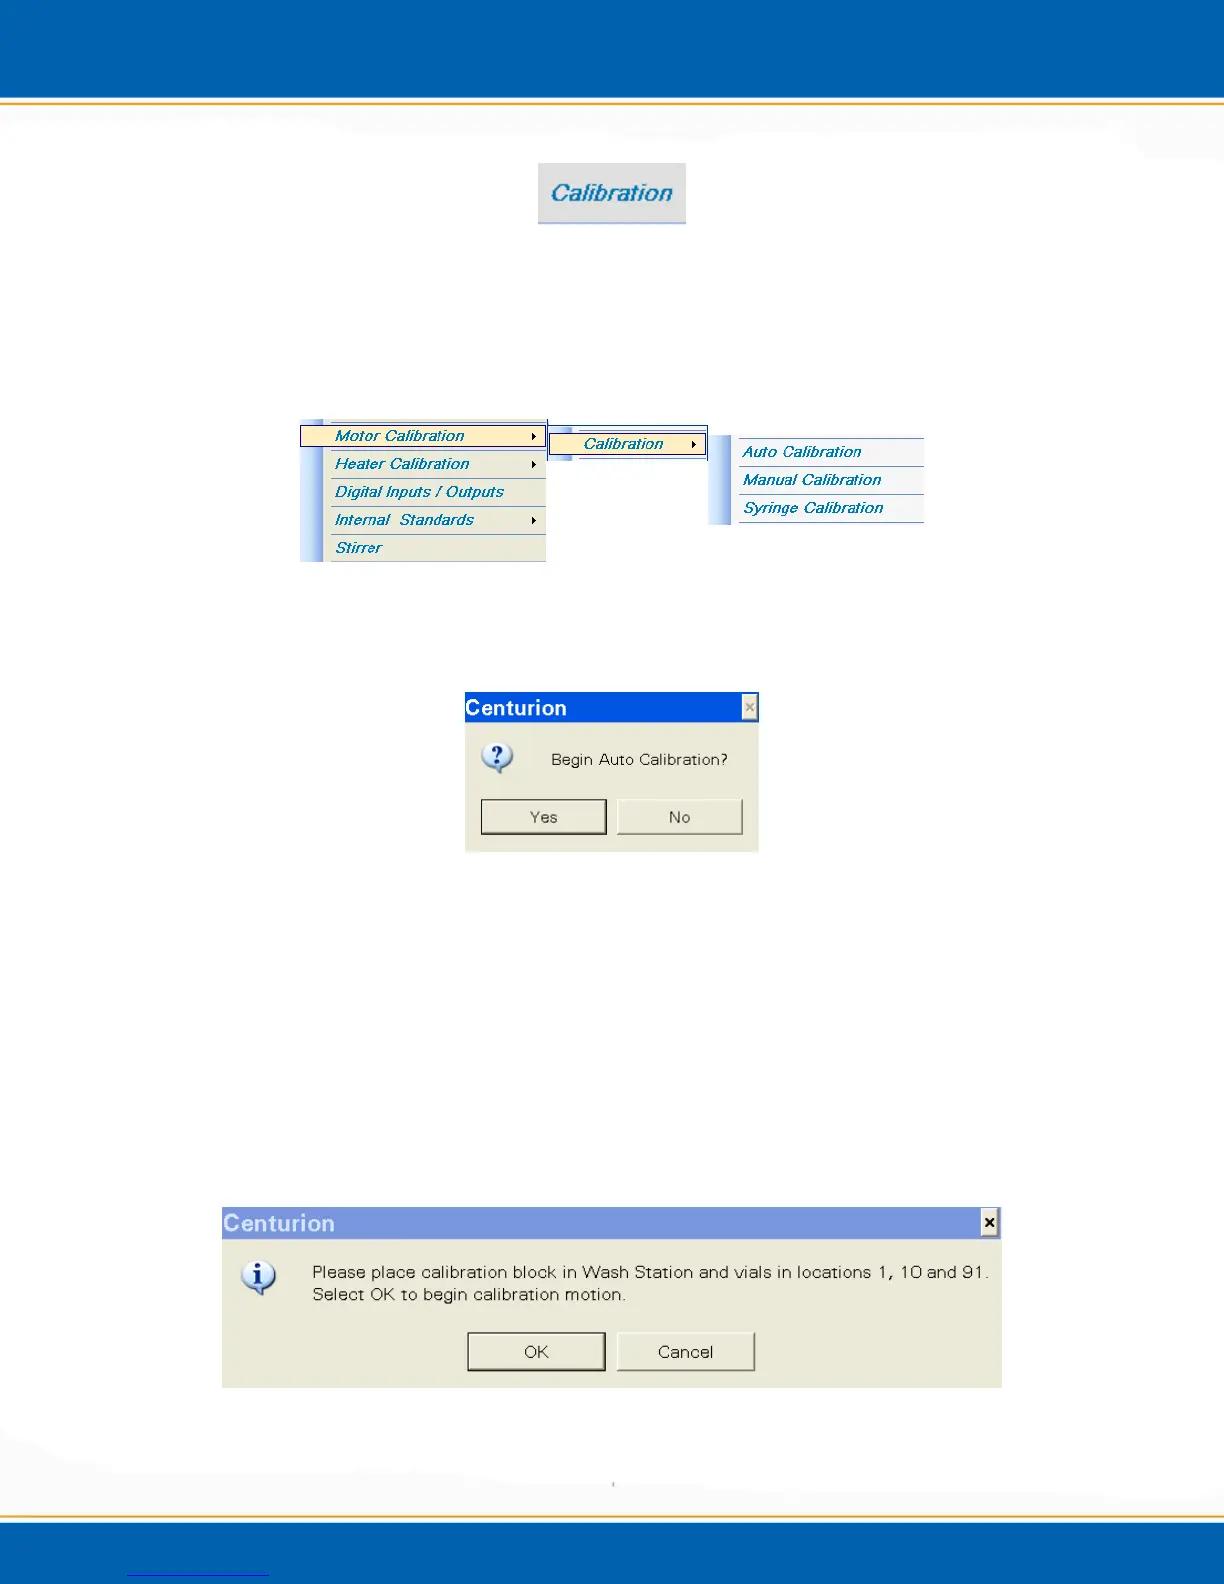
6. The software will then ask you to place the calibration block in the needle wash
station, (See Figure 4gg), and to place three vials into positions 1, 10 and 91. See
Figure 4ff.
Figure 4ff: Calibration Block and Vial Position command