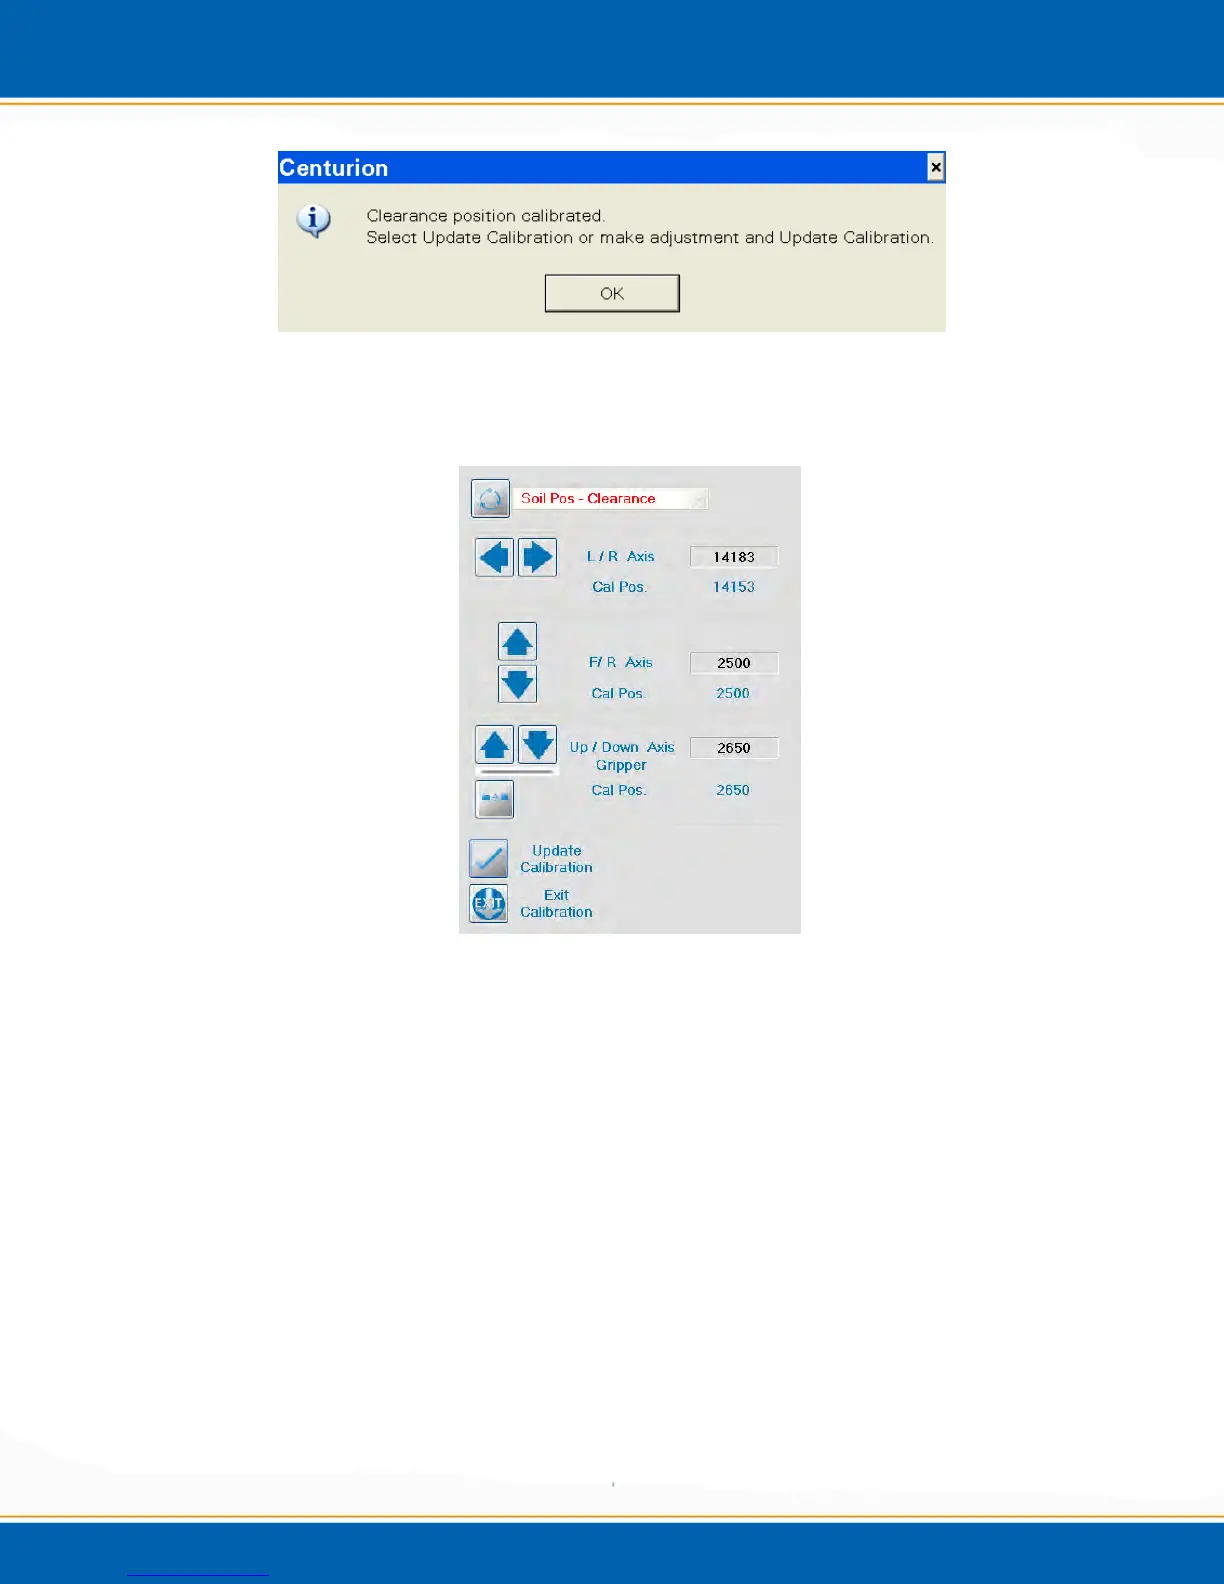
Figure 4vv: Clearance Position Pop-up
33. <click> OK and the clearance position can be calibrated. See Figure 4ww.
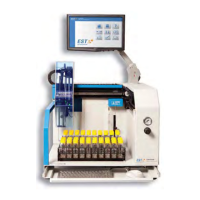
Figure 4ww: Clearance Position Calibration Screen
34. The only axis that needs adjustment here is the Up/Down axis. Refer to step 10.
35. Once clearance is established, see Figure 4xx. <click> Update Calibration.