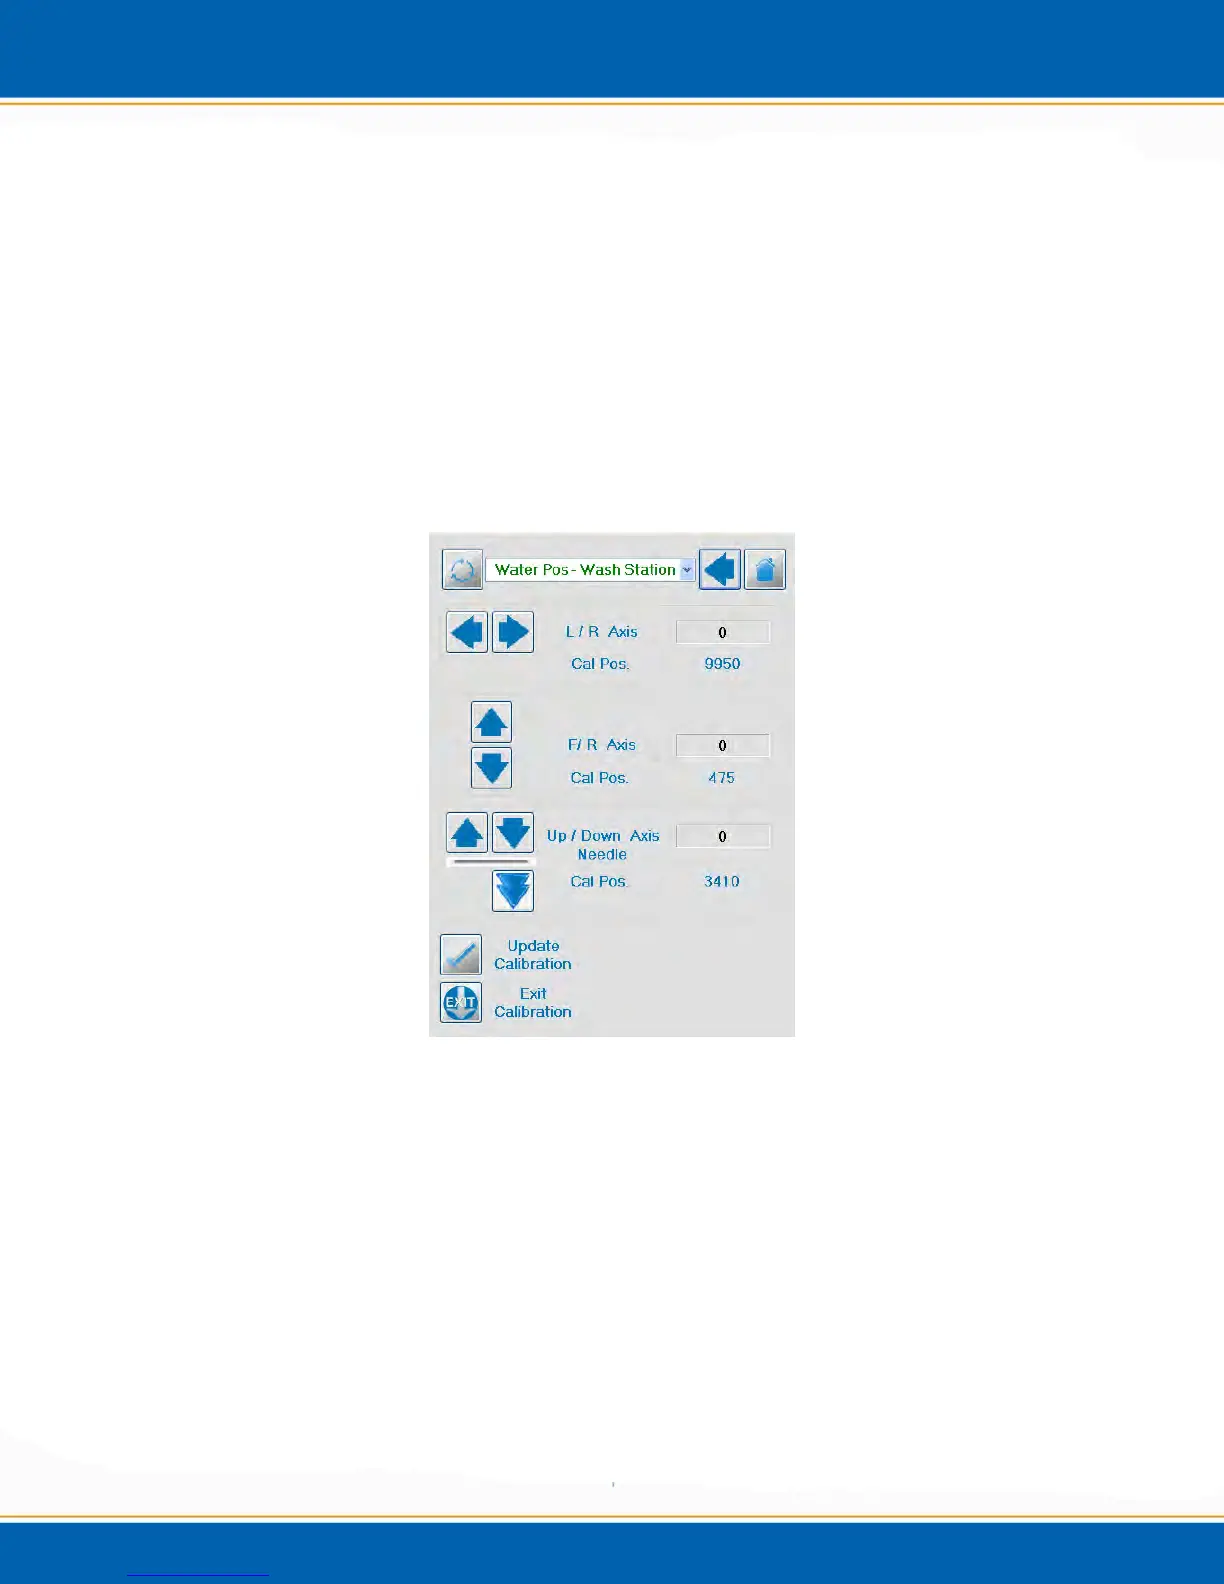
4. The next screen is the Manual Calibration screen. < Click> the position arrow at
the top of the screen and choose the position that needs calibration. See Figure 4ai.
5. Next, <click> the position arrows in order to adjust the positions that need calibration.
The Left/Right (L/R), Front/Rear (F/R) or Up/Down arrows are to the left of the
screen. One click of the L/R or F/R arrow will move the needle 20 steps in the
corresponding direction. While clicking the Down arrow will move 100 steps and the
Up arrow will move 20 steps. (Note: 20 steps = 0.5mm). In order to move the
needle axis into the calibration position <click> on the double arrow. See Figure 4ai.
6. Once the position is calibrated, <click> Update Calibration, this will save the new
calibration position. Next, <click> Exit Calibration in order to exit the manual
calibration routine. See Figure 4ai.
Figure 4ai: Manual Calibration Screen
4.6.3 Syringe Calibration
1. From diagnostic screen, <click> on the Calibration button, see Figure 4af.
2. <click> Motor Calibration, then <click> Calibration, finally <click> Syringe
Calibration, see Figure 4ag.
3. The next screen is the Syringe Axis Movement screen. See Figure 4aj. In this
screen, the syringe can be manually moved from the 0mL position to the 26mL
position.