ThermalRite Blast Chiller Easy Touch Screen Manual
the Product Probe will contribute to regulate the internal cycle’s steps, varying the Air
Set Temperature and Fan Speed.
The status of a core can be:
➢
Blue - Indicating the warmest sensor of the Product Probe.
➢
Green - Indicating that a Product Probe sensor is actually in the product.
➢
Grey - Indicating that a sensor was not placed in the product and was excluded.
Also in regards to the “food scan” the cycle will run through 4 different steps with
different settings, with the goal to chill the product in the shortest possible time, while
saving the product integrity. For instance, a piece of protein with a temperature of 150°F
(66°C), will run through an initial step at very low temperature, then gradually changing
the set temperature to a higher Air Temperature towards the end of the cycle to prevent
freezing of the outer surface. A pastry items will be probably chilled in a higher Air
Temperature (above 38°F/ 3°C) from the start, to prevent freezing the product and
affecting the product integrity. NOTE: The pre-programmed recipes are set up in the
factory and will guarantee the best combination of steps for a Chilling cycle.
5.3. Blast Chilling Custom Recipes
Every product (icon) allows to create 4 custom recipes (represented by the Gear icon on
the right side of the screen). The custom configuration requires the user to choose from
Time and Temperature, the Product Probe option, the cycle time length (if the
Product Probe is not selected), the cavity Air Temperature, the Fan Speed and the
Air Temperature of the Hold cycle. To disable or enable the Product Probe click on the
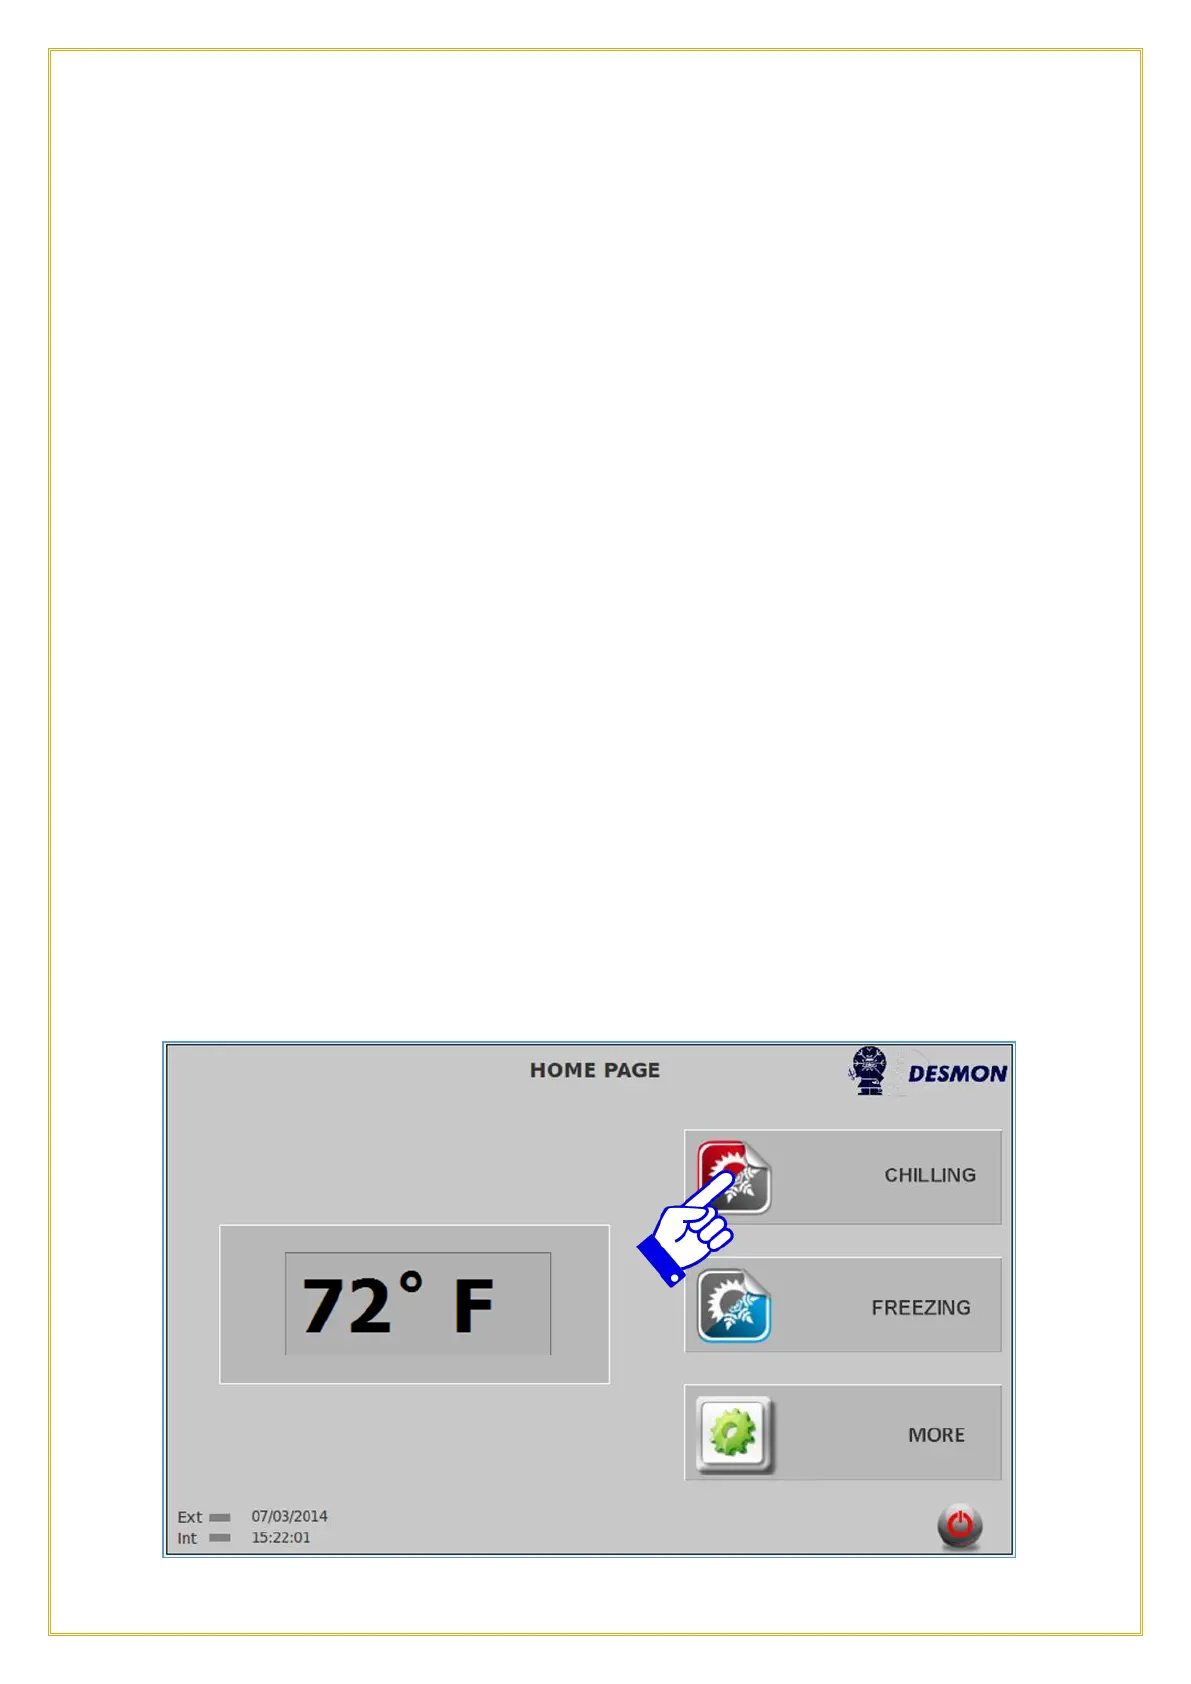
Green Checkmark or Red X. To access this function, from the Home screen, press
Chilling icon.