exacqVision User Manual
1/24/2011
Trigger Input Setup
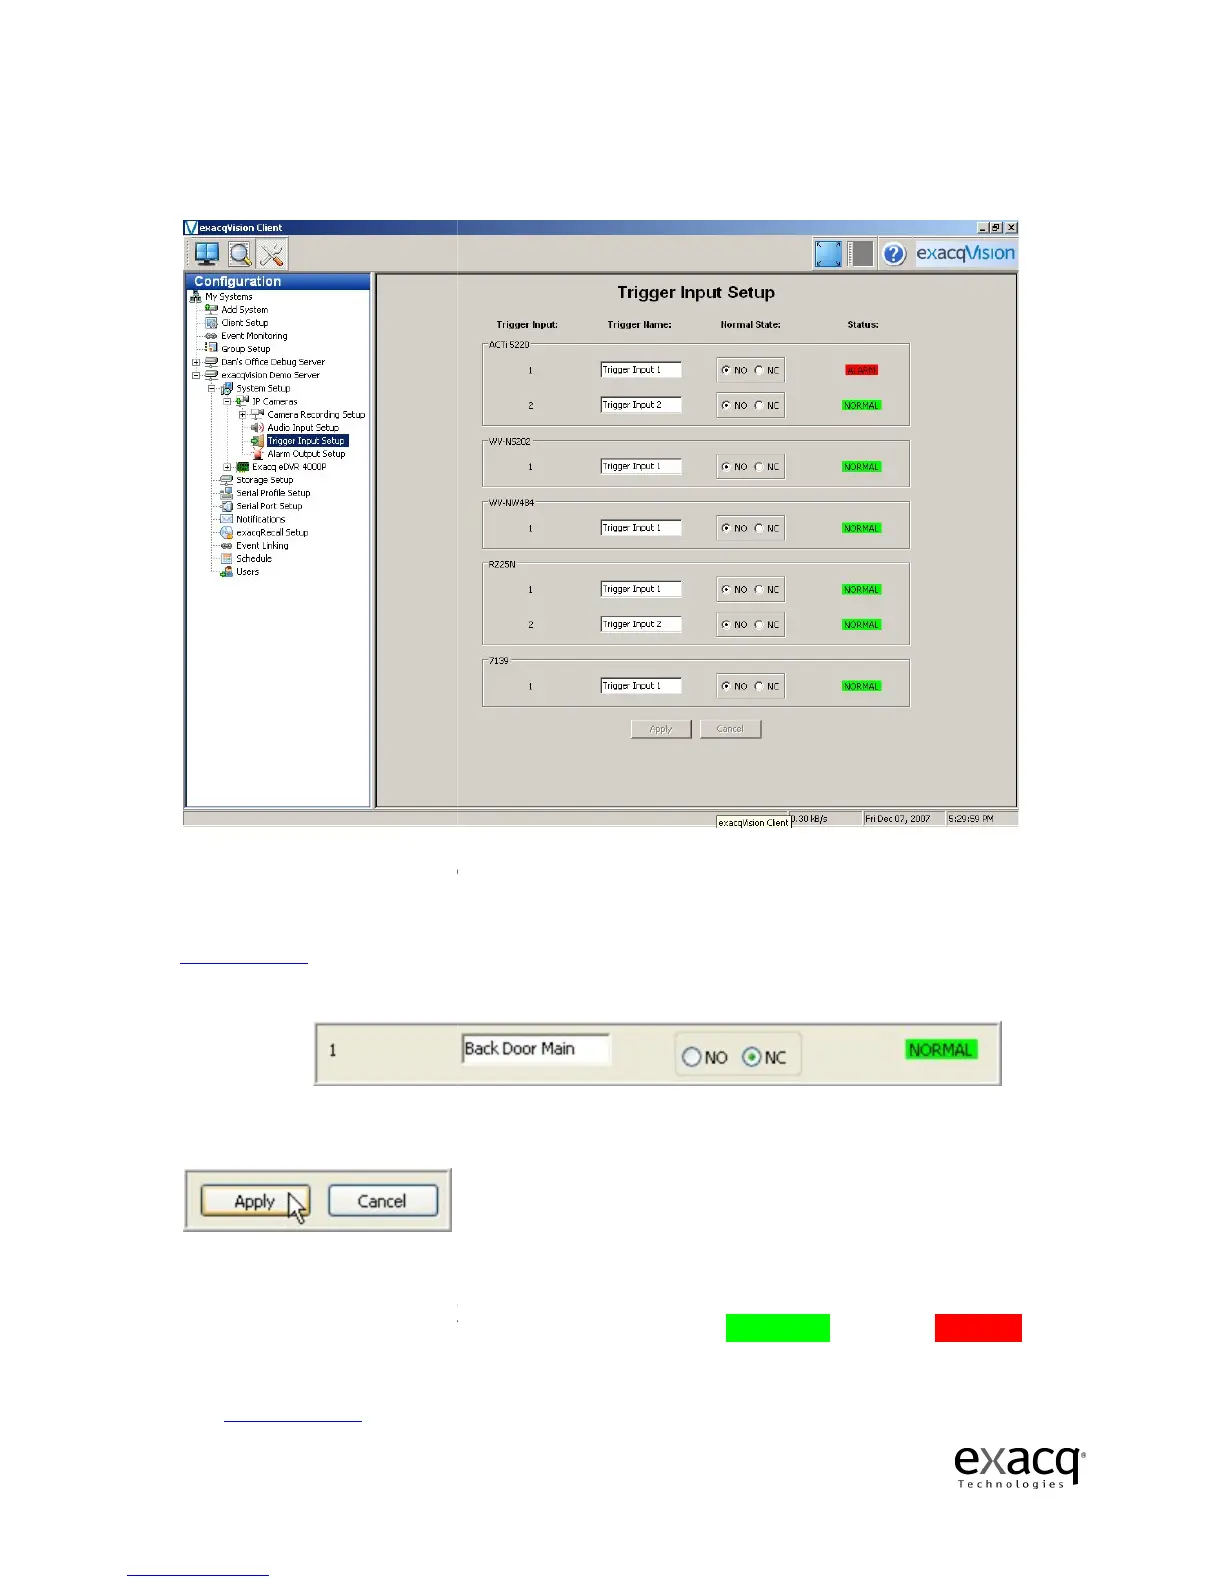
The Trigger Input Setup screen is where you assign names and set the Normal State (NO =
Normally Open and NC = Normally Closed) of the exacqVision input triggers.
Trigger Position that correspond to the 16 Trigger Inputs on the back the exacqVision NDVR (see
Trigger Input, page 21).
You can assign a new logical name and change the Normal State from the
default of NO to NC.
Once you have made changes click on Apply.
You can verify the proper operation of the input state by going to the Trigger Input setup screen
and observi
ng the “Status” state, which toggles back and forth between “Normal” and “Alarm”.
default the “Normal State” is set to NC (Normally Closed).
door you will see the “Status” state toggle from a green ‘
indicating an alarm has been detected.
video or triggering a relay by going to the Event Linking screen and configuring the desired action
(see Event Linking, page
Page 149
The Trigger Input Setup screen is where you assign names and set the Normal State (NO =
Normally Open and NC = Normally Closed) of the exacqVision input triggers.
Trigger Position that correspond to the 16 Trigger Inputs on the back the exacqVision NDVR (see
You can assign a new logical name and change the Normal State from the
Once you have made changes click on Apply.
You can verify the proper operation of the input state by going to the Trigger Input setup screen
ng the “Status” state, which toggles back and forth between “Normal” and “Alarm”.
default the “Normal State” is set to NC (Normally Closed).
If you trip the sensor by opening the
door you will see the “Status” state toggle from a green ‘
NORMAL
indicating an alarm has been detected.
The alarm can be linked to an action such as recording
video or triggering a relay by going to the Event Linking screen and configuring the desired action
).
The Trigger Input Setup screen is where you assign names and set the Normal State (NO =
Normally Open and NC = Normally Closed) of the exacqVision input triggers.
There are 16
Trigger Position that correspond to the 16 Trigger Inputs on the back the exacqVision NDVR (see
You can assign a new logical name and change the Normal State from the
You can verify the proper operation of the input state by going to the Trigger Input setup screen
ng the “Status” state, which toggles back and forth between “Normal” and “Alarm”.
By
If you trip the sensor by opening the
“ALARM”
The alarm can be linked to an action such as recording
video or triggering a relay by going to the Event Linking screen and configuring the desired action


 To Next Page