Quick Steps
3
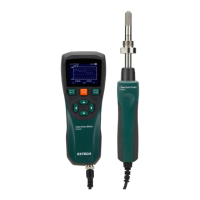
1. Connect the probe to the port at the bottom of the meter (Section 4.1).
2. Remove the probe’s protective cap and mount it in the process under test
using the threaded connector (0.5 inch) or hold it in ambient air (Section
4.2).
3. Short press F2 (orange colored function button) to power the meter, the
Home page will appear (Section 6).
4. View the three displayed readings. Press the left or right arrow button to
view the readings in a concise text format. Press the left or right arrow to
return to the Home page.
5. Press F2 (HOLD), to freeze readings. Press F1
to release the held
readings. Press F3
, while readings are held, to save them.
6. Press F1
to view real-time readings plotted on a set of four graphs
(Section 6). When the first graph is shown, the graph icon moves above
F3. Press F3 to step through the graph pages. Press F2 to set the interval
of time between captured readings. Press F1
to return to the Home
page.
7. Press F3
to open the Programming menu (Section 7).
8. Long press F2, until the progress bar reaches 100%, to power off.
#NAS100113; r. AA/87024/87024; en-US
5