FOX3 T 201 Transmitter • Internal Web Page 38
To set the IP addresses:
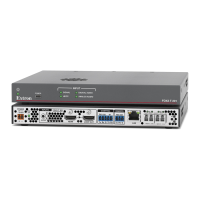
1. Click EDIT (see figure32 [left],
1
) in the Network Settings panel. The Network
Settings panel opens to allow edits (right).
Figure 32. Network Settings Panel
2. Edit the network settings as desired:
a. Click the DHCP switch (
2
) to toggle DHCP on and off. When DHCP is enabled (On),
the unit configures its IP address and other network settings from the DHCP server.
The default is Off.
b. To set any of the addresses (IP Address (
3
), Subnet mask (
4
), and Gateway
address (
5
), click in the desired field and enter the address.
3. When finished editing, click out of the field and click SAVE to confirm your changes or
CANCEL to close the window without making changes. Clicking the X in the upper-right
corner of the screen also closes the window.
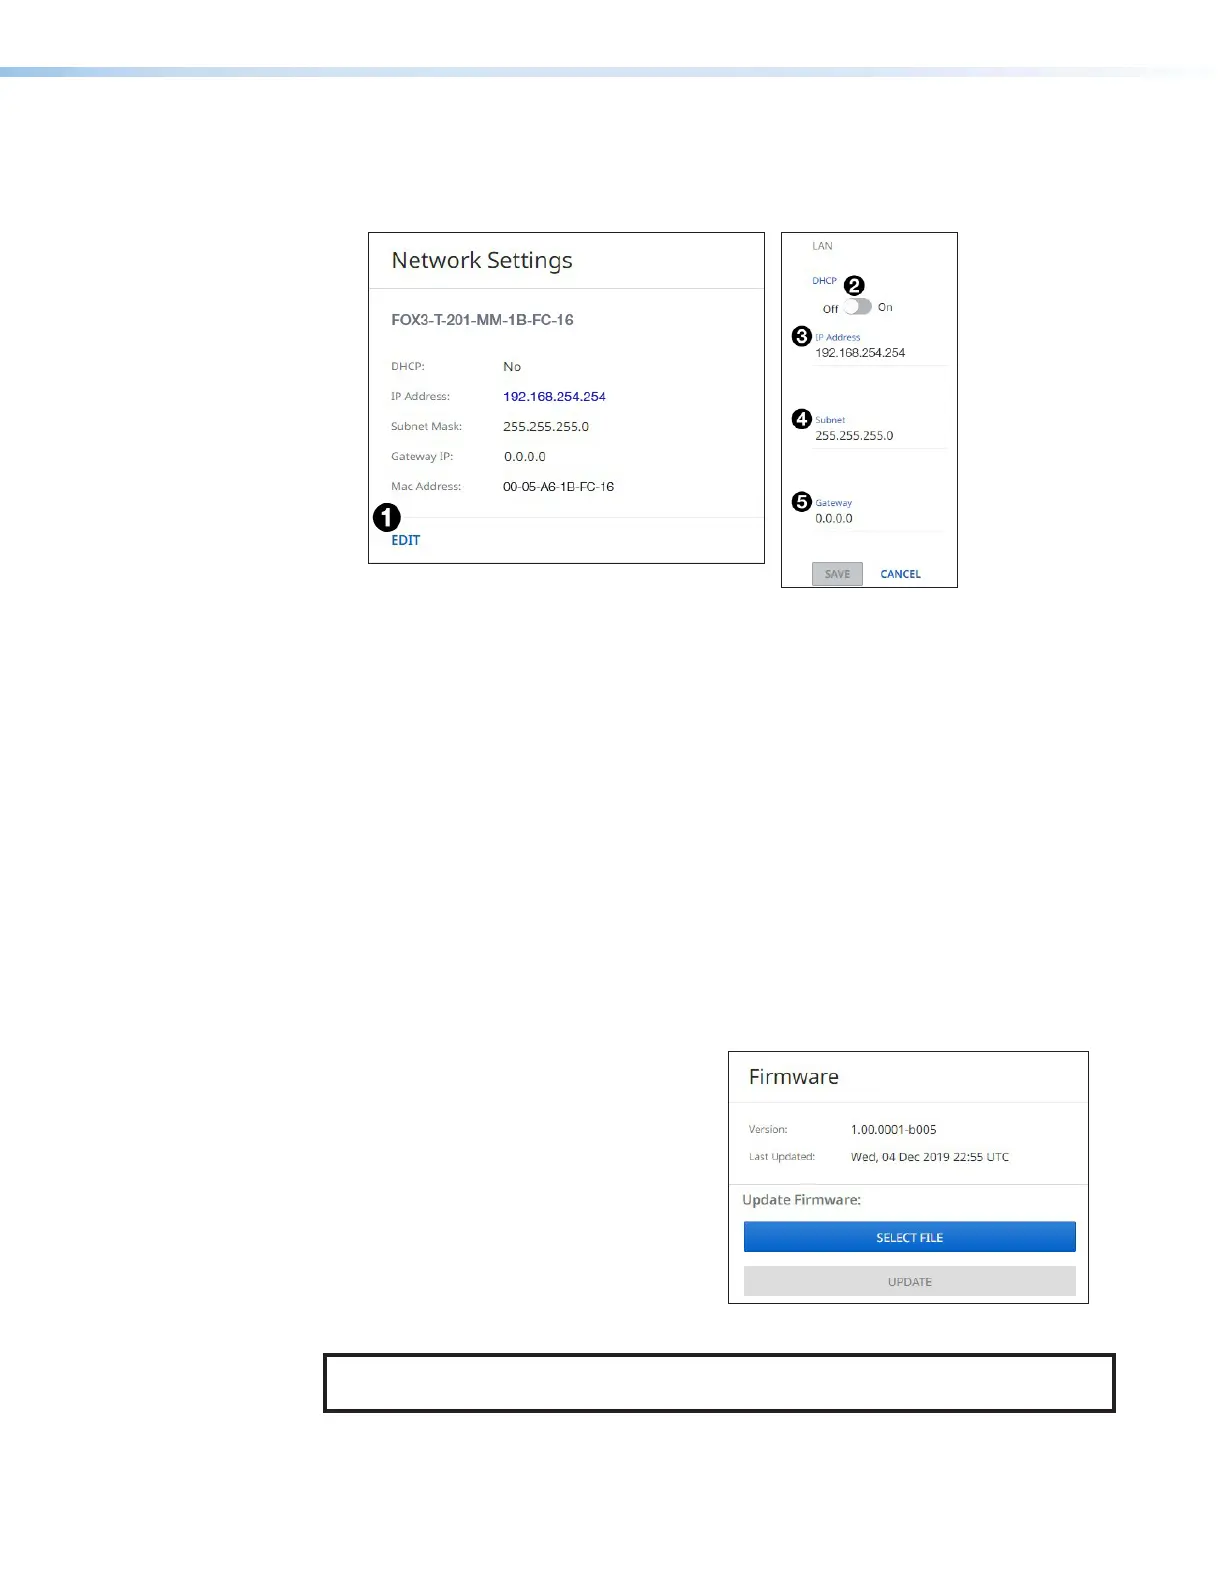
Firmware Panel
The Firmware panel (see figure29,
4
) displays the current firmware version and the date
it was last updated. Update the firmware on the FOX3T201 from this panel (see Software/
Firmware Installation on page26 to download the firmware files).
To update firmware:
1. In the Firmware panel, click the SELECT
FILE button.
2. In the Open dialog box, browse to locate
the new firmware file on your computer
(by default the file is stored at C:\
Program Files (x86)\Extron\Firmware\
FOX3T201 after being downloaded
from www.extron.com).
Figure 33. Firmware Panel
NOTE: Firmware files for FOX3T201 have a .eff extension. Do not attempt to load any
other file types.
32
33