22
23
2425
A B
400 17 732871 - Rev. D
1
B
B
1
A
A
1
2
3
2
17
x2
2
Translation of the original instructions
ENGLISH
■ FASTENING BY WELDING (22-A)
!
Welding must be carried out in a workmanlike manner. Safety may be
affected if it is carried out badly. Connect the earth (-) of the welder to the
leaf, NOT to the actuator. Protect the rod from weld spatter.
■ FASTENING WITH SCREWS (22-B)
Drill holes in the front bracket at the points provided on the side in
contact with the leaf. Use the bracket as a template for marking the
fixing points on the leaf, then drill the holes and fasten to the structure
using suitable screws and fastening torque.
7. Reconnect the joint to the front bracket and insert the screw to fix
it temporarily. To obtain the correct closed position, small adjust-
ments can be made by turning the joint by a few turns. When
finished, secure it in place using the nut (23).
8. Open and close the leaf manually to make sure that it can be com-
pletely opened and closed. If it is not possible to do so, make sure
that all the installation procedure has been carried out correctly.
!
During manual operation, gently guide the leaf the whole way.
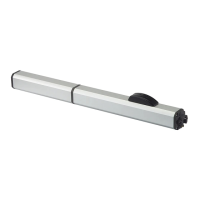
5.5 INSTALLING THE CASING
1. Install the cover onto the casing and fully insert the tie rods with
washers so that they slide into the guides A (24-1).
2. Install the casing and screw the tie rods into the holes B on the
actuator (24).
3. Press the 2 caps on (24-3).
5.6 INSTALLING THE POWER CABLE
!
Make sure that the minimum bending radius of the cable is 60 mm.
Move the leaf to make sure that the position of the cable does not interfere
with other parts.
1. Press the power supply cable connector on (25-1).
2. Fasten in place using the two screws (25-2).
 Loading...