400 20 732871 - Rev. D
Translation of the original instructions
ENGLISH
9. MAINTENANCE
RISKS
PERSONAL PROTECTIVE EQUIPMENT
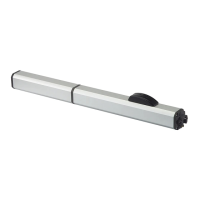
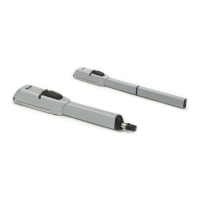
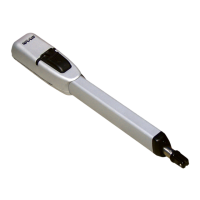
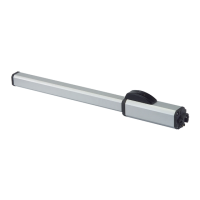
4 Scheduled maintenance of the actuator
To check the fastening torque, tighten (i.e. turn clockwise) using a torque
wrench until you reach the torque value indicated in the instructions manual
during installation.
Operations Frequency in months
Check that the cover/casing and all the movable guards are integral and that they
are fastened correctly. Tighten screws and bolts where necessary.
12
Check the fastening torque of the screws that secure the operator to the front
fork and to the front and rear brackets.
12
Check the tightening of the joint on the rod. 12
Check that the brackets are firmly secured to their supports. 12
Check that the SAFEcoder is properly secured, if present. 12
Check the tightening and adjustment of the positive stop, if present. 12
Check that the motor power cable is intact. 12
Clean the rod using a clean damp cloth. 12
Make sure that there is no oil leaking from the seals. 12
Generally clean the operator with a clean cloth, moistened with a neutral
detergent.
12
Grease all the rotation points with a brush. 12
Make sure that the manual release is working correctly. 12
5 Maintenance of other components
Operations Frequency in months
STRUCTURES
Check the structures and the parts of the building to which the
gate and the automation is fixed: make sure there is no damage,
cracking, breaks or subsidence.
Follow the manufac-
turer's instructions
Operations Frequency in months
9.1 SCHEDULED MAINTENANCE
It is mandatory to carry out the operations indicated in 4 in order
to keep the actuator working reliably and safely.
The installer/machine manufacturer is responsible for drawing up the
maintenance plan for the machine, supplementing this list or shorten-
ing maintenance intervals according to the machine characteristics
and current local regulations.
GATE
Check the frame: make sure that it is fixed correctly, that it is
intact and that there is no deformation or damage. Tighten
screws and bolts where necessary.
Follow the manufac-
turer's instructions
Check the leaf: make sure that it is intact and that there is no
deformation or damage.
Follow the manufac-
turer's instructions
Check the hinges: make sure that they are fixed correctly; that
they are intact, correctly positioned in their seats and that there
is no deformation or damage.
Follow the manufac-
turer's instructions
Lubricate hinges and locks/electric locks, if necessary.
Follow the manufac-
turer's instructions
Perform a general clean of the area of movement of the gate. 12
Make sure that the pictograms are present and intact. If they
are missing or damaged, replace them.
12
Operations Frequency in months
PROTECTIVE DEVICES AND CONTROL DEVICES
Check that the protective devices are intact and that they
operate correctly.
Follow the manufac-
turer's instructions
Check that the control devices are intact and that they operate
correctly.
Follow the manufac-
turer's instructions
Operations Frequency in months
GATE COMPLETE WITH OPERATOR
Check that the gate operates properly in both directions with
all the devices installed.
6
Check that the gate moves correctly - smooth, regular and
without making abnormal l noises.
6
Check that the opening and closing speed is correct. 6
Check that the gate operates properly in the selected operating
mode.
12
Check that the electric lock is working properly, if present.
Follow the manufac-
turer's instructions
Check that the safety devices (SAFEcoder, XS) are working cor-
rectly, if present.
6
Repeat the operations in the "Final checks" section. 6
Check that the gate's CE marking and the DANGER, AUTOMATIC
MOVEMENT warning sign is present, intact and legible.
12
F
Before performing any maintenance, disconnect the mains power supply. If
the disconnecting switch is not visible, apply a "ATTENTION - Maintenance in
progress" sign. Restore the power supply once maintenance is complete
and after tidying up the area.
!
Maintenance must be performed by the installer/maintenance technician.
Comply with all the safety instructions and recommendations provided in
this manual.
Close off the work site and prevent access/transit. Do not leave the work site
unattended.
The work area must be kept tidy and clear upon completing maintenance.
Before starting activities, wait for the components subject to heating to
cool down.
Do not modify the original components in any way.
FAAC S.p.A. disclaims any liability for damage caused by components that are
modified or tampered with.
The warranty shall be forfeited in the event of tampering with components.
For replacements, use only original spare parts FAAC.