User’s Manual
24
Notification
The DVR can be set up to send an email or to contact a computer running RAS (Remote Administration System) when
an event occurs.
Highlight Notification in the Network menu and press the button. The Notification setup screen displays. You will
be able to change the Mail and Callback settings.
Highlight Enable SSL/TLS and press the button to toggle between On and Off. When it is On, the DVR can send
an email via an SMTP server requiring SSL (Secure Sockets Layer) authentication.
NOTE: This product includes software developed by the OpenSSL Project for use in the OpenSSL Toolkit
(http://www.openssl.org/).
Highlight the box beside Sender and enter the sender’s e-mail address. Use the virtual keyboard to enter the e-mail address.
NOTE: The e-mail address must include the “@” character to be a valid address.
Highlight the box beside Recipient and enter the recipient’s e-mail address. Use the virtual keyboard to enter the e-mail
address.
Highlight the Test box and press the button to test emailing with the current settings you made.
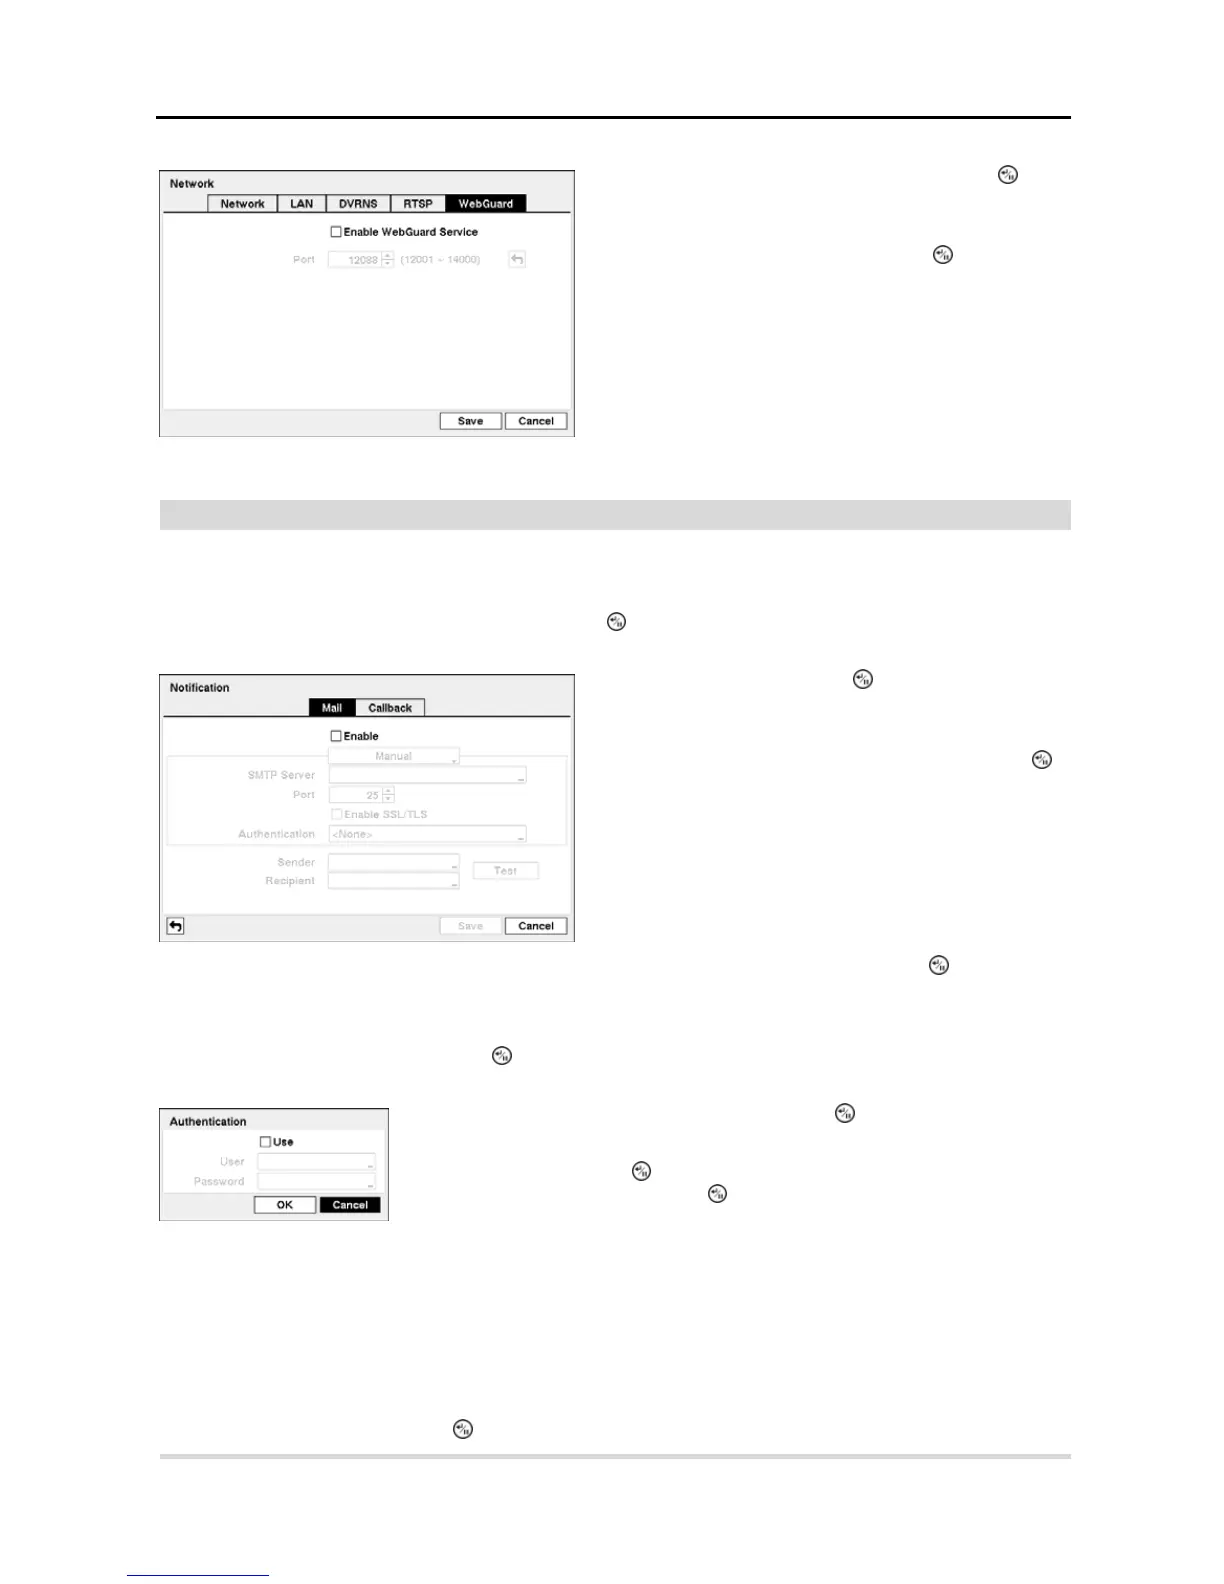
Figure 25 ─ WebGuard setup screen.
Highlight Enable WebGuard Service and press the button
to toggle between On and Off. See Appendix – WebGuard
for detailed descriptions of the WebGuard service.
Highlight the box beside Port and press the button. Set the
port number used when accessing WebGuard by using the Up
and Down arrow buttons to increase or decrease the numbers.
Figure 26 ─ Notification Mail setup screen.
Highlight Enable and press the button to toggle between
On and Off. You will only be able to change the settings if
Mail is enabled.
Highlight the box beside SMTP Server and press the
button. A virtual keyboard appears that you can use to enter
the IP address or domain name of the SMTP server.
NOTE: You will need to get the IP Address or domain name
of the SMTP Server from your network administrator.
NOTE: You can use the domain name instead of IP address
if you already set up the DNS Server when setting up the
LAN.
Highlight the box beside Port and press the button. Use the
arrow buttons to enter the SMTP Server port number obtained
from your system administrator. The default port number is 25.
Highlight the box beside Authentication and press the button. An Authentication
screen appears.
Highlight Use and press the button to toggle between On and Off. Highlight the box
beside User/Password and press the
button. A virtual keyboard appears allowing
you to enter the user ID and password.