4-Channel Digital Video Recorder
49
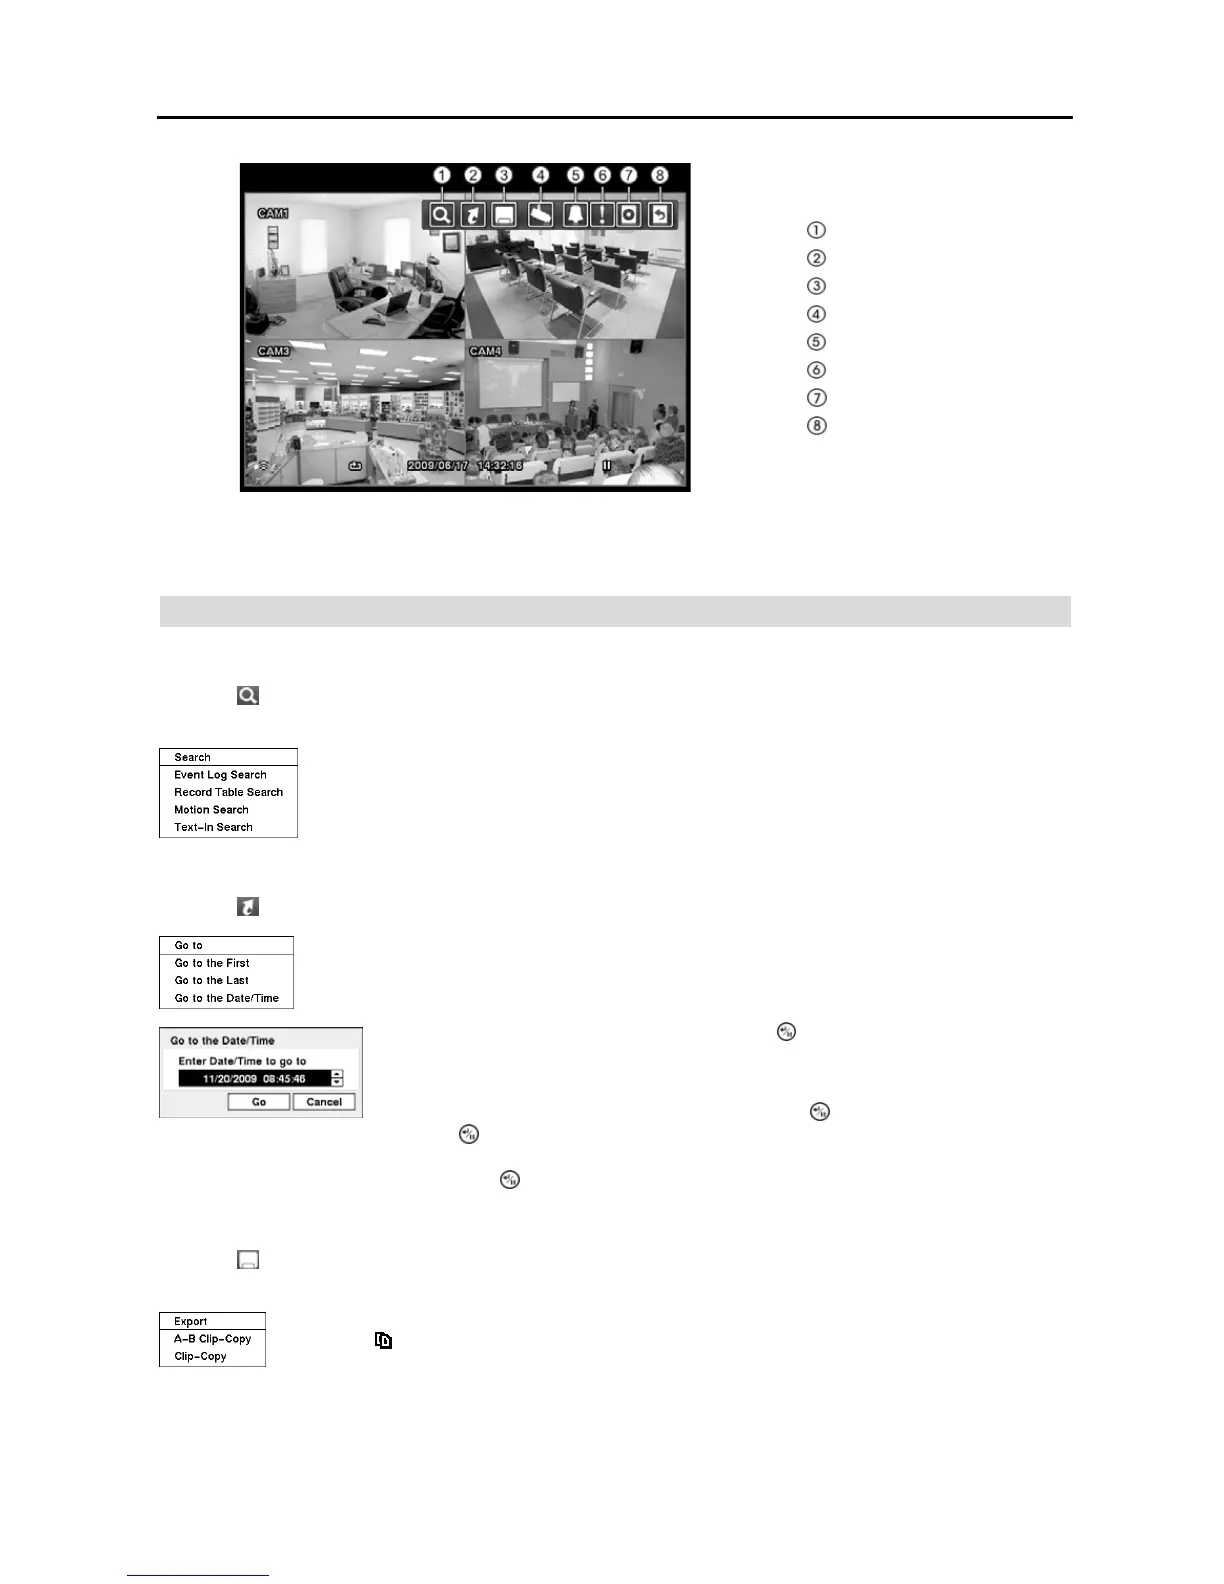
Search
Go To
Export
Camera Menu
Alarm Reset
Panic
Data Source
Exit
Figure 63 ─ Search menu.
NOTE: The Search menu also can be displayed by moving the mouse pointer to the top of the screen.
Search Menu
Search
Selecting (Search) in the Search menu displays the following Search menu. See the following Event Log Search,
Record Table Search, Motion Search and Text-In Search sections for details.
Event Log Search — Selecting Event Log Search selects video from the event log.
Record Table Search — Selecting Record Table Search selects using a recording table.
Motion Search — Selecting Motion Search selects motion events.
Text-In Search — Selecting Text-In Search selects text input strings.
Go To
Selecting (Go To) in the Search menu displays the following GO TO menu.
Go to the First: Selecting Go to the First displays the first recorded image.
Go to the Last: Selecting Go to the Last displays the last recorded image.
Go to the Date/Time: Selecting Go to the Date/Time displays the Go to the Date/Time screen.
Move the cursor over the date and time and press the (Enter) button. You can use the Left
and Right arrow buttons to highlight the year, month, day, hours, minutes and seconds. Use
the Up and Down arrow buttons to change to the date and time you want to search for video.
Once you have set the date and time you want, press the button. Then highlight Go and
press the
button. The selected date and time will display. (If no video was recorded
during the selected time, a message appears alerting you that no image was recorded at
that time.) The button and arrow buttons can now be used to review the surrounding video.
Export
Selecting (Export) in the Search menu displays the following Export menu. See the following Clip Copy section
for details.
A–B Clip-Copy: Selecting A–B Clip-Copy will set the starting point of the video to be clip copied,
and the
icon displays at the bottom-left corner of the screen. Selecting A–B Clip-Copy again
will set the ending point of the video to be clip copied and displays the Clip-Copy screen.
Clip-Copy: Select Clip-Copy, and the Clip-Copy screen appears to allow clip copy setup.