FEASA LED ANALYSER
FUNCTIONAL VERSION
Daisy Chain Mode
Step-by-Step method for Daisy Chaining
To sucessfully implement Daisychaining the following steps are recommended:-
1. Decide how many Analysers are to be daisychained.
2. Make a list of the Serial Numbers of the Analysers and note the order
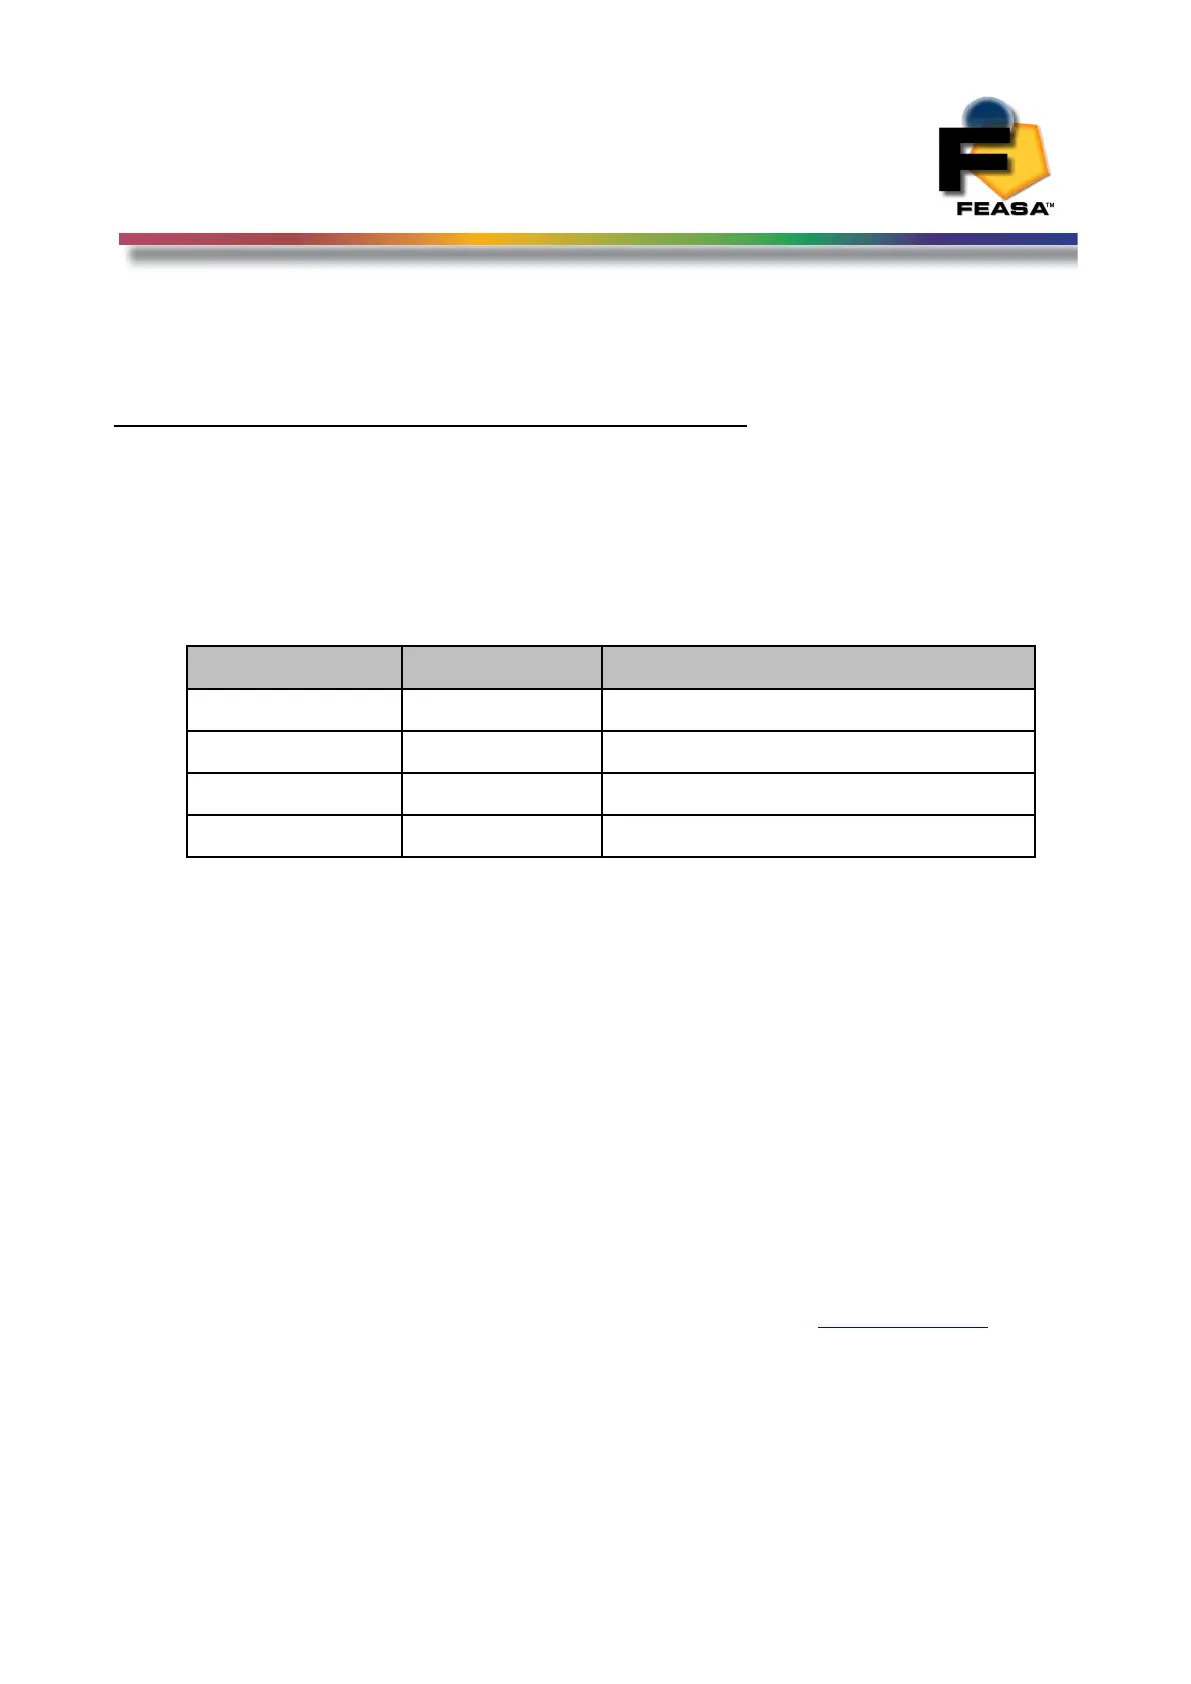
in which they will be interconnected. For example we have 4 analysers as follows:
Chain Order Serial No Comments
1 F304 Tests D40 – D59 Connected to PC
2 F461 Tests D60 - D69
3 F201 Tests LED01 – LED20 All White
4 F006 Tests LED21 – LED40 All Red
3. Set the required baud rate on each Analyser (All baudrates must be the same).
4. Locate the Daisy Chain cables and connect the Daisy_Out of s/n F304 to the
Daisy_In of s/n F461. Connect Daisy_Out of s/nF461 to Daisy_In of s/nF201.
Connect Daisy_Out of s/nF201 to Daisy_In of s/nF006.
5. Next locate the 2-pin Power cable supplied to s/n F461, s/n F201 and s/n F006
Analysers. It is necessary to apply 5V @220mA to each of these Analysers in the chain.
The green power Led should be visible on these 3 analysers.
6. Connect s/n F304 to the PC using the usb cable. The green power led should come on.
If you don't have a usb port available and only a Serial port please connect the s/n
F304 to the PC using the Serial Cable provided AND connect the 2 pin power connector
to the 5V 220mA supply.
7. The supplied Terminal Program can be used to verify the operation of the Daisy Chain.
Connect to the port on which the 1
st
Analyser is installed. See USB Port Control
8. Send capture to verify the communications with the 1
st
Analyser.
The response should be OK.
9. Send getserial and the response should be F304.
114
 Loading...