32
!
!
%
"
"
#
%$
10 5
010 5
0
0
10
5
1mm
A 941 / AD 941
AD 951
B A
B A
!
Planer-Thicknesser
A 941 / AD 941 / AD 951
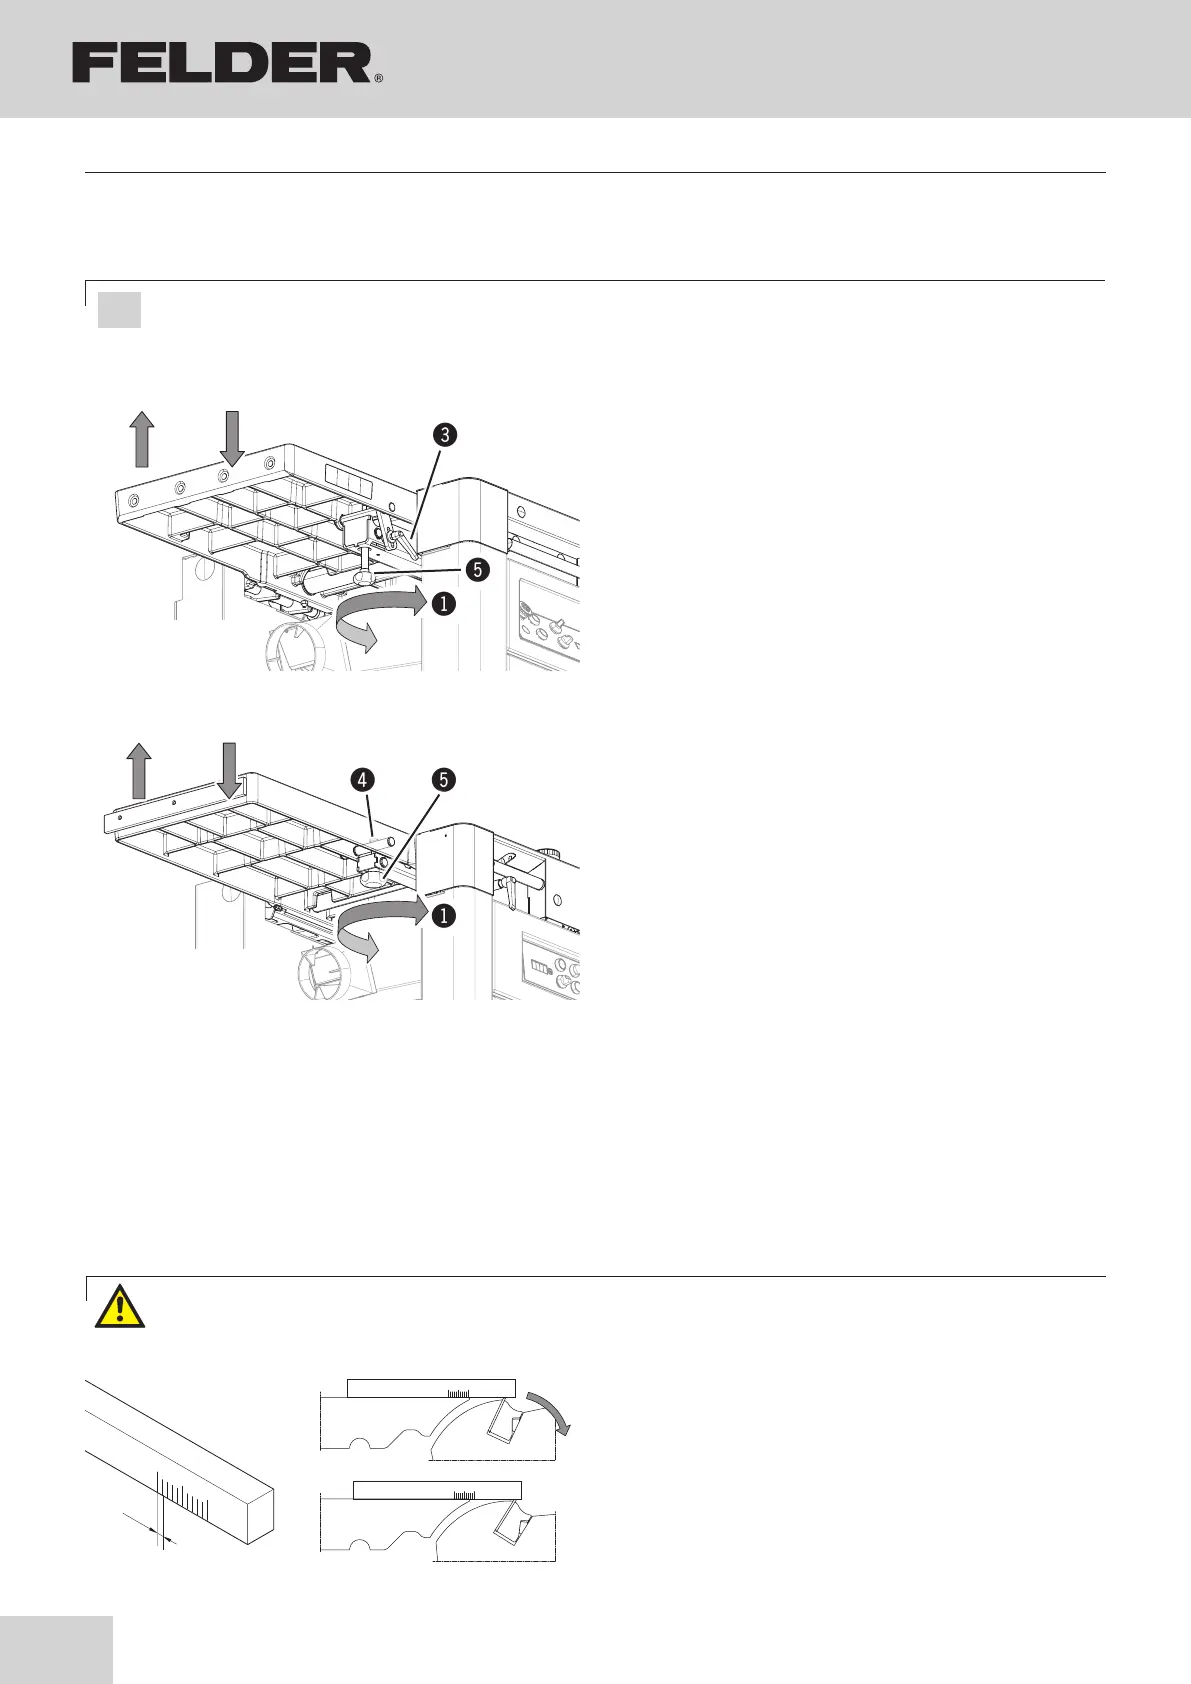
Adjusting in the „A“ direction
Direction of rotation
!
Planer table below circle of cut
Adjusting in the „B“ direction
Direction of rotation
":
Planer table above circle of cut
Switch the machine off and ensure that it cannot be swit-
ched on again!
AD 951:
1. Loosen the clamping lever.
2. Adjust finely with the thumb screw.
(turn until the desired height of the planer table is
reached)
3. Lock the clamping lever.
4. Loosen the thumb screw.
(approx. 1/4 revolution)
A 941 / AD 941
1. Loosen the locking nut.
2. Adjust finely with the thumb screw.
(turn until the desired height of the planer table is
reached)
3. Tighten the lock nut.
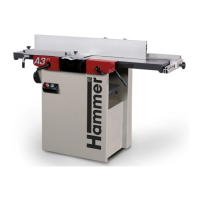
8.3 Adjusting the height of the receiver side of the planer table
1. Prepare the gauge as shown in the illustration opposi-
te.
2. Set the gauge on the receiver-side of the planer table
edge to “0”.
3. Turn the cutterblock manually.
4. The planing knives should move the gauge
2 to 3 mm (usual setting)
Fig. 8-2: Receiver-side of the planer table
#Clamping lever (AD 951)
$Locking nut (A 941 / AD 941)
%Thumb screw
8.3.1 Check the adjustment with a gauge
Fig. 8-3: Check the planer knives
Attention! Risk of injury! The planer knives are razor sharp. Handle the planer knives with the utmost care.
especially when turning the cutterblock by hand.
Attention! Risk of material damage!
Proceed very cautiously with the settings described here. The given values are recommended values and must
be tested using sample workpieces.
Making adjustments and preparations