36
212UAB
212UAB
" (
!
$ %
)
BL#
& /
# ! "
!
Planer-Thicknesser
A 941 / AD 941 / AD 951
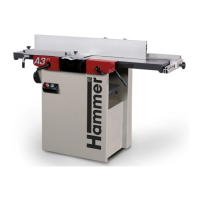
Fig. 8-11: Calibration of control unit
!F key
"Save key (ABS>INC)
#LED - Inc
8.9.1 Calibration of control unit
The control unit may lose the factory setting during trans-
port. Use the following procedure to calibrate once the
machine is set up:
• Produce a sample workpiece and measure precisely.
• Press F key for about 5 seconds.
• ”REF” and the last calibration are displayed.
• Press ABS>INC (LED flashes)
• Enter the measured value.
• Save the parameter value with the ABS>INC key.
• The calibration value is adopted as the actual value.
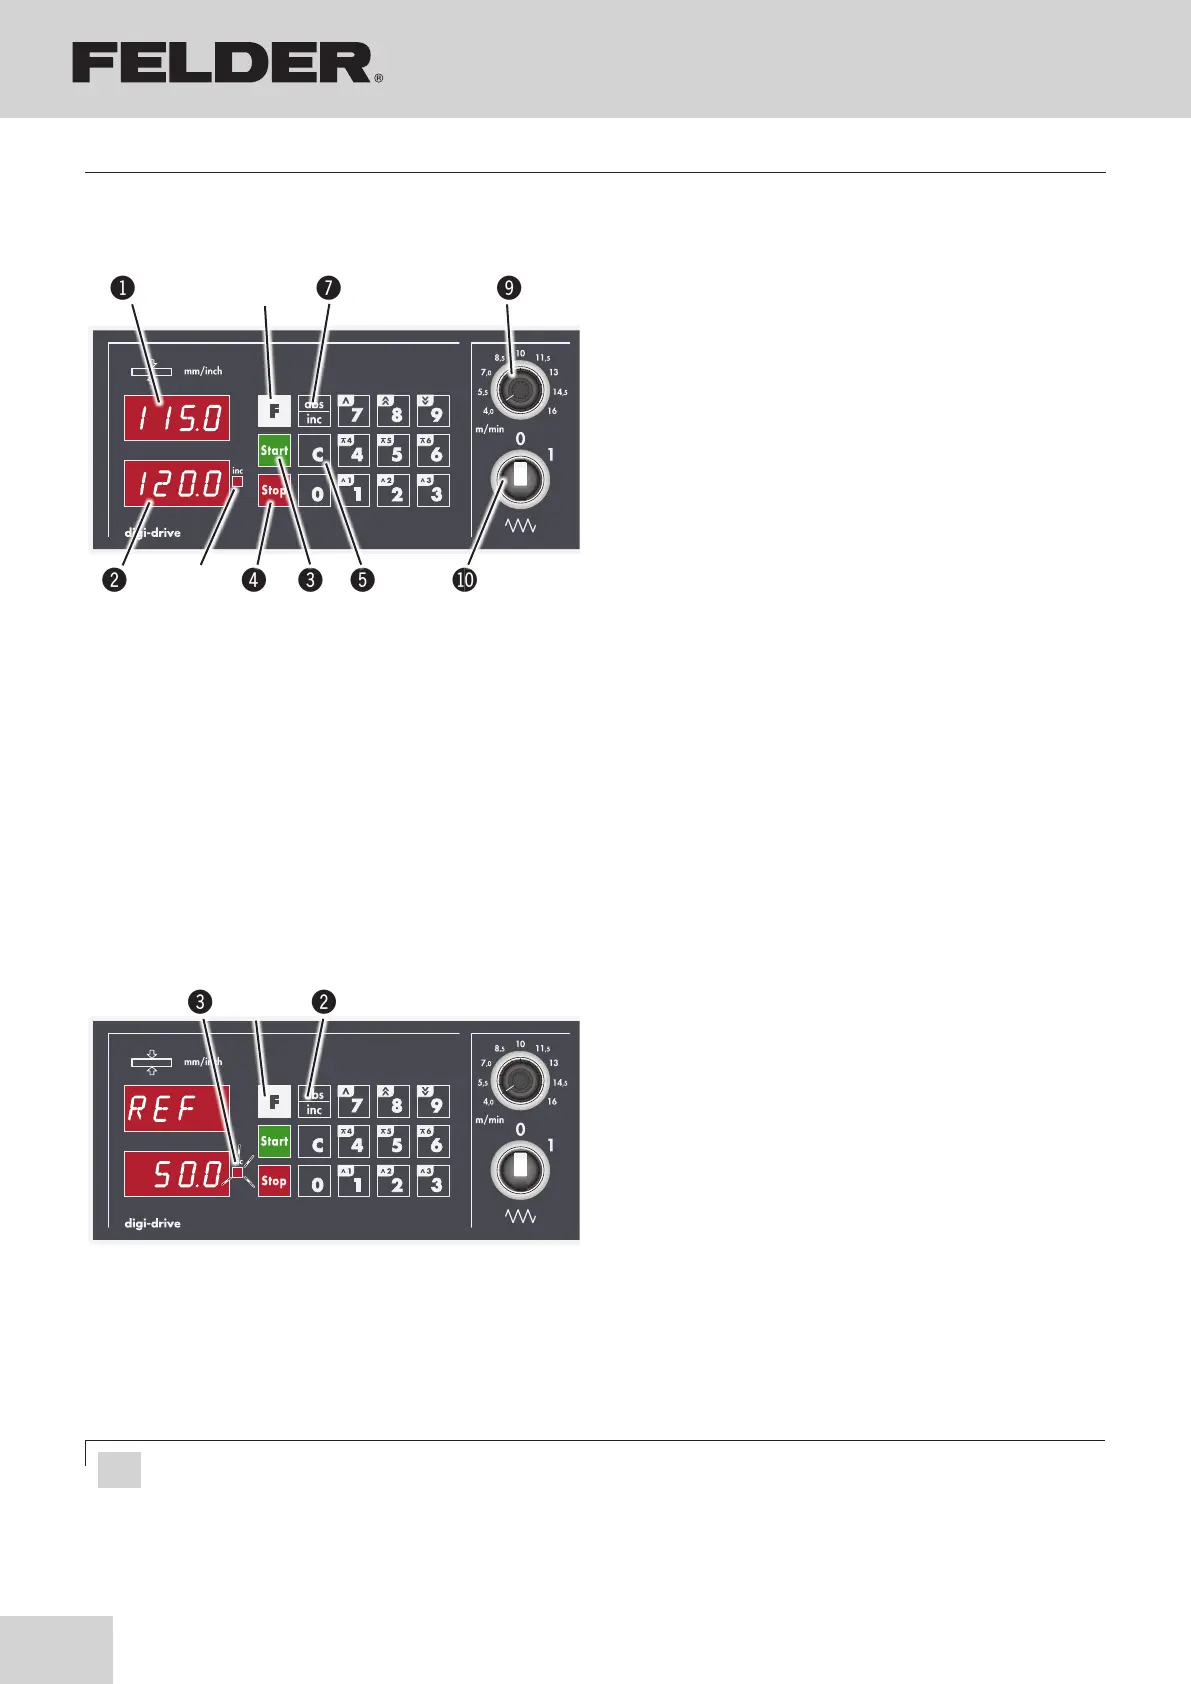
!Actual value display
"Desired value display
#Start a position duty
$Stop a position duty, delete error codes
%Delete the last input
&Long operation:
Switch over between parametric level and manual/
fixed value mode.
Short operation:
Manual positioning mode
>> Quick motion up/down
> Creep motion up/down in steps of
0,1 mm/0,005“ steps.
1-3, 4-6 Fixed values
/ABS>INC:
Switch over between absolute and incremental mode
In parametric level - Modify and store parameter
values.
*LED - Inc lights up:
The control unit is working in incremental mode.
)Potentiometer
BLSwitch - ON/OFF feeder switch
8.9 “Digi-Drive” equipment (AD 951)
Fig. 8-10: Digi-Drive
Attention! First decimal place must be entered (e.g. 1-2-0-0 for 120 mm)!
Making adjustments and preparations