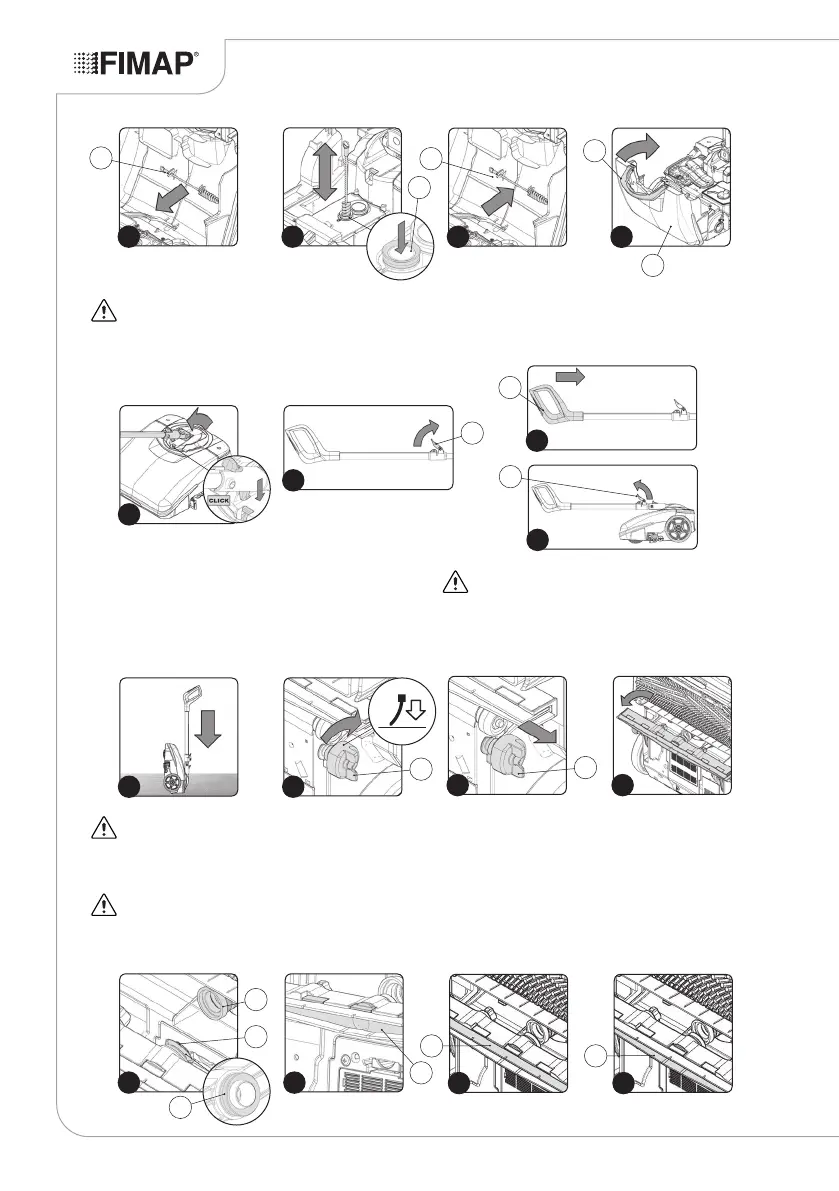
16
ATTENTION: during this operation, do not rest your foot on
the appliance.
26. Rotate the stop lever of the command handlebar (20) in the
direction of the arrow (Fig.22).
27. Close the command handlebar, pushing the handle (21) towards
the main part of the appliance (Fig.23).
28. Rotate the stop lever of the command handlebar (20) in the
direction of the arrow (Fig.24).
29. Position the appliance with its rear part in contact with the oor
(Fig.25).
30. Make sure the squeegee is in the work position. If it isn't, rotate
the knob (22) in the direction of the arrow (Fig.26).
ATTENTION: Fig.26 shows the left side of the device. Rotate
the knob on the right-hand side as well.
31. Bring the squeegee coupling to the maintenance position and
shift the knob (22) outwards (Fig.27). Rotate the squeegee
coupling towards you (Fig.28).
ATTENTION: carry out this operation for both the left-hand
knob and the right-hand knob.
32. Use a damp cloth to thoroughly clean the vacuum nozzle duct
(23) (Fig.29).
ATTENTION: be careful not to lose or damage the seal (24)
above the vacuum nozzle (Fig.29).
33. Use a damp cloth to thoroughly clean the vacuum chamber of the
squeegee (25) (Fig.30).
34. Use a damp cloth to thoroughly clean the front rubber (26) of the
squeegee (Fig.31). Check the condition of the front rubber blade;
if the edge that is in contact with the oor is worn, replace it.
35. Use a damp cloth to thoroughly clean the rear rubber (27) of the
squeegee (Fig.32). Check the condition of the rear rubber blade;
if the edge that is in contact with the oor is worn, replace it.
17 18
18
19
5
4
20
18
19
21
22
23
20
21
25
24
20
22
26
22
27 28
25
30
31 32
27
26
29
23
24
23