EN
80
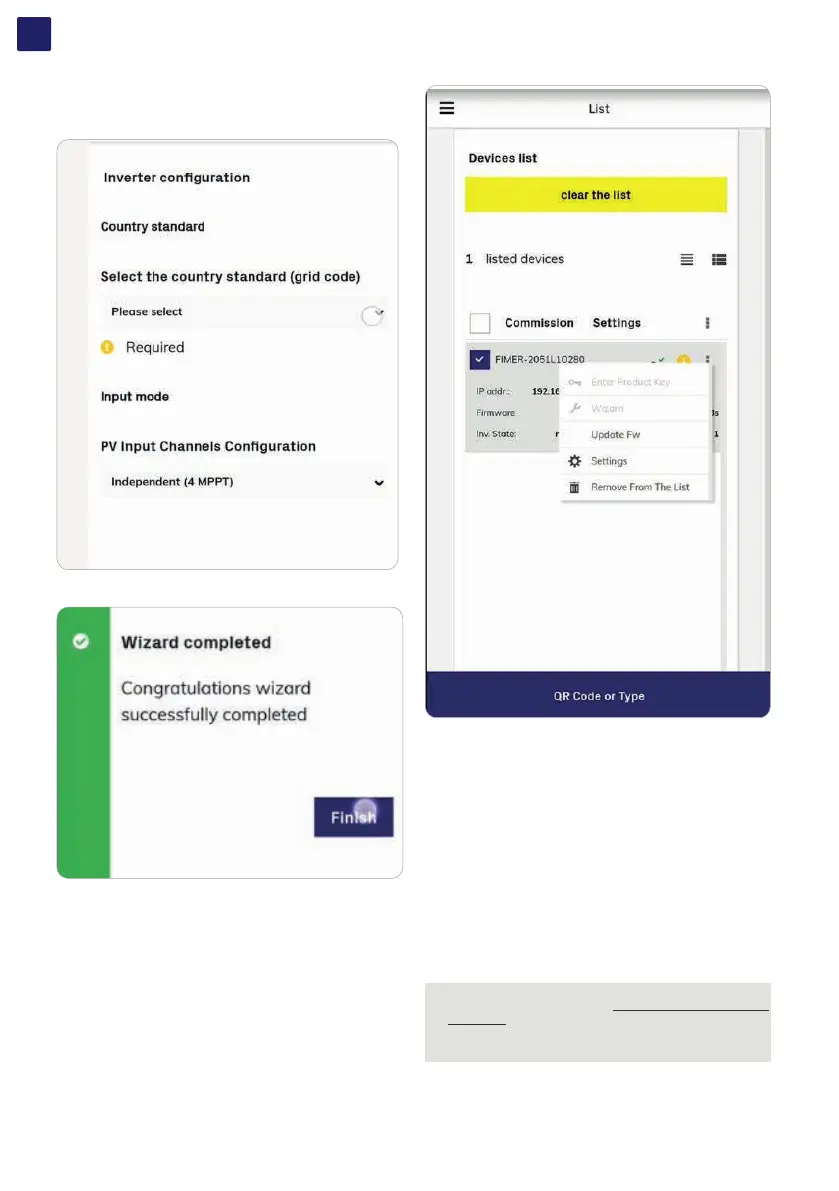
• Select the country standard and the configuration of the input
channels and confirm the setting by clicking “DONE”.
• The image shows the successful commissioning.
• Update firmware (if necessary). Tap on “Firmware update” for
aligning the firmware of all the inverters in the list to the last
version (internet connection is needed for inverters).
In the SETTINGS section it’s possible to access the following sub-
menus:
RS485 (allows to set address, baud rate, parity mode and
communication protocol.
LAN (it’s possible to view the status and change the daisy chain
configuration of the two ethernet ports of the inverter).
WLAN (it’s possible to view the status of the two wireless channels
of the inverter, and to disconnect the channel 2).
Monitored Devices (it’s possible to add and config the connected
supported accessories to the RS485. In this case, modify the data
on the rs485 tab according to the characteristics of the inserted
device).
Country standard (It’s possible to modify the Country Standard)
NOTE – D For any other specific settings of parameters of
single inverters please refer to “Web User Interface menu
structure” paragraph.
NOTE – D In the Export Limitation section is possible to
enable and configure the active power control
After the commissioning via the Fimer Installer for Solar Inverters
APP is completed, the inverter changes the behaviour of the
“Power” and “Alarm” LEDs (08) , in relation of the input voltage
value: