EN
79
NOTE – D Both QR code and Product key are provided on
the Communication identification label applied onto each
inverter or applied on the plant documentation (if this has
been done during installation).
NOTE – D It’s required to digit also the dash “-” characters of
the Product Key in the password field.
NOTE – D It’s recommend to create a plant map and apply
the Communication Identification label (the Communication
Identification label is divided in two separate parts by a
dashed line) of each inverters in the right position of that map.
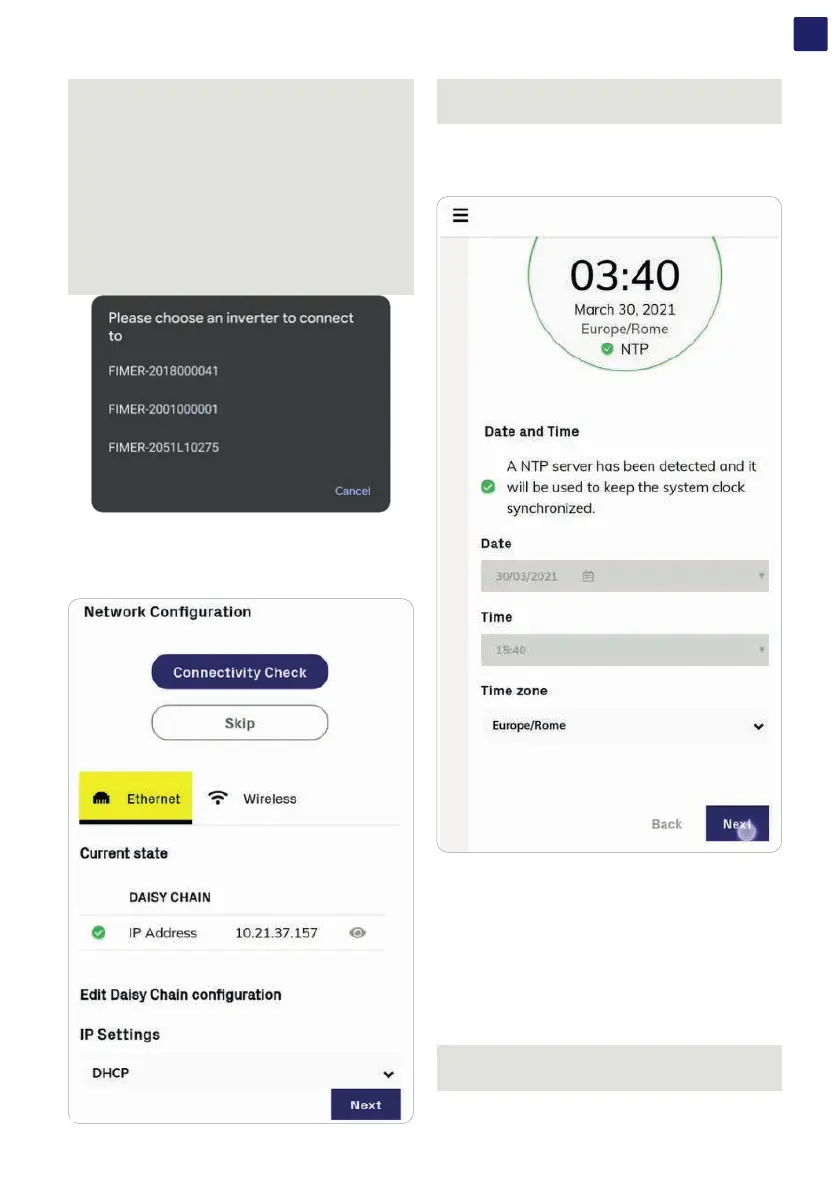
NOTE – D In case of multi inverters commissioning is
necessary to select which inverter the mobile APP should
connect to. Be careful to stay in front of the selected inverter
to assure a strong wifi signal.
• Configure Ethernet or Wireless settings according to the
newtorking parameters of the plant.
• For a further check of the correct inverter configuration click on
“Connectivity Check”
NOTE – D When the networking configuration is concluded,
it is possibile test the inverter connectivity to internet and
Aurora Vision cloud services.
• Time zone, date and time are automatically retrieved, please
check if they are correctly filled before continuing with the next
step.
• Tap the “Commissioning” button.
• Enter the IP Settings (DHCP or Static), Network SSID
and password.
Tap on “Connect” button to connect the inverter to the local
wireless network.
NOTE – D If the inverter should not be connected to a Local
wireless network tap on “Skip this step” button (the inverter
connection remains point-to-point).